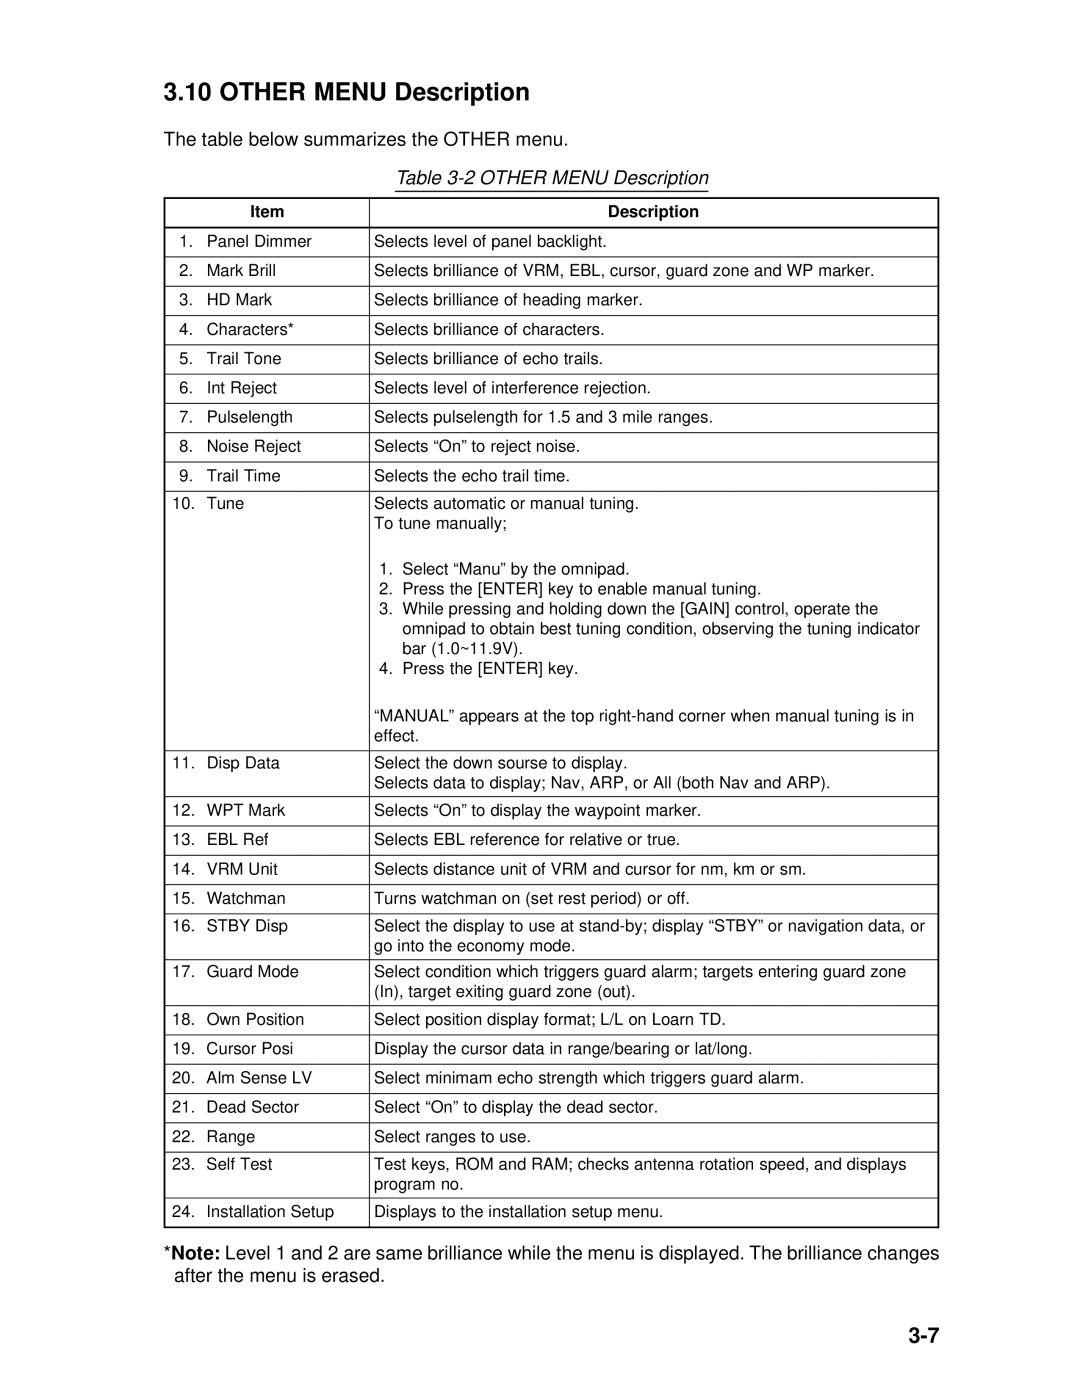
3.10 OTHER MENU Description
The table below summarizes the OTHER menu.
|
| Table | ||
|
|
|
|
|
| Item |
| Description | |
|
|
| ||
1. | Panel Dimmer | Selects level of panel backlight. | ||
|
|
| ||
2. | Mark Brill | Selects brilliance of VRM, EBL, cursor, guard zone and WP marker. | ||
|
|
| ||
3. | HD Mark | Selects brilliance of heading marker. | ||
|
|
| ||
4. | Characters* | Selects brilliance of characters. | ||
|
|
| ||
5. | Trail Tone | Selects brilliance of echo trails. | ||
|
|
| ||
6. | Int Reject | Selects level of interference rejection. | ||
|
|
| ||
7. | Pulselength | Selects pulselength for 1.5 and 3 mile ranges. | ||
|
|
| ||
8. | Noise Reject | Selects “On” to reject noise. | ||
|
|
| ||
9. | Trail Time | Selects the echo trail time. | ||
|
|
| ||
10. | Tune | Selects automatic or manual tuning. | ||
|
| To tune manually; | ||
|
| 1. Select “Manu” by the omnipad. | ||
|
| 2. Press the [ENTER] key to enable manual tuning. | ||
|
| 3. While pressing and holding down the [GAIN] control, operate the | ||
|
|
| omnipad to obtain best tuning condition, observing the tuning indicator | |
|
|
| bar (1.0~11.9V). | |
|
| 4. Press the [ENTER] key. | ||
|
| “MANUAL” appears at the top | ||
|
| effect. | ||
|
|
| ||
11. | Disp Data | Select the down sourse to display. | ||
|
| Selects data to display; Nav, ARP, or All (both Nav and ARP). | ||
|
|
| ||
12. | WPT Mark | Selects “On” to display the waypoint marker. | ||
|
|
| ||
13. | EBL Ref | Selects EBL reference for relative or true. | ||
|
|
| ||
14. | VRM Unit | Selects distance unit of VRM and cursor for nm, km or sm. | ||
|
|
| ||
15. | Watchman | Turns watchman on (set rest period) or off. | ||
|
|
| ||
16. | STBY Disp | Select the display to use at | ||
|
| go into the economy mode. | ||
|
|
| ||
17. | Guard Mode | Select condition which triggers guard alarm; targets entering guard zone | ||
|
| (In), target exiting guard zone (out). | ||
|
|
| ||
18. | Own Position | Select position display format; L/L on Loarn TD. | ||
|
|
| ||
19. | Cursor Posi | Display the cursor data in range/bearing or lat/long. | ||
|
|
| ||
20. | Alm Sense LV | Select minimam echo strength which triggers guard alarm. | ||
|
|
| ||
21. | Dead Sector | Select “On” to display the dead sector. | ||
|
|
| ||
22. | Range | Select ranges to use. | ||
|
|
| ||
23. | Self Test | Test keys, ROM and RAM; checks antenna rotation speed, and displays | ||
|
| program no. | ||
|
|
| ||
24. | Installation Setup | Displays to the installation setup menu. | ||
|
|
|
|
|
*Note: Level 1 and 2 are same brilliance while the menu is displayed. The brilliance changes after the menu is erased.
