1.2 Monitor Unit
The monitor unit is can flush mounted in a panel or mounted on a desktop (requires optional accessories).
The
For
Mounting considerations
When selecting a mounting location, keep in mind the following points:
•Select a location where the screen can be viewed conveniently while facing the bow.
•Locate the unit out of direct sunlight and away from heat sources because of heat that can build up inside the cabinet.
•Locate the unit away from places subject to water splash and rain.
•Leave sufficient space on the sides and rear of the unit to facilitate maintenance, referring to the outline drawing for maintenance space.
•The monitor unit will give interference to a magnetic compass if it is placed too close to the com- pass. Observe the compass safe distances on page ii to prevent interference to the compass.
Mounting procedure
Flush mounting
Follow the procedure below to mount the monitor unit in a console.
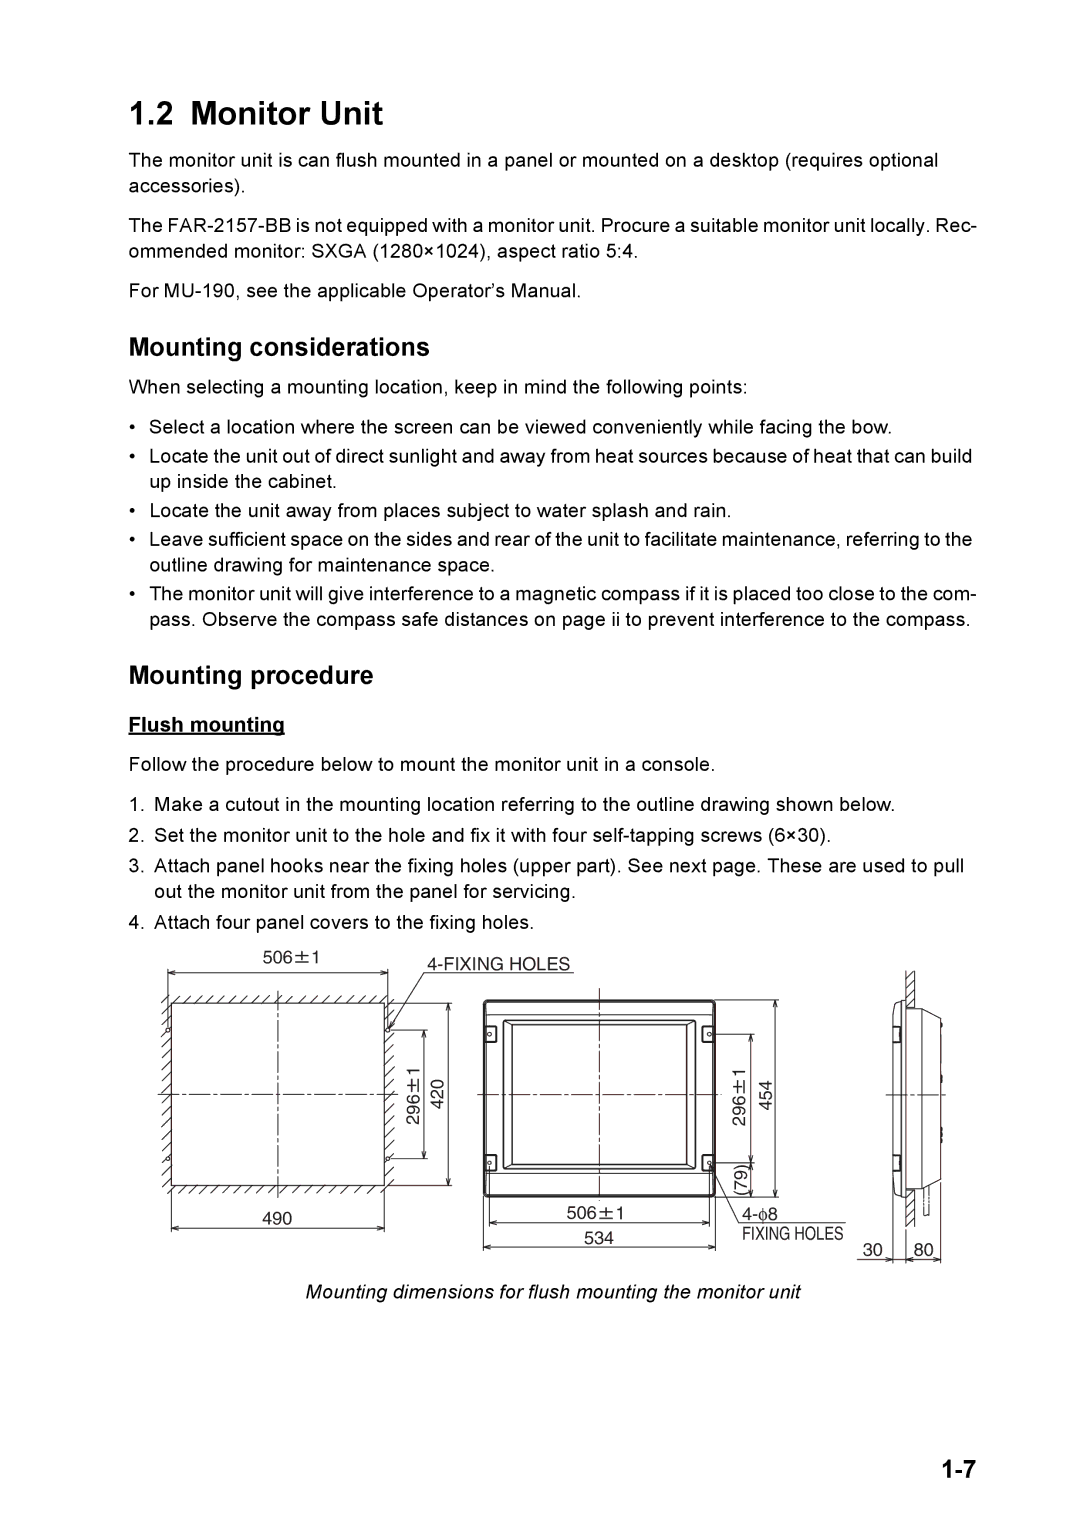
1.Make a cutout in the mounting location referring to the outline drawing shown below.
2.Set the monitor unit to the hole and fix it with four
3.Attach panel hooks near the fixing holes (upper part). See next page. These are used to pull out the monitor unit from the panel for servicing.
4.Attach four panel covers to the fixing holes.
506 | 1 |
|
|
|
| |
|
|
|
|
|
| |
| 1 | 420 |
| 1 | 454 |
|
| 296 |
| 296 |
| ||
|
|
|
| (79) |
|
|
490 |
| 506 | 1 |
| ||
|
| 534 |
| FIXING HOLES | 80 | |
|
|
|
|
| 30 | |
Mounting dimensions for flush mounting the monitor unit
