1.3 Turning On/Off the Power
Press the POWER key to turn the power on/ off. When the unit is turned on it proceeds in the sequence shown below.
ROM: OK | ROM and RAM | |
RAM: OK | check; displayed for | |
several seconds. | ||
|
PROGRAM No: 02522800** ** Program version
no.
You may press any key to show the sounder display immediately.
| 200k | Sounder |
0.0 | 0 | |
|
| display |
| 20 |
|
| 40 |
|
| 60 |
|
49.6 | 80 |
|
Figure 1-3 Start-up sequence
Note: Wait at least five sec. before reapply- ing the power.
1.4 Adjusting Tone and Brilliance
1.Press the BRILL key. The tone and bril- liance setting display appears.
LOWt sHIGH
TONE : 5 ![]()
![]()
![]()
![]()
![]()
![]()
![]()
![]()
![]()
![]()
![]()
![]()
![]()
![]()
![]()
![]()
![]()
![]()
![]()
![]()
LOW ![]()
![]() HIGH
HIGH
BRILL : 7 ![]()
![]()
![]()
![]()
![]()
![]()
![]()
![]()
![]()
![]()
![]()
![]()
![]()
![]()
![]()
![]()
Figure 1-4 Tone and brilliance setting display
2.Press t or s to adjust display tone.
3.Press ▲ or ▼ to adjust display brilliance.
Note: Tone or brilliance must be adjusted within about 10 seconds after pressing the BRILL key or the tone and brilliance display will be erased.
1.5 Selecting a Display
Seven displays are available: normal (50 or 200 kHz), dual frequency, marker zoom, bot- tom zoom, bottom lock, data, and graphic. (An
1. Press the MODE key.
SELECT SOUNDER MODE
▲NORMAL DUAL MARKER ZOOM BOTTOM ZOOM BOTTOM LOCK DATA
▼GRAPHIC
t | 50kHz | 200kHzs |
MODE: SEL ESC: CLOSE
Figure 1-5 Select sounder mode screen
2.Press the MODE key again to select a sounder mode. You may also select a sounder mode by pressing ▲ (upward) or ▼ (downward).
3.Press the MENU ESC key to conclude your selection.
Normal display
50 kHz
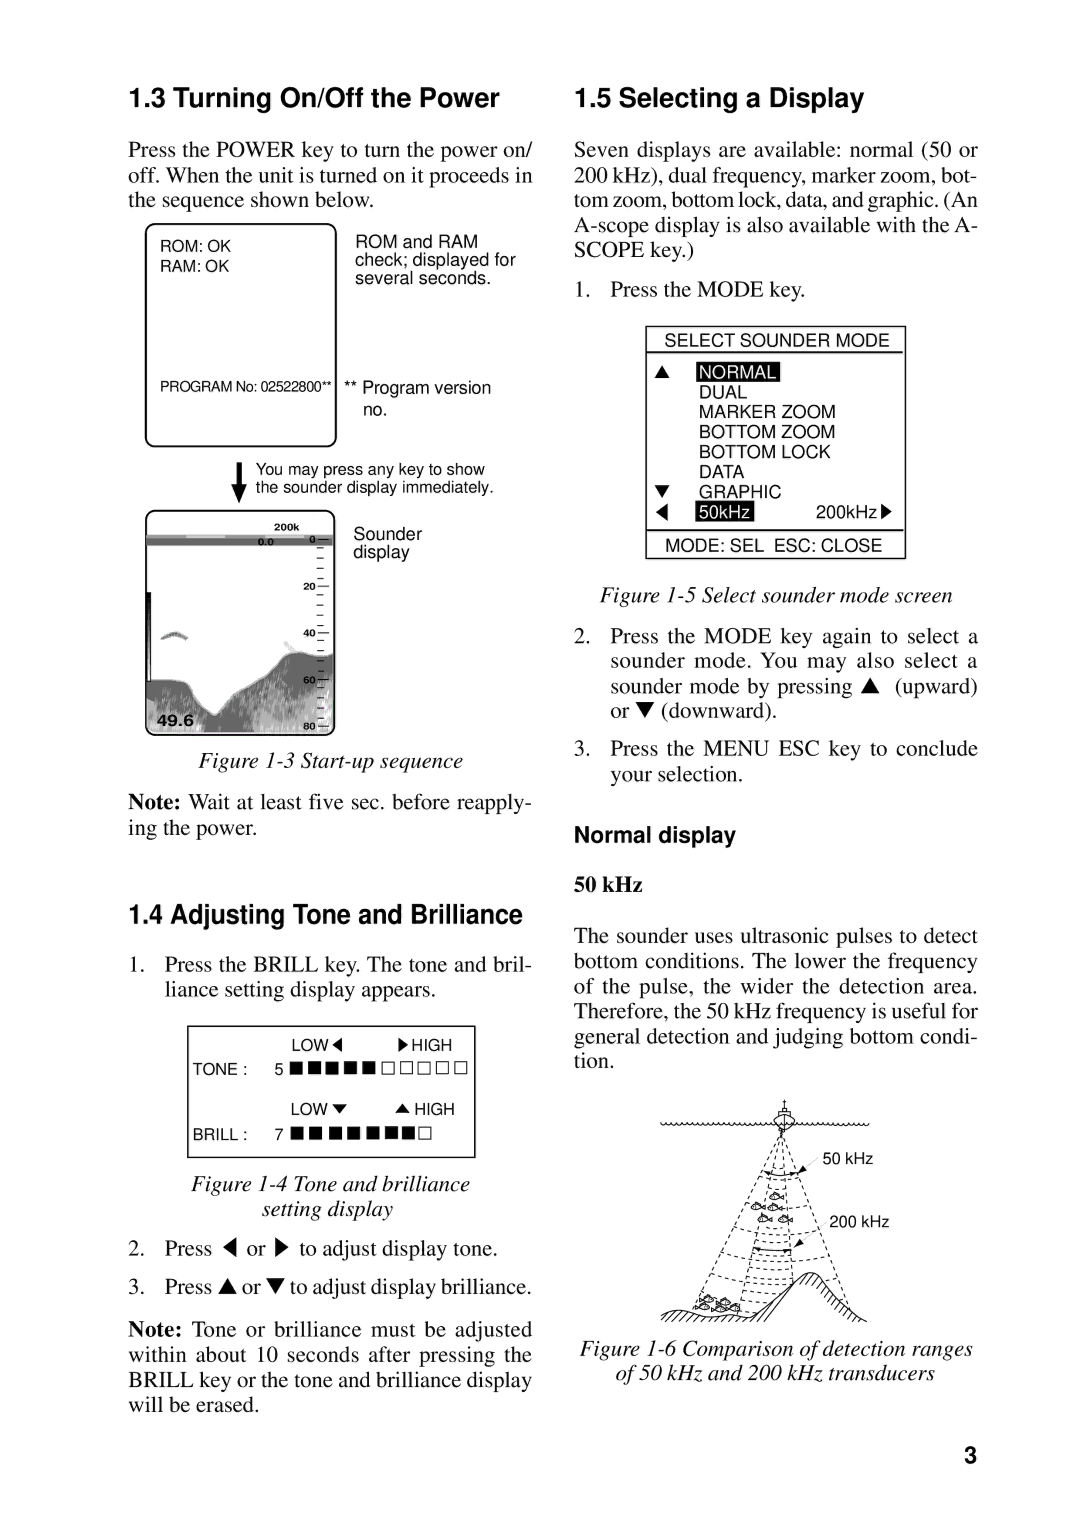
The sounder uses ultrasonic pulses to detect bottom conditions. The lower the frequency of the pulse, the wider the detection area. Therefore, the 50 kHz frequency is useful for general detection and judging bottom condi- tion.
![]() 50 kHz
50 kHz
200 kHz
Figure 1-6 Comparison of detection ranges
of 50 kHz and 200 kHz transducers
3