Furuno GP-1850DF installation manual AP-3

Models: GP-1850DF

1 63
Download 63 pages 6.35 Kb
Page 48
Image 48

2° -10°transom angle

11° transom angle

19° -22°transom angle


NO SHIM


shim with


shim with

taper down


taper up

YES

YES

YES

parallel

parallel

parallel


12-18°transom angle


NO SHIM


NO

YES

NO

angle

slight

angle

reversed

angle

too steep


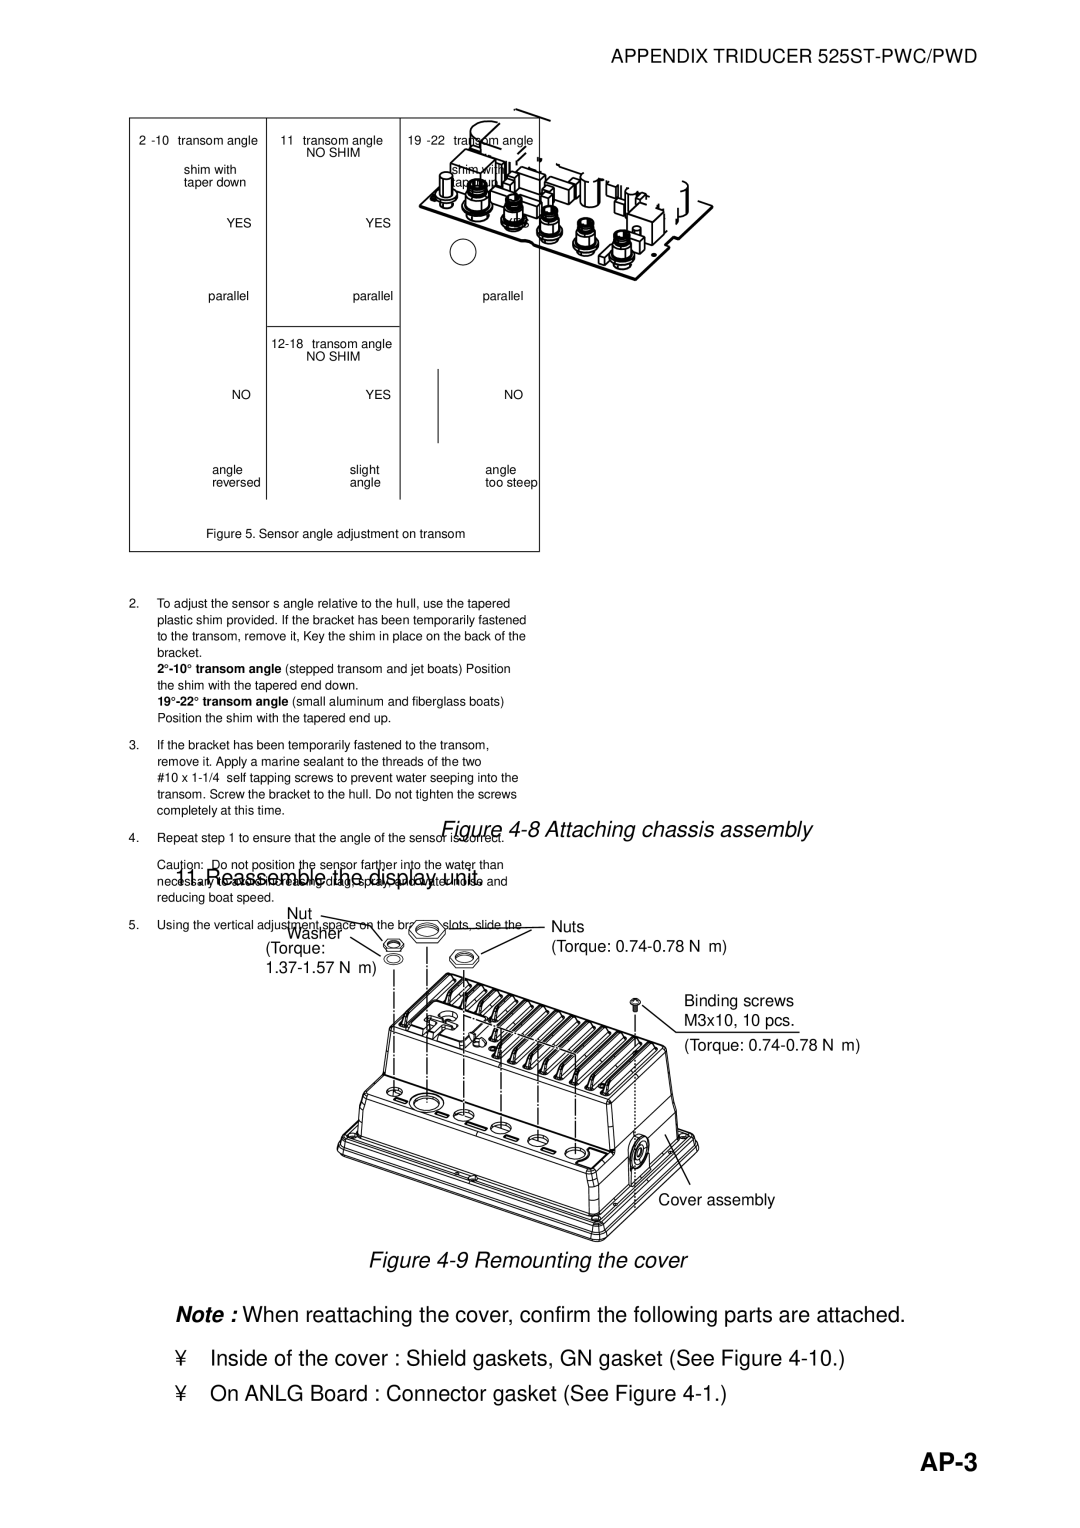
Figure 5. Sensor angle adjustment on transom

2.To adjust the sensor’s angle relative to the hull, use the tapered plastic shim provided. If the bracket has been temporarily fastened to the transom, remove it, Key the shim in place on the back of the bracket.

2°-10° transom angle (stepped transom and jet boats)—Position the shim with the tapered end down.

19°-22° transom angle (small aluminum and fiberglass boats)— Position the shim with the tapered end up.

3.If the bracket has been temporarily fastened to the transom, remove it. Apply a marine sealant to the threads of the two

#10 x 1-1/4” self tapping screws to prevent water seeping into the transom. Screw the bracket to the hull. Do not tighten the screws completely at this time.

4.Repeat step 1 to ensure that the angle of the sensor is correct.

Caution: Do not position the sensor farther into the water than necessary to avoid increasing drag, spray, and water noise and reducing boat speed.

5.Using the vertical adjustment space on the bracket slots, slide the sensor up or down to provide a projection of 3mm (1/8”). Tighten the screws (see Figure 6).

Attaching the Sensor to the Bracket

1.If the retaining cover near the top of the bracket is closed, open it by depressing the latch and rotating the cover downward

(see Figure 4).

2.Insert the sensor’s pivot arms into the slots near the top of the bracket.

3.Maintain pressure until the pivot arms click into place.

4.Rotate the sensor downward until the bottom snaps into the bracket.

5.Close the retaining cover to prevent the accidental release of the sensor when the boat is underway.

APPENDIX TRIDUCER 525ST-PWC/PWD

Cable Routing

Route the sensor cable over the transom, through a drain hole, or thorough a new hole drilled in the transom above the waterline.

Caution: Never cut the cable or remote the connector; this will void the warranty.

Warning: Always wear safety goggles and a dust mask.

1.If a hole must be drilled, choose a location well above the waterline. Check for obstructions such as trim tabs, pumps, or wiring inside the hull. Mark the location with a pencil. Drill a hole through the transom using a 19mm or 3/4” bit (to accommodate the connector).

2.Route the cable over or through the transom.

3.On the outside of the hull secure the cable against the transom using the cable clamps. Position a cable clamp 50mm(2”) above the bracket and mark the mounting hole with a pencil (see Figure 6).

4.Position the second cable clamp halfway between the first clamp and the cable hole. Mark this mounting hole.

5.If a hole has been drilled in the transom, open the appropriate slot in the transom cable cover. Position the cover over the cable where it enters the hull. Mark the two mounting holes.

6.At each of the marked locations, use a 3mm or 1/8” bit to drill a hole 10mm (3/8”) deep. The prevent drilling too deeply, wrap masking tape around the bit 10mm (3/8”) from the point.

7.Apply marine sealant to the threads of the #6 x 1/2” self-tapping screw to prevent water from seeping into the transom. If you have drilled a hole through the transom, apply marine sealant to the space around the cable where it passes through the transom.

8.Position the two cable clamps and fasten them in place. If used, push the cable cover over the cable and screw it in place.

9.Route the cable to the instrument being careful not to tear the cable jacket when passing it though the bulkhead(s) and other parts of the boat. To reduce electrical interference, separate the sensor

cable from other electrical wiring and “noise” sources. Coil any excess cable and secure it in place with zip-ties to prevent damage.

10.Refer to your echosounder owner’s manual to connect the sensor to the instrument.

cable cover

cable clamp

50mm (2")

Hull projection 3mm (1/8")

Figure 6. Vertical adjustment and cable routing

AP-3

Page 48
Image 48
Furuno GP-1850DF installation manual AP-3

GP-1850DF specifications

Furuno is renowned for its high-quality marine electronics, and the GP-1850DF and GP-1850F are no exceptions. These advanced GPS chart plotters are designed to meet the needs of both professional mariners and recreational boaters alike.

The GP-1850DF is equipped with a powerful 12-channel GPS that provides fast and accurate positioning information, while the GP-1850F features a sturdy built-in fish finder, making it ideal for anglers. Both units boast a brilliant color display that enhances visibility in various lighting conditions, ensuring that users can easily read information on the screen, even in direct sunlight.

One of the standout features of these models is their compatibility with a variety of chart formats, including C-MAP, and Furuno’s proprietary raster charts. This flexibility allows users to choose from a broad range of navigational charts, catering to specific regional needs and preferences. The intuitive interface of the GP-1850 series simplifies navigation, offering menu-driven commands and support for multiple languages.

Furuno has integrated advanced sonar technology in the GP-1850F model, including a high-resolution fish finder capable of detecting fish signatures with remarkable precision. The dual-frequency capabilities enable users to switch between higher frequencies for shallow water fishing and lower frequencies for deeper waters. This enriches the fishing experience while improving catch rates.

Moreover, both devices feature a built-in waypoint register, allowing users to store up to 1,000 waypoints, which can be essential for returning to promising fishing spots or navigating back to port. The navigation functions also include routes and track recording, empowering boaters to create custom paths and review their previous journeys.

The GP-1850 series also places a high emphasis on safety, incorporating features like man overboard (MOB) alarms and route alarms to enhance on-water safety. Additionally, they are designed to withstand the harsh marine environment, with waterproof housings that ensure durability during adverse weather conditions.

In conclusion, the Furuno GP-1850DF and GP-1850F models provide an exceptional combination of performance, reliability, and user-friendly features, making them a preferred choice for both fishermen and navigators. Their adaptability in various maritime situations, alongside advanced technologies, cements their reputation as essential tools for successful and safe voyages on the water.