You can then rotate the Encoder Volume Control to select from the following
WHITE: GREEN1: GREEN2: GREEN3: AMBER: PINK1:
PINK2: PURPLE1: PURPLE2: BLUE1: BLUE2: USER
COLOUR: ORANGE
Press the ESC/RGB button | to confirm your selection. |
See Page 10 for details on how to set the USER COLOUR
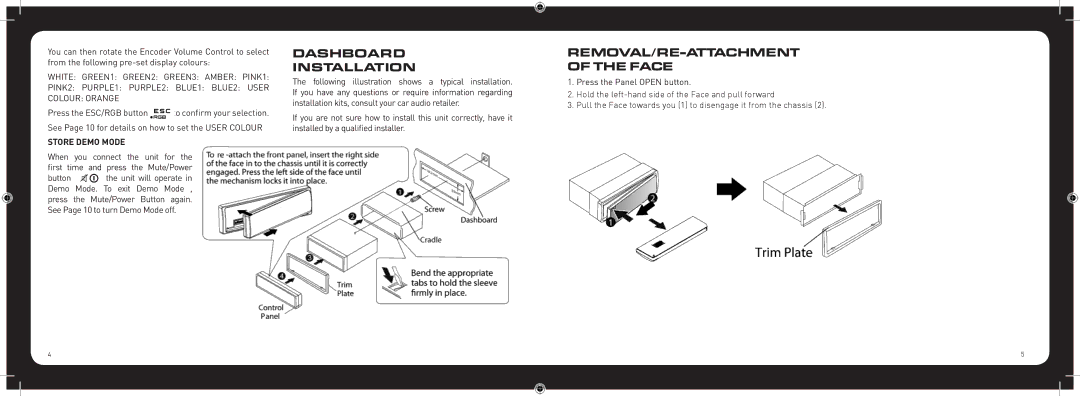
DASHBOARD
INSTALLATION
The following illustration shows a typical installation. If you have any questions or require information regarding installation kits, consult your car audio retailer.
If you are not sure how to install this unit correctly, have it installed by a qualified installer.
REMOVAL/RE-ATTACHMENT OF THE FACE
1.Press the Panel OPEN button.
2.Hold the
After flipping down the front panel, push it to the right (A),
3.Pull the Face towards you (1) to disengage it from the chassis (2). then draw the left of the front panel outwards (B)
3.To
STORE DEMO MODE
When you connect the unit for the first time and press the Mute/Power
button ![]()
![]() the unit will operate in Demo Mode. To exit Demo Mode , press the Mute/Power Button again. See Page 10 to turn Demo Mode off.
the unit will operate in Demo Mode. To exit Demo Mode , press the Mute/Power Button again. See Page 10 to turn Demo Mode off.
| 4 | 5 |
|
| ||
|
|
|
|
|
|
|
|
|
|
|
|
|
|
|
|
|
|
|
|
|
|
|
|
|
|
|
|