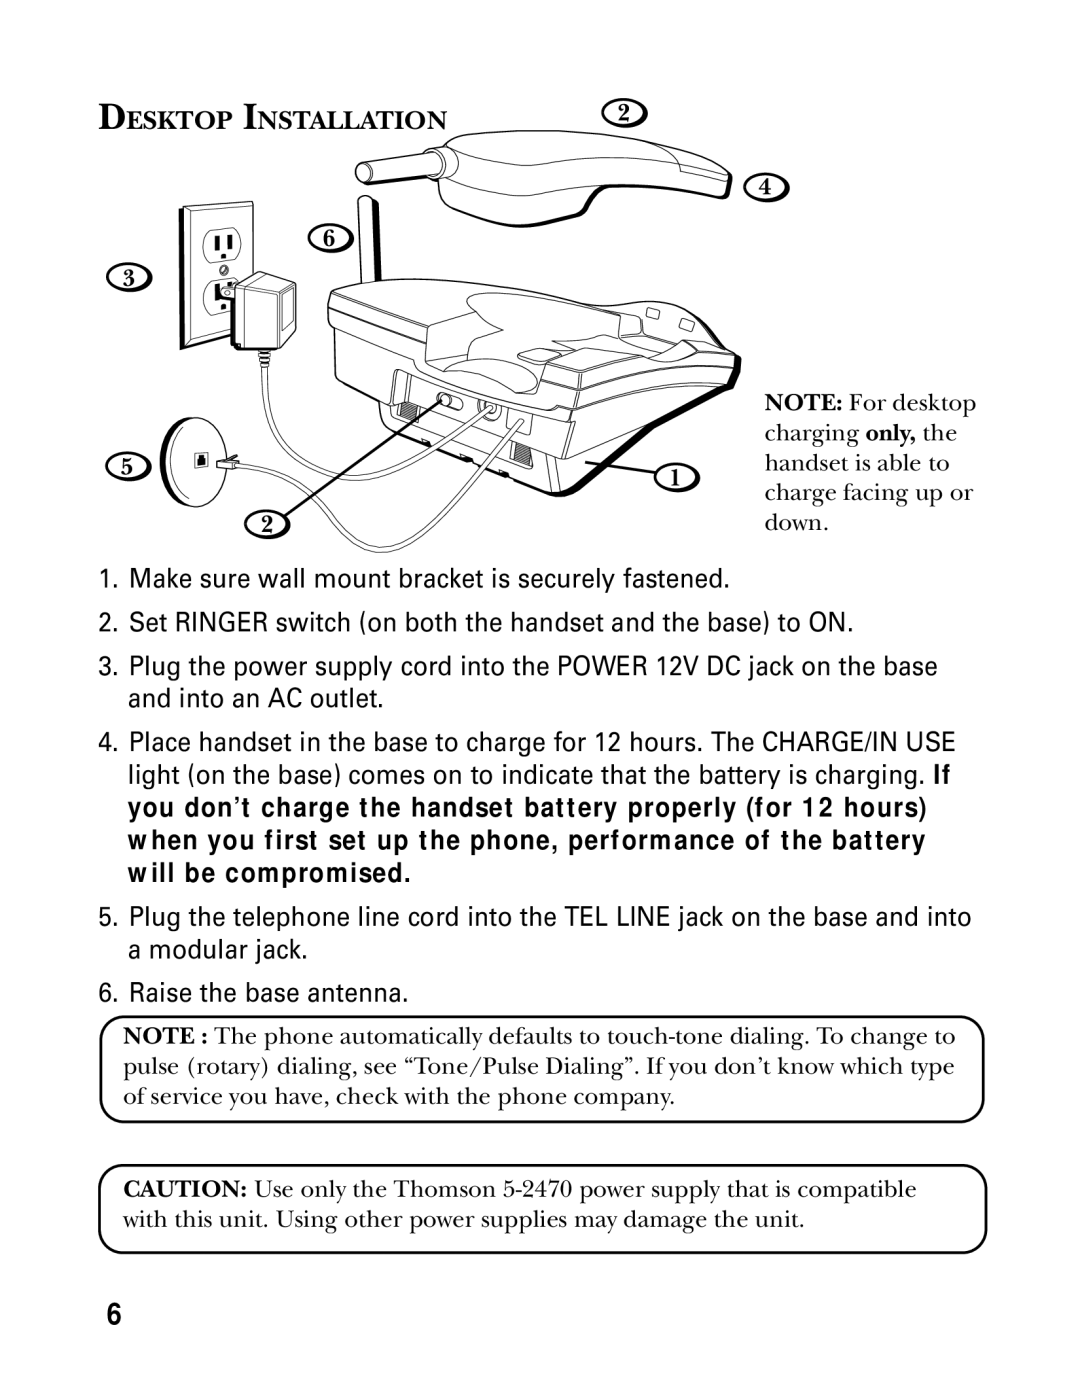
DESKTOP INSTALLATION | 2 |
|
|
| 4 |
6 |
|
|
3 |
|
|
|
| NOTE: For desktop |
|
| charging only, the |
5 | 1 | handset is able to |
| charge facing up or | |
|
| |
2 |
| down. |
1.Make sure wall mount bracket is securely fastened.
2.Set RINGER switch (on both the handset and the base) to ON.
3.Plug the power supply cord into the POWER 12V DC jack on the base and into an AC outlet.
4.Place handset in the base to charge for 12 hours. The CHARGE/IN USE light (on the base) comes on to indicate that the battery is charging. If you don’t charge the handset battery properly (for 12 hours) when you first set up the phone, performance of the battery will be compromised.
5.Plug the telephone line cord into the TEL LINE jack on the base and into a modular jack.
6.Raise the base antenna.
NOTE : The phone automatically defaults to
CAUTION: Use only the Thomson
6