Window Installation Instructions for 6000, 8000, and 10,000 BTU Units (models AS_06, AS_08, and AS_10)
Installation Instructions OperatingInstructions SafetyInstructions
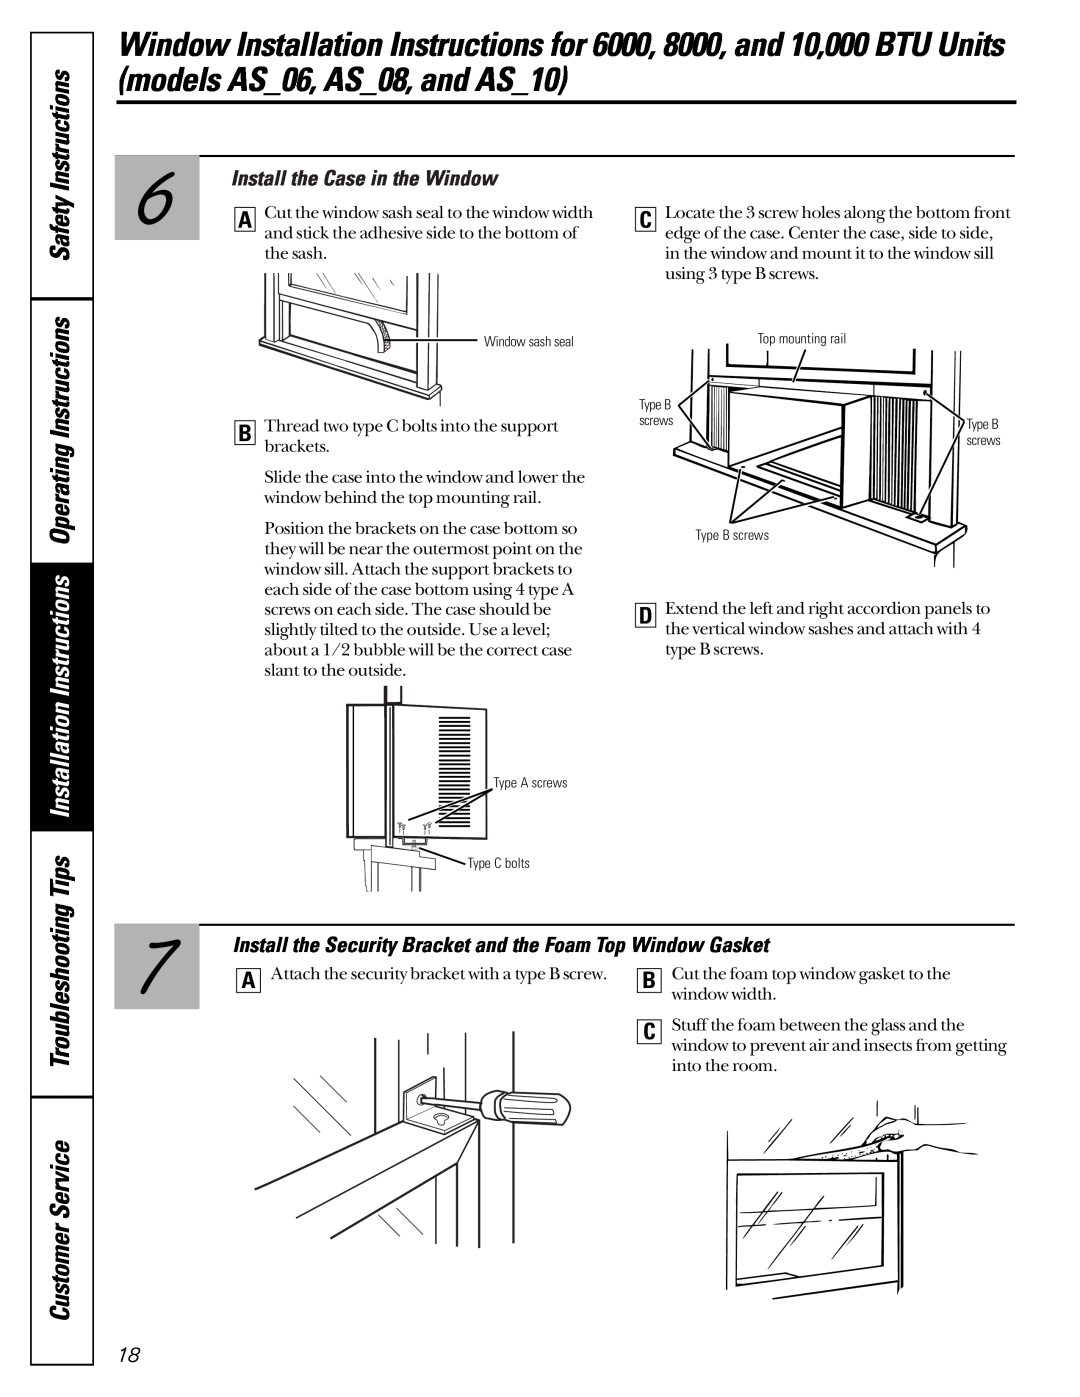
Install the Case in the Window
6 | A | Cut the window sash seal to the window width |
and stick the adhesive side to the bottom of |
the sash.
Window sash seal
BThread two type C bolts into the support brackets.
Slide the case into the window and lower the window behind the top mounting rail.
Position the brackets on the case bottom so they will be near the outermost point on the window sill. Attach the support brackets to each side of the case bottom using 4 type A screws on each side. The case should be slightly tilted to the outside. Use a level; about a 1/2 bubble will be the correct case slant to the outside.
CLocate the 3 screw holes along the bottom front edge of the case. Center the case, side to side, in the window and mount it to the window sill using 3 type B screws.
| Top mounting rail |
| ||
Type B |
|
|
|
|
|
|
|
| |
|
|
|
| |
|
|
|
| |
screws |
|
|
| Type B |
|
|
|
| screws |
Type B screws
DExtend the left and right accordion panels to the vertical window sashes and attach with 4 type B screws.
TroubleshootingTips
CustomerService
Type A screws
![]() Type C bolts
Type C bolts
Install the Security Bracket and the Foam Top Window Gasket
7 | A | Attach the security bracket with a type B screw. | B | Cut the foam top window gasket to the | ||||
|
|
|
|
| window width. | |||
|
|
|
|
|
|
| ||
|
|
|
|
|
|
|
| Stuff the foam between the glass and the |
|
|
|
|
|
|
| C | |
|
|
|
|
|
|
| ||
|
|
|
|
|
|
|
| window to prevent air and insects from getting |
|
|
|
|
|
|
|
| into the room. |
|
|
|
|
|
|
|
|
|
|
|
|
|
|
|
|
|
|
|
|
|
|
|
|
|
|
|
|
|
|
|
|
|
|
|
|
18