Installation Instructions
WINDOW
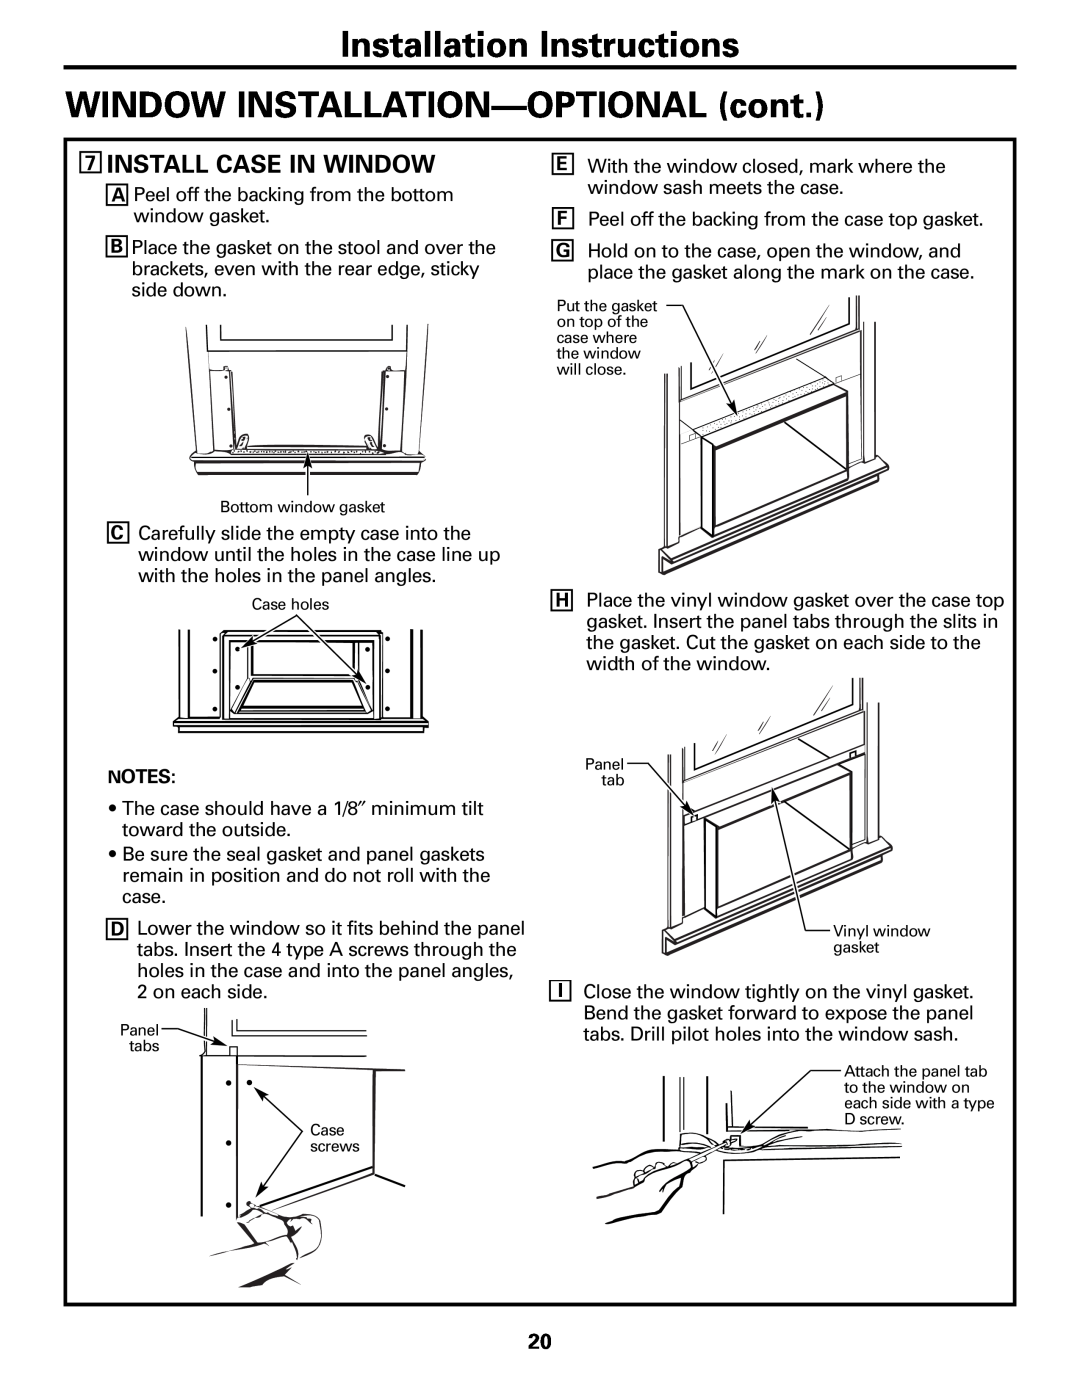
7INSTALL CASE IN WINDOW
APeel off the backing from the bottom window gasket.
BPlace the gasket on the stool and over the brackets, even with the rear edge, sticky side down.
Bottom window gasket
CCarefully slide the empty case into the window until the holes in the case line up with the holes in the panel angles.
Case holes
NOTES:
•The case should have a 1/8″ minimum tilt toward the outside.
•Be sure the seal gasket and panel gaskets remain in position and do not roll with the case.
DLower the window so it fits behind the panel tabs. Insert the 4 type A screws through the holes in the case and into the panel angles, 2 on each side.
Panel tabs
Case screws
EWith the window closed, mark where the window sash meets the case.
FPeel off the backing from the case top gasket.
GHold on to the case, open the window, and place the gasket along the mark on the case.
Put the gasket on top of the case where the window will close.
HPlace the vinyl window gasket over the case top gasket. Insert the panel tabs through the slits in the gasket. Cut the gasket on each side to the width of the window.
Panel tab
Vinyl window gasket
IClose the window tightly on the vinyl gasket. Bend the gasket forward to expose the panel tabs. Drill pilot holes into the window sash.
Attach the panel tab to the window on each side with a type D screw.
20