
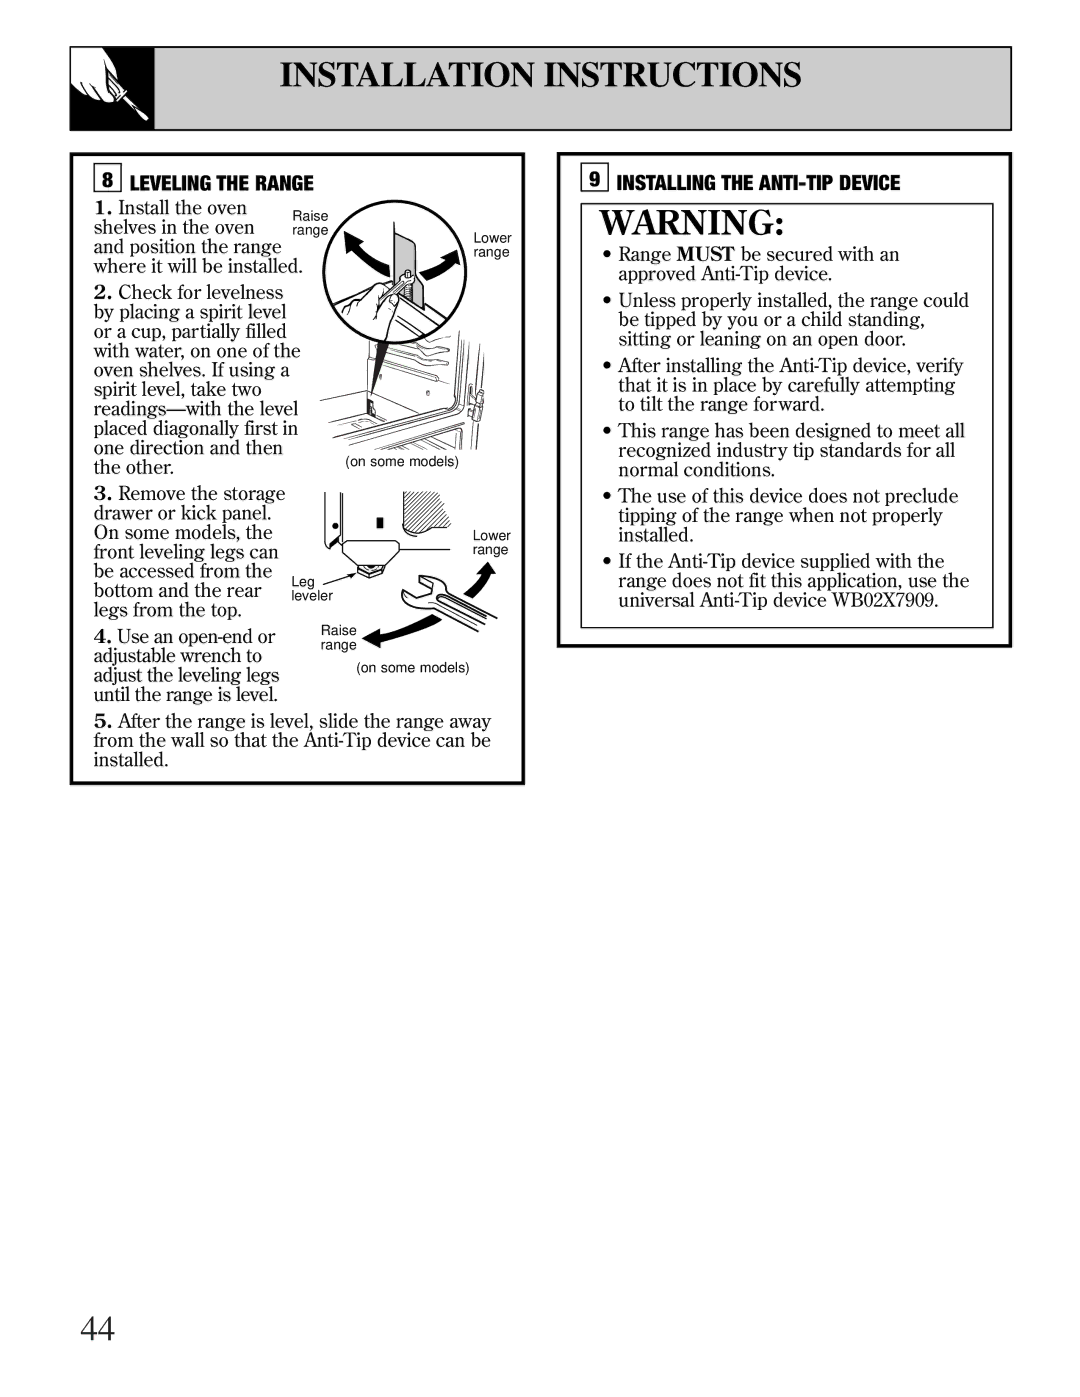
JGBP40, JR EGR3000, EGR3001 specifications
The GE EGR3001, JR EGR3000, and JGBP40 are three innovative industrial equipment models from General Electric, renowned for their efficiency and advanced engineering.The GE EGR3001 represents a significant advancement in gas turbine technology. This model is designed for optimal performance in combined cycle power plants, where its high efficiency helps to reduce fuel consumption and greenhouse gas emissions. The EGR3001 features an advanced combustor design that facilitates low emissions and enhances fuel flexibility, allowing it to operate on various fuels, including natural gas and liquid fuels. This flexibility is crucial in today's energy markets, where energy source availability may fluctuate.
The EGR3001 is also equipped with sophisticated control systems that provide reliable performance even under varying load conditions. Its modular design simplifies maintenance, allowing for faster service times and lower operational costs. Additionally, the EGR3001's robust construction ensures durability and longevity, making it an excellent investment for power generators.
The JR EGR3000 is another remarkable model in GE's lineup, focusing on integration and performance in industrial settings. This unit combines the features of a gas turbine with superior steam generation capabilities. The JR EGR3000 prides itself on its compact design, which facilitates easy installation without compromising performance. It features advanced aerodynamics and heat recovery systems that maximize output while minimizing fuel consumption.
A key highlight of the JR EGR3000 is its digital twin technology, which allows operators to simulate and analyze performance in real-time. This technology provides valuable insights for maintenance planning and operational efficiency, leading to decreased downtime and optimally managed assets.
The JGBP40 is a unique offering, primarily designed for industrial applications requiring higher efficiency and reliability. It integrates advanced gearbox technology with high-speed turbine operations, facilitating increased torque and power output. The JGBP40 is designed for versatility, able to support various applications across different industries.
Its design incorporates advanced materials to withstand high-stress conditions, thereby increasing operational lifespan. The model also features smart diagnostics and predictive maintenance capabilities, allowing operators to monitor health and performance efficiently. This proactive approach minimizes unplanned outages and enhances overall productivity.
In summary, the GE EGR3001, JR EGR3000, and JGBP40 are testament to General Electric’s commitment to innovation, efficiency, and reliability in industrial equipment. Their advanced features and technologies not only optimize performance but also address modern energy challenges, making them essential assets for electricity producers and industrial users alike.