Install the Cooktop
1.Align the cooktop with the downdraft and fasten cooktop in place.
NOTE: Accurate alignment of cooktop and downdraft is necessary to ensure that there is not interference when air vent is raised and lowered. There should be a gap of
Adjust the Switch
The downdraft is
To adjust position of activating switch:
WARNING: To avoid possible electrical shock, personal injury or death— disconnect electrical power.
1.If the downdraft is plugged into the electrical outlet, unplug it.
2.Lift the air vent straight up and cock it slightly so it remains in the UP position.
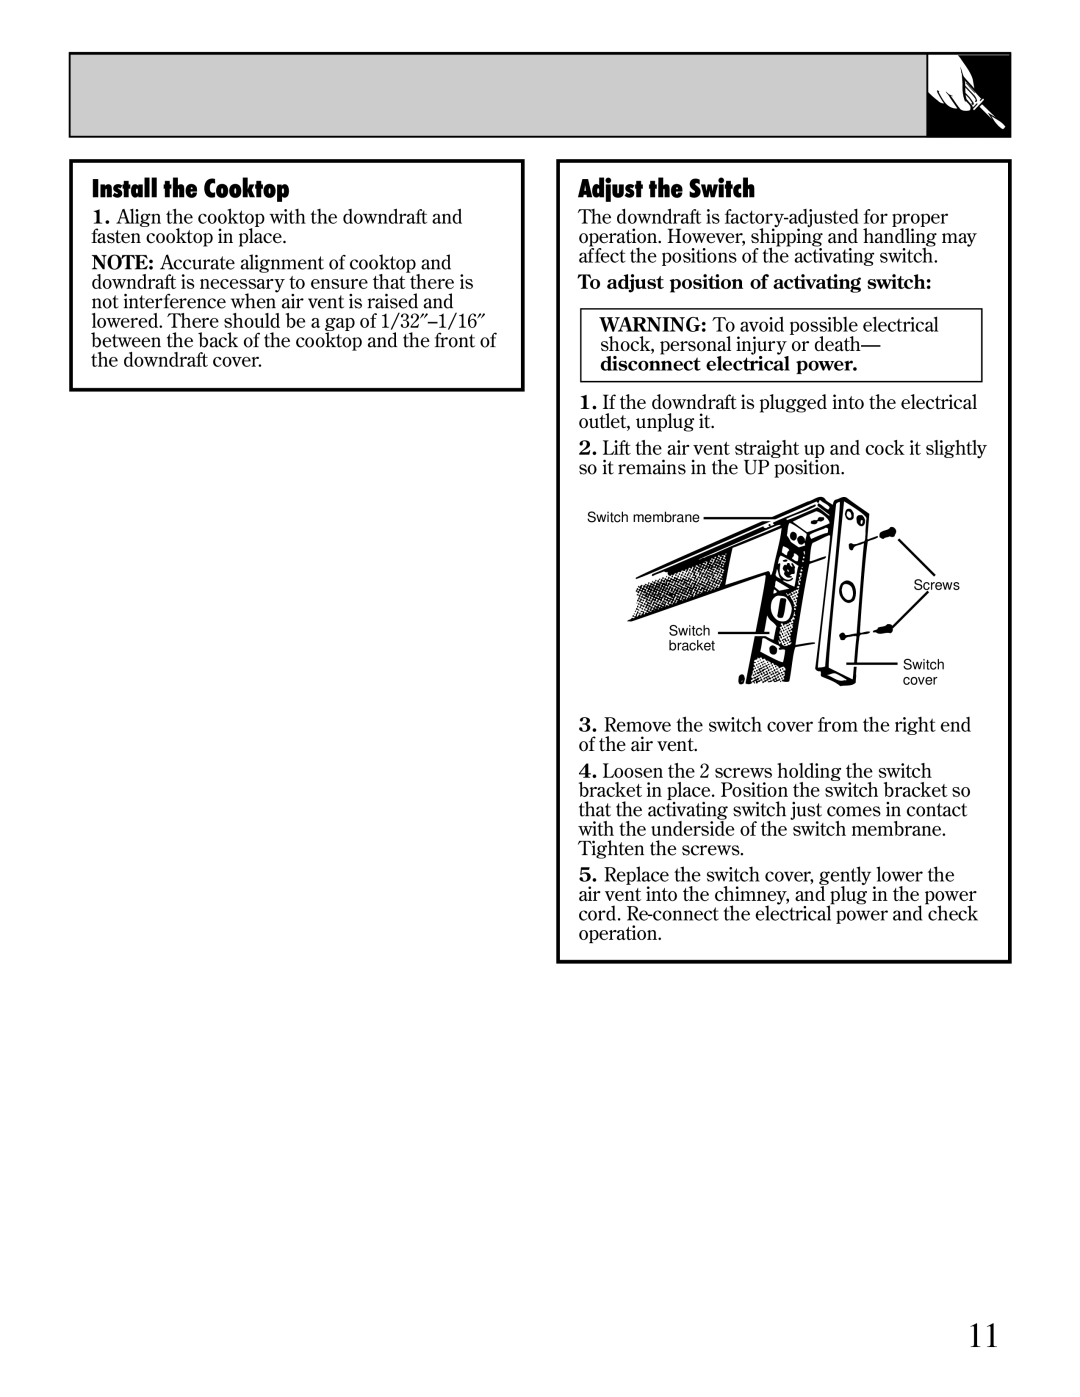
Switch membrane ![]()
Screws
Switch bracket
Switch cover
3.Remove the switch cover from the right end of the air vent.
4.Loosen the 2 screws holding the switch bracket in place. Position the switch bracket so that the activating switch just comes in contact with the underside of the switch membrane. Tighten the screws.
5.Replace the switch cover, gently lower the air vent into the chimney, and plug in the power cord.
11