Installation Instructions
FAUCET ASSEMBLY (cont.)
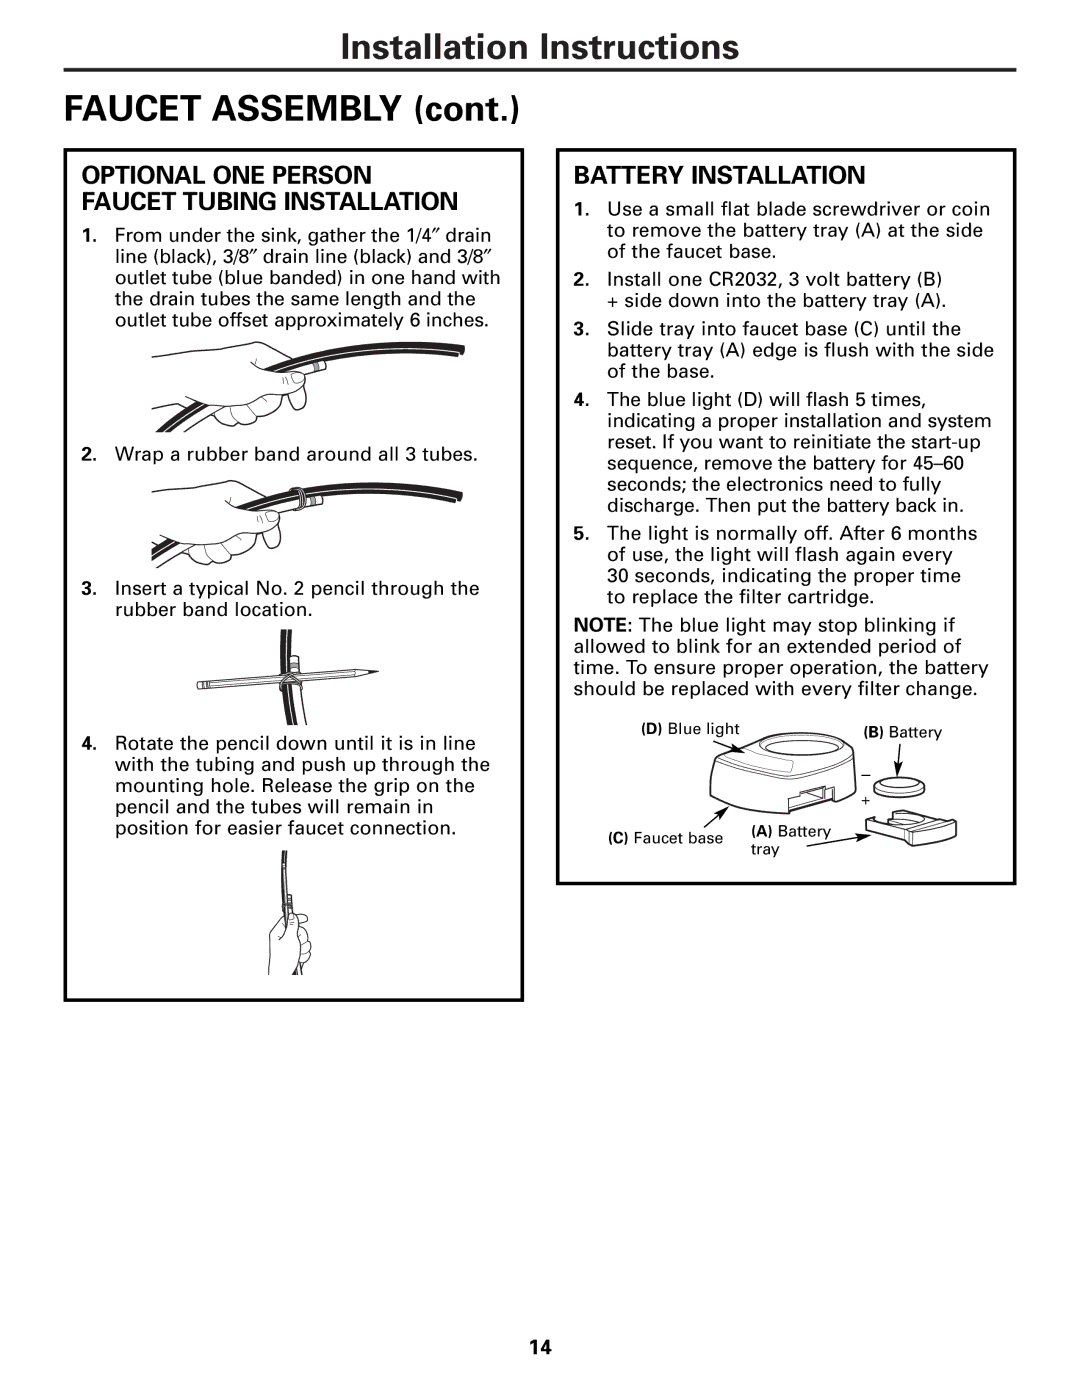
OPTIONAL ONE PERSON FAUCET TUBING INSTALLATION
1.From under the sink, gather the 1/4″ drain line (black), 3/8″ drain line (black) and 3/8″ outlet tube (blue banded) in one hand with the drain tubes the same length and the outlet tube offset approximately 6 inches.
2.Wrap a rubber band around all 3 tubes.
3.Insert a typical No. 2 pencil through the rubber band location.
4.Rotate the pencil down until it is in line with the tubing and push up through the mounting hole. Release the grip on the pencil and the tubes will remain in position for easier faucet connection.
BATTERY INSTALLATION
1.Use a small flat blade screwdriver or coin to remove the battery tray (A) at the side of the faucet base.
2.Install one CR2032, 3 volt battery (B) + side down into the battery tray (A).
3.Slide tray into faucet base (C) until the battery tray (A) edge is flush with the side of the base.
4.The blue light (D) will flash 5 times, indicating a proper installation and system reset. If you want to reinitiate the
5.The light is normally off. After 6 months of use, the light will flash again every 30 seconds, indicating the proper time to replace the filter cartridge.
NOTE: The blue light may stop blinking if allowed to blink for an extended period of time. To ensure proper operation, the battery should be replaced with every filter change.
(D) Blue light | (B) Battery | |
| – | |
| + | |
(C) Faucet base | (A) Battery | |
tray | ||
|
14