recall it by holding the TIME MODE/RECALL CUE (25) down for 3 seconds,until the LCD display shows the word ‘LOAD’ along with the time of the MASTER CUE POINT. Then press the MASTER CUE BUTTON (17) to assign the recalled Cue Point.
FWD 17. REVERSE SWITCH (26): During playback, flipping the
| reverse switch will play the audio program backwards from |
| the current time displayed. In CD Mode, the REVERSE |
REV | SWITCH (26) will affect CD playback. In TT Mode, the |
REVERSE SWITCH (26) affects the playback of Vinyl only. In Mix Mode, the REVERSE SWITCH (26) again affects the playback of Vinyl only, even if there is a CD playing simultaneously.
![]() 18. INSTANT REVERSE MODES (27): There are 3 Reverse Modes
18. INSTANT REVERSE MODES (27): There are 3 Reverse Modes
found on the
scenarios. Here is a brief explanation of each mode, and an example of how it may be applied:
NOT ENGAGED - When the INSTANT REVERSE MODES (27) LED is completely unlit, and the switch is flipped to ‘REV,’ the platter will turn counterclock- wise, and the music program will play backwards. When the switch is flipped to ‘FWD,’ the platter will turn clockwise, and the music will resume playing forwards from the time point at which the switch was flipped back to ‘FWD.’ This is effectively the same exact implementation of the Reverse feature on a vinyl turntable.
INSTANT REVERSE MODE #1 - This mode is engaged by pressing the INSTANT REVERSE MODES (27) button momentarily, which will solidly illuminate the INSTANT REVERSE MODES (27) LED. When the switch is flipped to ‘REV,’ the platter will turn counterclockwise, and the music program will play back- wards, but you will not hear the sound of the motor slowing down as the platter in order to turn in the opposite direction. When the switch is flipped to ‘FWD,’ the platter will turn clockwise, and the music will resume playing, without slowdown effect, forwards from the time that would read on the display had you never engaged the Reverse feature to begin with. This allows you to reverse at any time, even while beatmixing with another device, as the music will stay completely in time and the musical structure will never be altered. This is very useful for DJs that play electronic music and rely on beatmatching for a large part of their per- formance.
INSTANT REVERSE MODE #2 - This mode is engaged by pressing and hold- ing the INSTANT REVERSE MODES (27) button for 2 seconds, which will flash the INSTANT REVERSE MODES (27) LED. When the switch is flipped to ‘REV,’ the platter will turn counterclockwise, and the music program will play backwards, but you will not hear the sound of the motor slowing down as the platter in order to turn in the opposite direction. When the switch is flipped to ‘FWD,’ the platter will turn clockwise, and the music will resume playing, without slowdown effect, forwards from the time point at which the switch was flipped back to ‘FWD.’
19. STOP/EJECT BUTTON (41): During CD playback, this button stops the audio and disengages the laser from reading the disc.
Once the unit has stopped, pressing the STOP/EJECT BUTTON (41) will eject the disc from the CD transport.
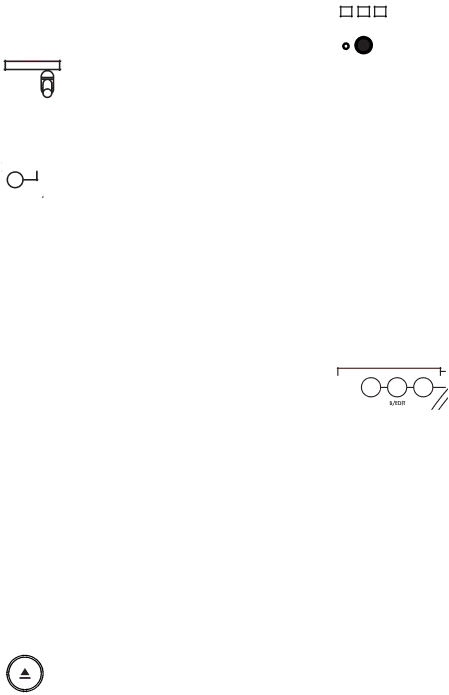
20. PLATTER SPEED CONTROL (42): This button allows to you to change the speed of the platter to 33, 45, or 78rpm. Although this is the same concept as a conventional
![]() turntable, the functionality has been extended to control a few different areas of the unit:
turntable, the functionality has been extended to control a few different areas of the unit:
CHANGING DEFAULT CD CONTROL SPEED: Since some DJs are accustomed to spinning records at one platter speed, the default “normal” speed can be altered to provide the feel necessary according to preference. This can be done while the unit is in Stop Mode (not in Pause mode) by pressing the PLATTER SPEED CONTROL (42) momentarily to toggle between 33 and 45rpm (78rpm is not supported for CD control). If the unit is in Play Mode, press the STOP/EJECT BUTTON (41) once before changing the setting. THE PLATTER SPEED LED INDICATORS (43) will reflect what speed has been selected.
CHANGING PLAYBACK SPEED: If you wish to change the actual playback speed of a CD during playback, simply press the PLATTER SPEED CONTROL (42) momentarily while in Play or Pause Mode to toggle between 33 and 45rpm (78rpm is not supported for CD playback). You will hear an audible change in the tempo and key of the music, as you are effectively playing the record- ing at a speed much slower or faster than it was intended.
CHANGING PLAYBACK SPEED FOR VINYL: If you wish to change the actual play- back speed of a Vinyl record during playback, simply press the PLATTER SPEED CONTROL (42) momentarily, while in Mix or TT Mode, to toggle between 33 and 45rpm. 78rpm is engaged by holding down the PLATTER SPEED CONTROL (42) for 3 seconds.
21. LOOP SECTION (28), (29), (30): Using the ![]()
![]() LOOP SECTION allows you to seamlessly repeat a segment of audio from the CD section. The
LOOP SECTION allows you to seamlessly repeat a segment of audio from the CD section. The
A
LOOP IN A (28) sets the starting point of the seg- ment. The LOOP OUT B/EDIT (29) sets the end point of the segment. RELOOP
(30)restarts the loop from the beginning once it has been engaged. Loop points can be set on the fly during playback or can be set in Pause Mode. To end looping, when it is engaged, press the LOOP OUT B/EDIT (29) button. To edit the loop points, press the LOOP OUT B/EDIT (29) button, find the point you wish you replace, then press either The LOOP IN A (28) or LOOP OUT B/EDIT (29) to set the point you wish you replace. For
SETTING CUE POINTS AND LOOPS:
1.SETTING THE MASTER CUE POINT:
a. During the playback of a CD, find the point at which you want to set the
MASTER CUE POINT.
b. Pause the playback by pressing the PLAY/PAUSE BUTTON (16). The platter will stop.
c. Using the SCRATCH CONTROL VINYL PLATE (3), make any necessary adjust-
ments to the MASTER CUE POINT. Using the SCRATCH CONTROL VINYL PLATE (3)
to make adjustments is limited to CD Mode.
d. To memorize the MASTER CUE POINT, press the PLAY/PAUSE BUTTON (16) again. The platter will start again, and the music will resume playback.
<7>
e. To advance to the MASTER CUE POINT, press the MASTER CUE BUTTON (17). You may now press the PLAY/PAUSE BUTTON (16) to begin playback from the
set MASTER CUE POINT
f. To preview the MASTER CUE POINT, first press the MASTER CUE BUTTON (17) to advance to the MASTER CUE POINT, then press and hold down the MASTER CUE BUTTON (17) for as long as needed to preview. When the MASTER CUE BUTTON (17) is released, the unit will advance back to the MASTER CUE
POINT.
g. To advance and begin playing from the set MASTER CUE POINT without interruption, press the HOT START CUE FUNCTION (18) button.
h. To permanently save the MASTER CUE POINT to the memory of the CDT- 05 (for CD Audio discs only, not MP3 discs), hold the MEMO BUTTON (23) down for 3 seconds. When the MASTER CUE POINT has been saved to mem- ory, the bottom line of the LCD DISPLAY (1) will read ‘SAVE’ along with the track number and time of the MASTER CUE POINT. Whenever you load an Audio CD that you have stored MASTER CUE POINT information for, the bot- tom left portion of the LCD DISPLAY (1) will flash the word ‘CUE.’
i. To recall the MASTER CUE POINT that has been saved, hold down the TIME MODE/RECALL CUE (25) button for 3 seconds, until the bottom line of the LCD DISPLAY (1) reads ‘LOAD’ along with the track number and time of the MASTER CUE POINT. Press the MASTER CUE BUTTON (17) to confirm the assignment of the saved cue point to the MASTER CUE. Now you are free to use the loaded MASTER CUE POINT as normal.
j. When the track is advanced using the TRACK SKIP & DSP PARAMETER (22) knob, the MASTER CUE POINT will be cleared from temporary memory. You may choose to set a new MASTER CUE POINT or use the RECALL CUE function to load a saved point.
2.SETTING HOT CUE POINTS:
a.During the playback of a CD, find the point at which you want to set a HOT CUE POINT. If you want to set a HOT CUE POINT on the fly, proceed to step B. Otherwise, while in CD Mode only, you may pause the playback by pressing the PLAY/PAUSE BUTTON (16), and adjust the position by using the SCRATCH CONTROL VINYL PLATE (3), then proceed to step B.
b.To memorize a HOT CUE POINT, first press the MEMO BUTTON (23) momentarily, until the light inside of the button becomes illuminated.
c.At the point of which you wish to set the HOT CUE POINT, press the desired HOT STARTABLE CUE POINT (24) button which corresponds to the bank of which you wish the point to be saved.
d.Repeat the process for up to a total of 3 HOT STARTABLE CUE POINTS.
e.To advance to a saved HOT STARTABLE CUE POINT, simply press the desired HOT STARTABLE CUE POINT (24) button which corresponds to the bank of which you wish to play. The unit will advance to this point (and the corre- sponding track from which the point was set) without interruption, regard- less of which track is currently playing.
f.To reset a HOT STARTABLE CUE POINT, simply repeat the process and over- write the HOT STARTABLE CUE POINT (24) which corresponds to the bank of which you wish to overwrite.