Chapter 2 — Installation
Power Connection
1Place the printer in a suitable location that allows easy access to printed labels and preferably also easy reload of media and transfer ribbon. The printer should only be operated while resting on a hori- zontal surface, like a table or similar.
The printer and power supply unit must never be operated in a location where they can get wet. Personal injury could result! Only use with power supply adapter Intermec SPN-
2Place the power supply adapter in a suitable location between the printer and an electrical outlet, for example on the floor. The power supply adapter can be used for 100 to 240 VAC, 50 to 60 Hz. The configuration of the power cord plug differs according to national standards.
3Check that the printer’s On/Off switch at the back is off (O).
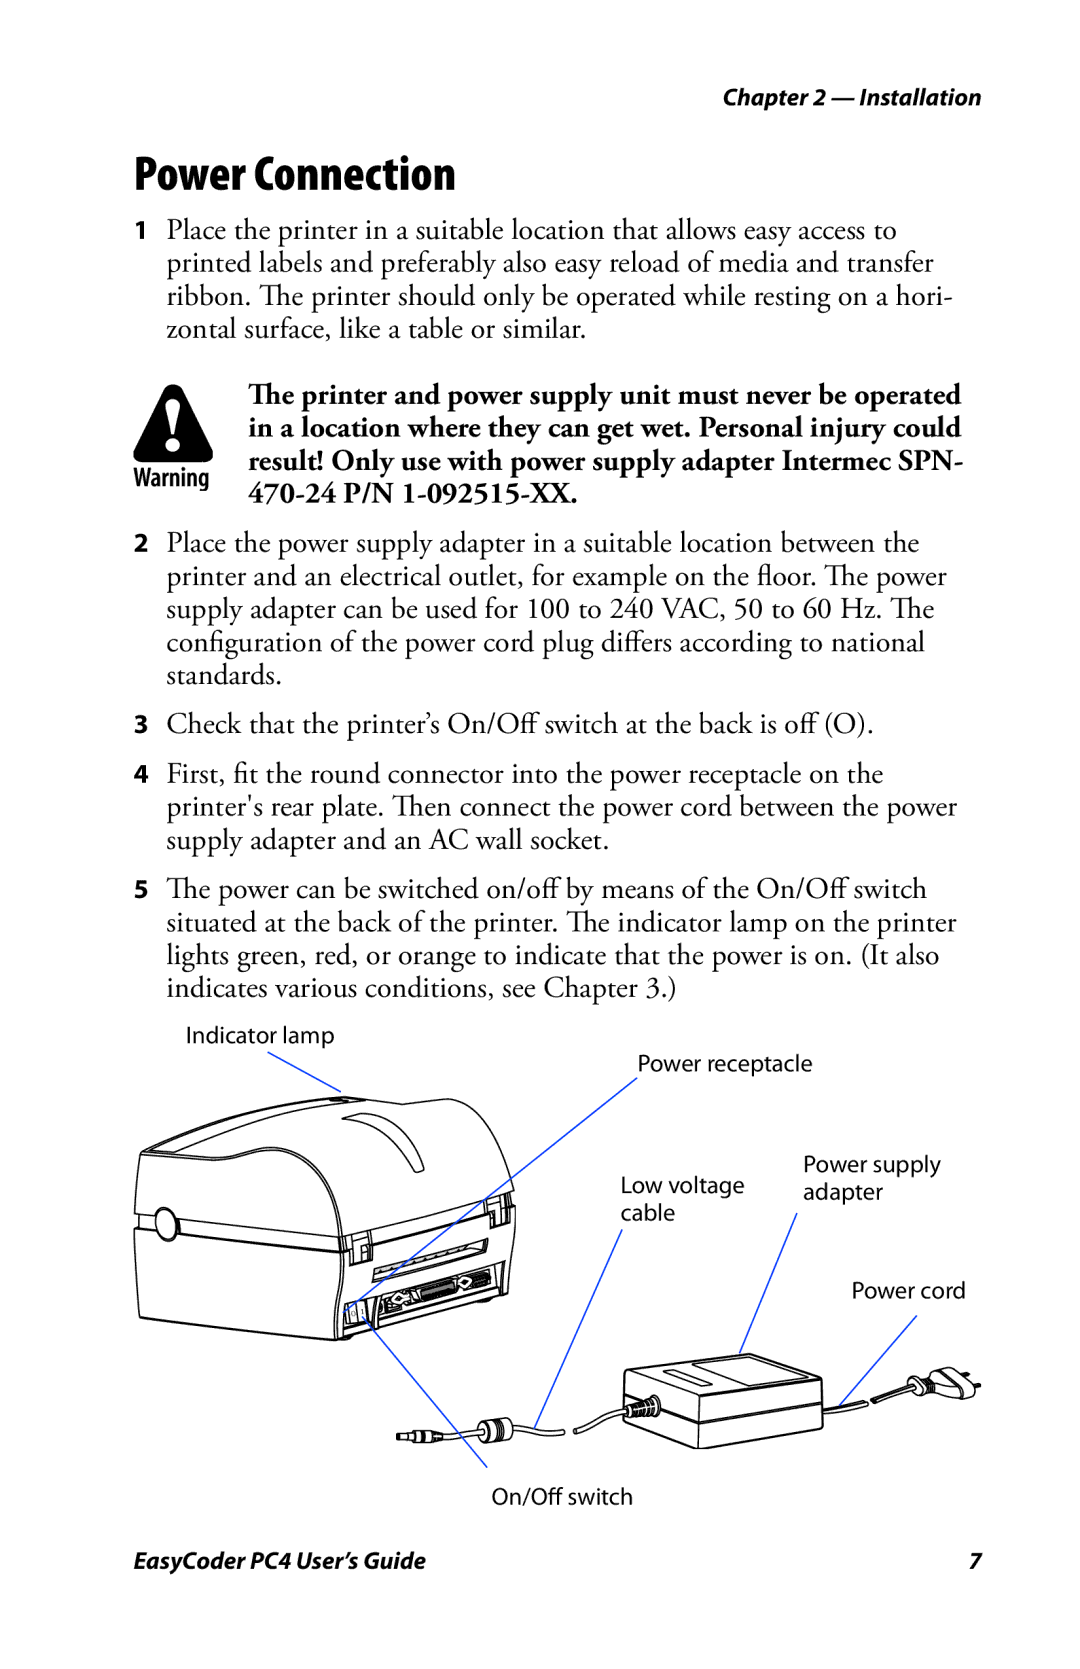
4First, fit the round connector into the power receptacle on the printer's rear plate. Then connect the power cord between the power supply adapter and an AC wall socket.
5The power can be switched on/off by means of the On/Off switch situated at the back of the printer. The indicator lamp on the printer lights green, red, or orange to indicate that the power is on. (It also indicates various conditions, see Chapter 3.)
Indicator lamp
Power receptacle
O
Power supply
Low voltage adapter cable
Power cord
I
On/Off switch
EasyCoder PC4 User’s Guide | 7 |