GP7122 REPAIR INSTRUCTIONS
NOTE: Always take time to lubricate all metal and
TO CHECK VALVES
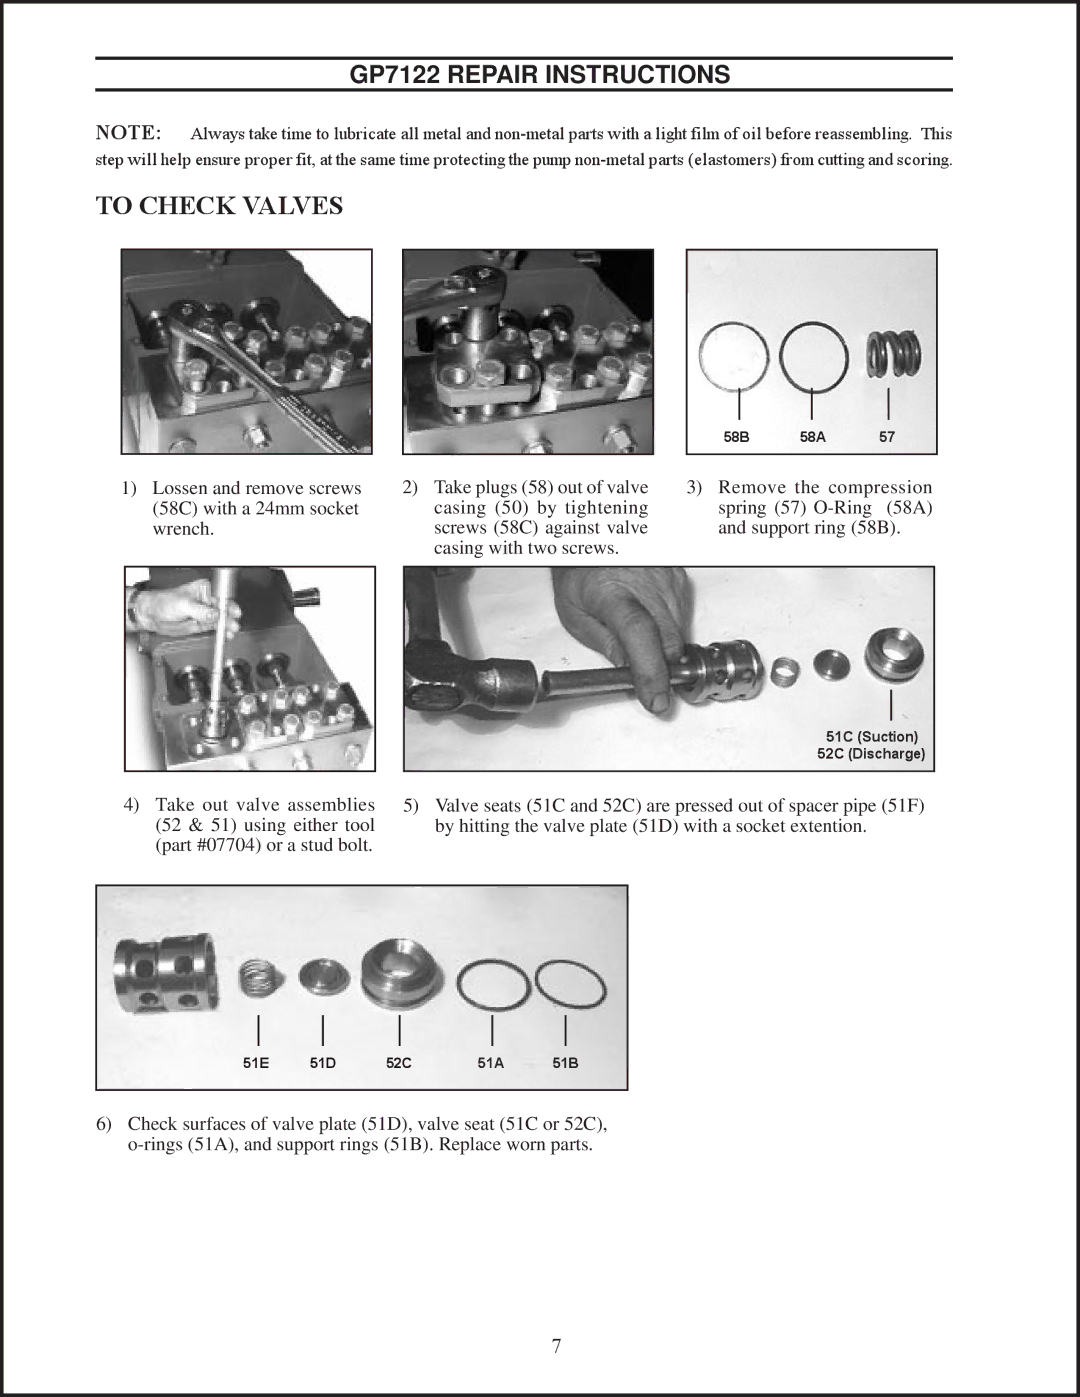
1)Lossen and remove screws (58C) with a 24mm socket wrench.
4)Take out valve assemblies (52 & 51) using either tool (part #07704) or a stud bolt.
|
|
|
|
|
|
|
|
|
|
|
|
|
|
|
|
|
| 58B | 58A | 57 | |||
|
|
|
|
|
| ||
2) Take plugs (58) out of valve |
| 3) Remove the compression | |||||
casing (50) by tightening |
| spring (57) | (58A) | ||||
screws (58C) against valve |
| and support ring (58B). | |||||
casing with two screws. |
|
|
|
|
|
|
|
51C (Suction)
52C (Discharge)
5)Valve seats (51C and 52C) are pressed out of spacer pipe (51F) by hitting the valve plate (51D) with a socket extention.
|
|
|
|
|
|
|
|
|
|
|
|
|
|
|
|
|
|
|
|
51E | 51D | 52C | 51A | 51B | |||||
|
|
|
|
|
|
|
|
|
|
6)Check surfaces of valve plate (51D), valve seat (51C or 52C),
7
