4 Installation Instruction
Please follow the reference sections in order for installation.
4-1 Installation of Power Supply
To facilitate the installation, it is recommended to place the 3D AURORA casing upright on the table.
Required tools: power supply securing screws x 4.
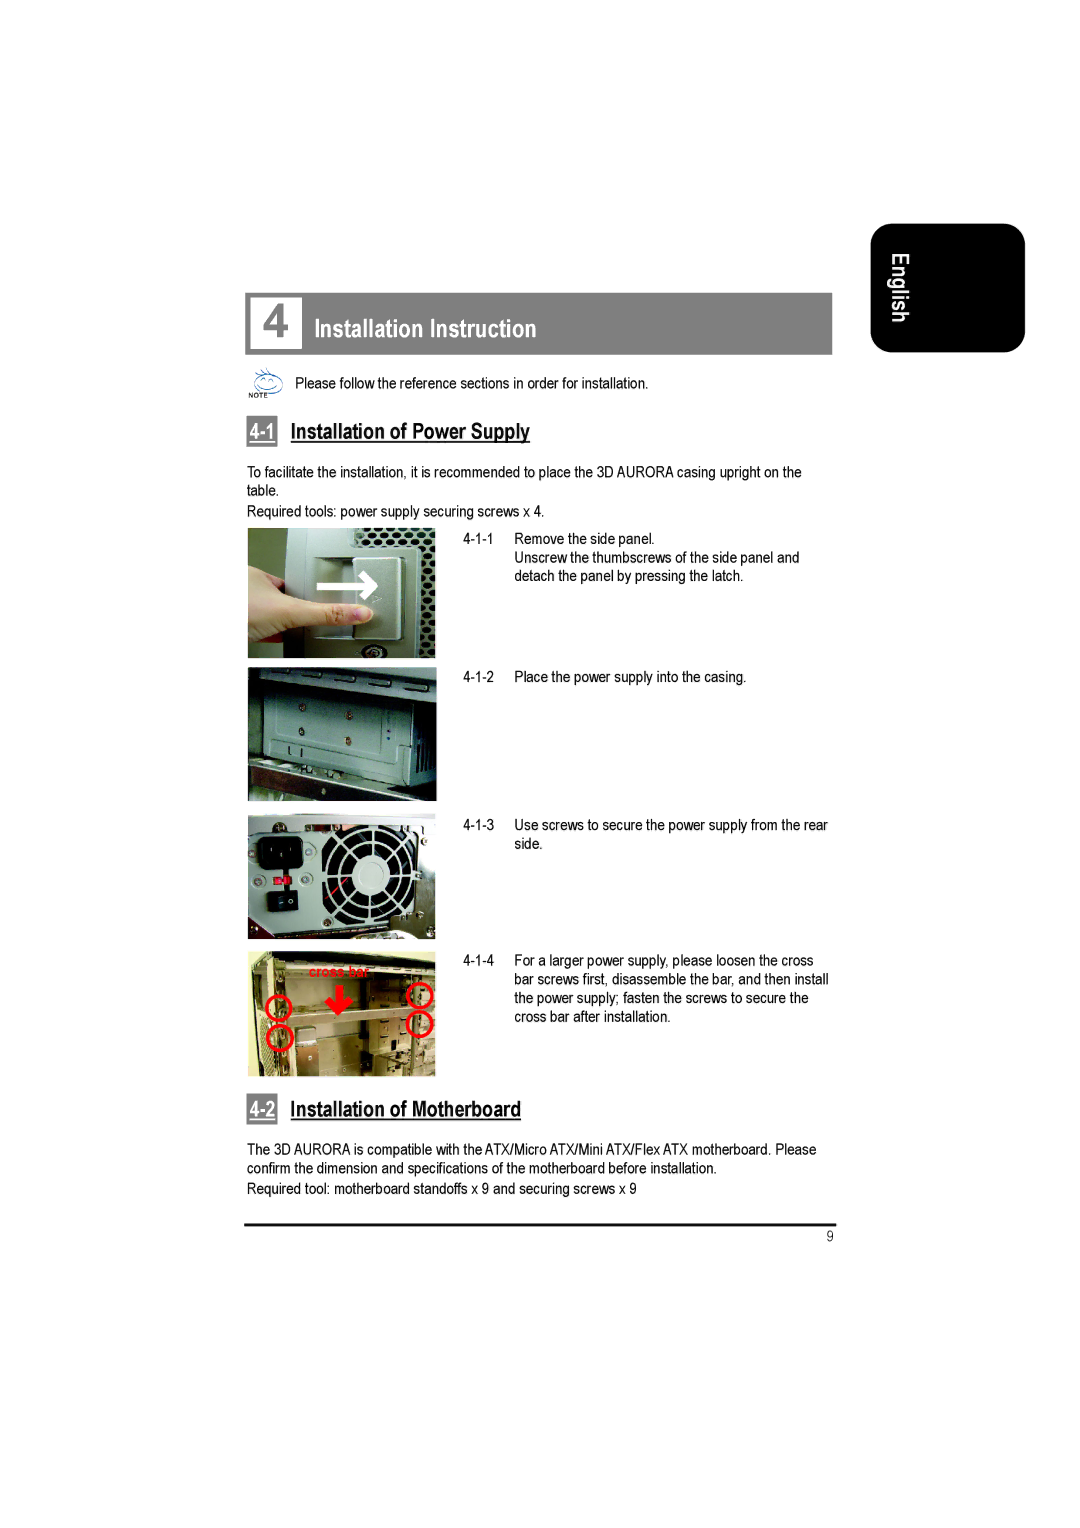
Unscrew the thumbscrews of the side panel and detach the panel by pressing the latch.
cross bar | ||
bar screws first, disassemble the bar, and then install | ||
| ||
| the power supply; fasten the screws to secure the | |
| cross bar after installation. |
4-2 Installation of Motherboard
The 3D AURORA is compatible with the ATX/Micro ATX/Mini ATX/Flex ATX motherboard. Please confirm the dimension and specifications of the motherboard before installation.
Required tool: motherboard standoffs x 9 and securing screws x 9
9
English