2. Assembling your GN 6110
First assemble your GN 6110 to work with your desk telephone, and then set it up to work with your mobile phone. The GN 6110 supports the GN 1000 Remote Handset Lifter for desk telephones.
See Section 4.3 for hook switch set up instructions and use.
2.1 Setting up for desk telephone use
Connecting cords
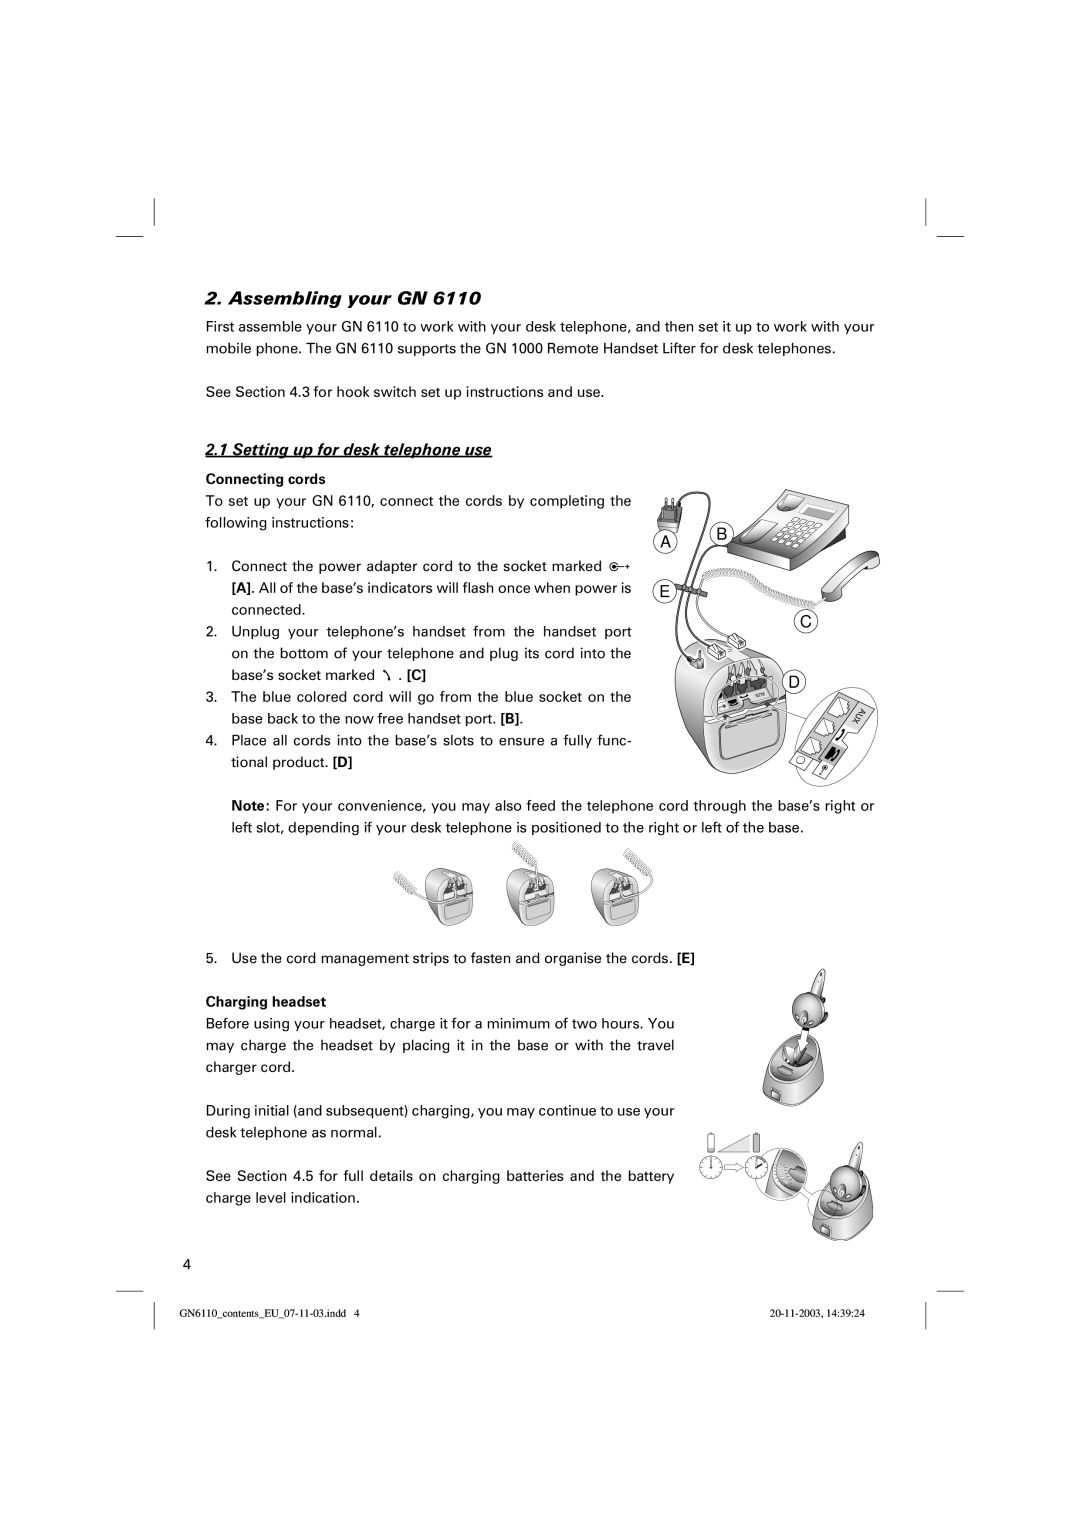
To set up your GN 6110, connect the cords by completing the following instructions:
1.Connect the power adapter cord to the socket marked 2
[A]. All of the base’s indicators will flash once when power is connected.
2.Unplug your telephone’s handset from the handset port on the bottom of your telephone and plug its cord into the base’s socket marked 0 . [C]
3.The blue colored cord will go from the blue socket on the base back to the now free handset port. [B].
4.Place all cords into the base’s slots to ensure a fully func- tional product. [D]
A B
E ![]()
![]()
![]()
![]()
![]()
C
D
AUX
AUX
Note: For your convenience, you may also feed the telephone cord through the base’s right or left slot, depending if your desk telephone is positioned to the right or left of the base.
5. Use the cord management strips to fasten and organise the cords. [E]
Charging headset
Before using your headset, charge it for a minimum of two hours. You may charge the headset by placing it in the base or with the travel charger cord.
During initial (and subsequent) charging, you may continue to use your desk telephone as normal.
See Section 4.5 for full details on charging batteries and the battery charge level indication.
4