Connections (Continued)
Connecting a TV
Choose one of the following TV connections, depending on the capabilities of your equipment.
![]() ote
ote
All video signals are available from all video out- puts. That means that whichever TV connection you use, it will work with all input sources, including VHS out of the Component/Progressive Video Output.
RF Coaxial Connection
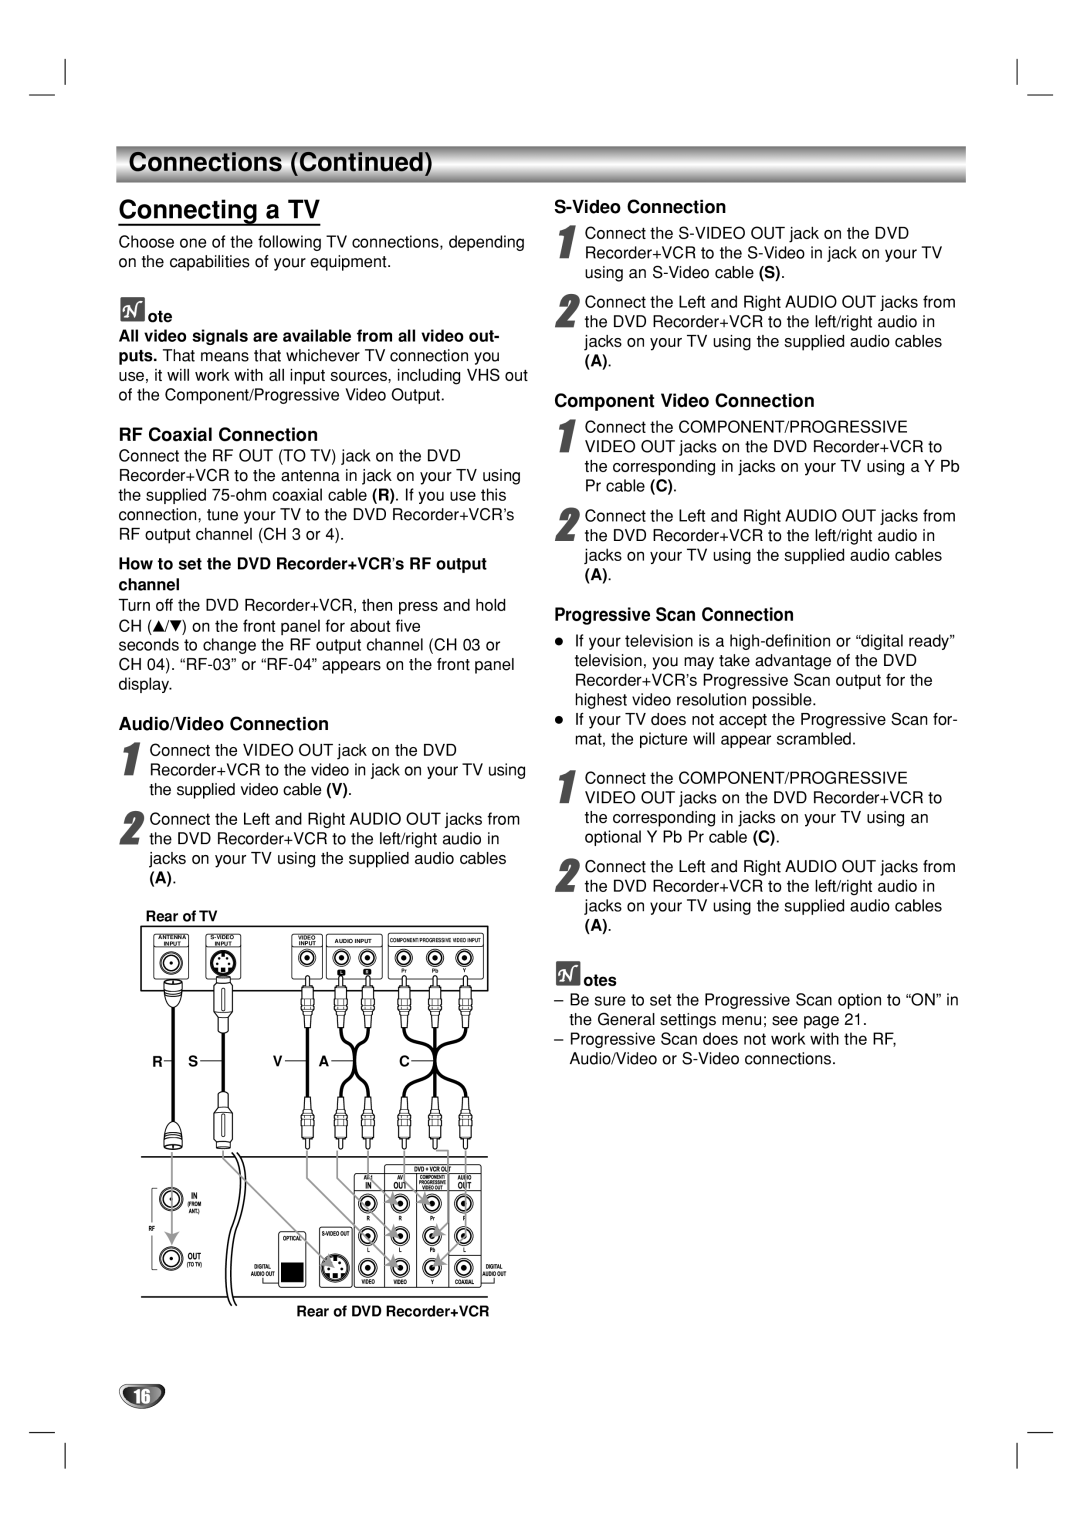
Connect the RF OUT (TO TV) jack on the DVD Recorder+VCR to the antenna in jack on your TV using the supplied
How to set the DVD Recorder+VCR’s RF output channel
Turn off the DVD Recorder+VCR, then press and hold CH (v/V) on the front panel for about five seconds to change the RF output channel (CH 03 or
CH 04).
Audio/Video Connection
1Recorder+VCR to the video in jack on your TV using the supplied video cable (V).Connect the VIDEO OUT jack on the DVD
2the DVD Recorder+VCR to the left/right audio in
jacks on your TV using the supplied audio cables
(A).Connect the Left and Right AUDIO OUT jacks from
Rear of TV
ANTENNA | VIDEO | AUDIO INPUT | COMPONENT/PROGRESSIVE VIDEO INPUT | |||||
INPUT | INPUT | INPUT | ||||||
|
|
|
|
| ||||
|
|
| L | R | Pr | Pb | Y | |
R SV AC
Rear of DVD Recorder+VCR
S-Video Connection
1Recorder+VCR to the
2the DVD Recorder+VCR to the left/right audio in
jacks on your TV using the supplied audio cables
(A).Connect the Left and Right AUDIO OUT jacks from
Component Video Connection
1VIDEO OUT jacks on the DVD Recorder+VCR to
the corresponding in jacks on your TV using a Y Pb Pr cable (C).Connect the COMPONENT/PROGRESSIVE
2the DVD Recorder+VCR to the left/right audio in
jacks on your TV using the supplied audio cables
(A).Connect the Left and Right AUDIO OUT jacks from
Progressive Scan Connection
If your television is a
If your TV does not accept the Progressive Scan for- mat, the picture will appear scrambled.
1VIDEO OUT jacks on the DVD Recorder+VCR to
the corresponding in jacks on your TV using an optional Y Pb Pr cable (C).Connect the COMPONENT/PROGRESSIVE
2the DVD Recorder+VCR to the left/right audio in
jacks on your TV using the supplied audio cables
(A).Connect the Left and Right AUDIO OUT jacks from
![]() otes
otes
–Be sure to set the Progressive Scan option to “ON” in the General settings menu; see page 21.
–Progressive Scan does not work with the RF, Audio/Video or
16
