DHT7000 specifications
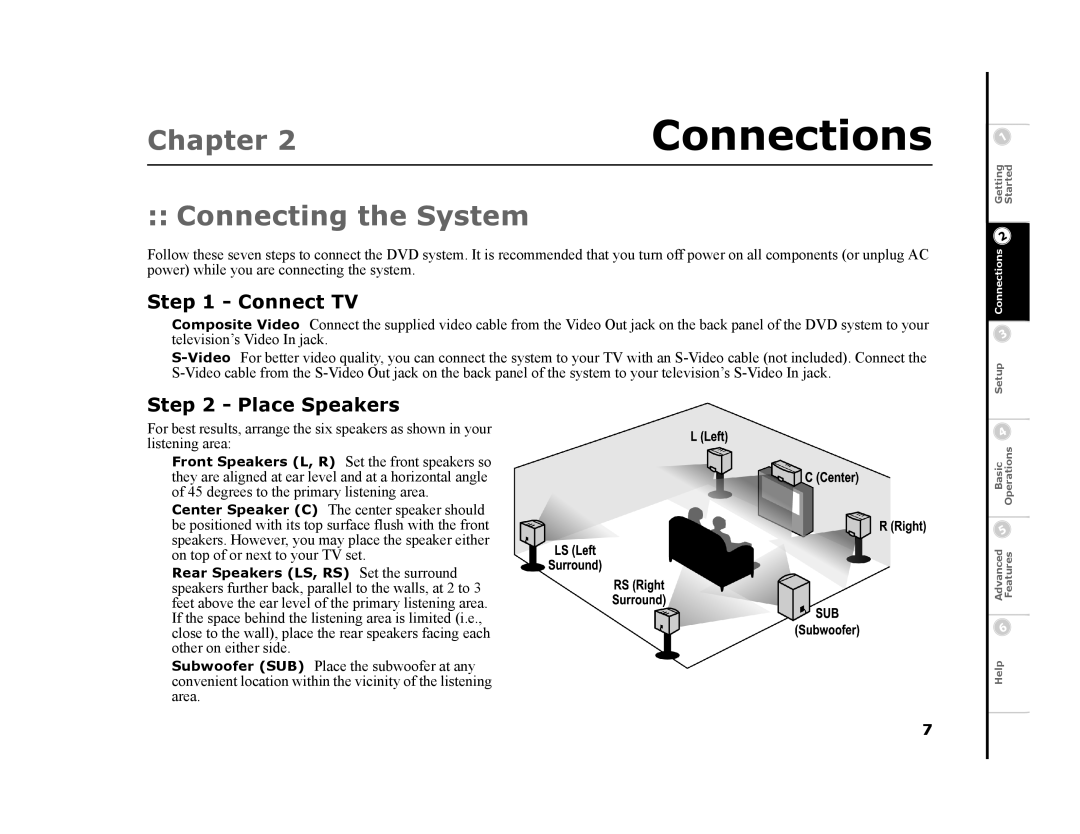
The GoVideo DHT7000 is an innovative and versatile home theater receiver designed to enhance the audio and visual experience in any living space. This receiver is packed with state-of-the-art features and technologies that cater to both audiophiles and home theater enthusiasts.One of the standout features of the DHT7000 is its support for high-definition audio formats. It offers compatibility with Dolby Atmos, DTS:X, and other immersive sound technologies, providing a three-dimensional sound experience that draws listeners into the action. This capability is complemented by its multi-channel amplification system that delivers pristine audio quality across multiple speakers, transforming standard stereo audio into a full surround sound experience.
Equipped with advanced connectivity options, the DHT7000 ensures seamless integration with modern devices. It supports HDMI 2.1, which allows for 8K video pass-through, enabling users to enjoy higher resolutions with minimal lag. Additionally, it features multiple HDMI inputs, making it easy to connect gaming consoles, Blu-ray players, and other entertainment devices. The inclusion of Bluetooth and Wi-Fi connectivity allows users to stream music directly from their smartphones or tablets, enhancing the versatility of this receiver.
The DHT7000 also takes pride in its user-friendly interface, with an intuitive remote control and an easy-to-navigate onboard menu system. This simplicity allows even those unfamiliar with audio equipment to set up and customize their home theater system easily. Moreover, the receiver comes with automatic room calibration technology. This feature intelligently adjusts the audio output based on the room's acoustics, ensuring the best sound quality regardless of the listening environment.
In terms of design, the GoVideo DHT7000 boasts a sleek and modern aesthetic, featuring a compact footprint that can fit into various entertainment setups. The build quality reflects durability while also ensuring efficient heat dissipation, which prolongs the lifespan of the receiver.
Another notable characteristic of the DHT7000 is its energy efficiency. The device complies with energy-saving standards, making it an environmentally friendly choice for those looking to reduce their carbon footprint.
In summary, the GoVideo DHT7000 is a feature-rich home theater receiver that combines high-definition audio support, versatile connectivity, user-friendly operation, and an attractive design. With its advanced technologies, it stands out as a top choice for anyone looking to elevate their home entertainment experience.

