Install Tip/Guard Assembly (if not installed)
Install Tip/Guard Assembly (if not installed)
Reversible Tip Selection Chart
MATERIALS
*Thin | Medium | Heavy |
|
|
|
Thin stains, | Enamels, solid | Heavy latex |
stains, thin latex |
| |
|
|
|
311 | 315, 515 | 517 |
|
|
|
*For thin materials install
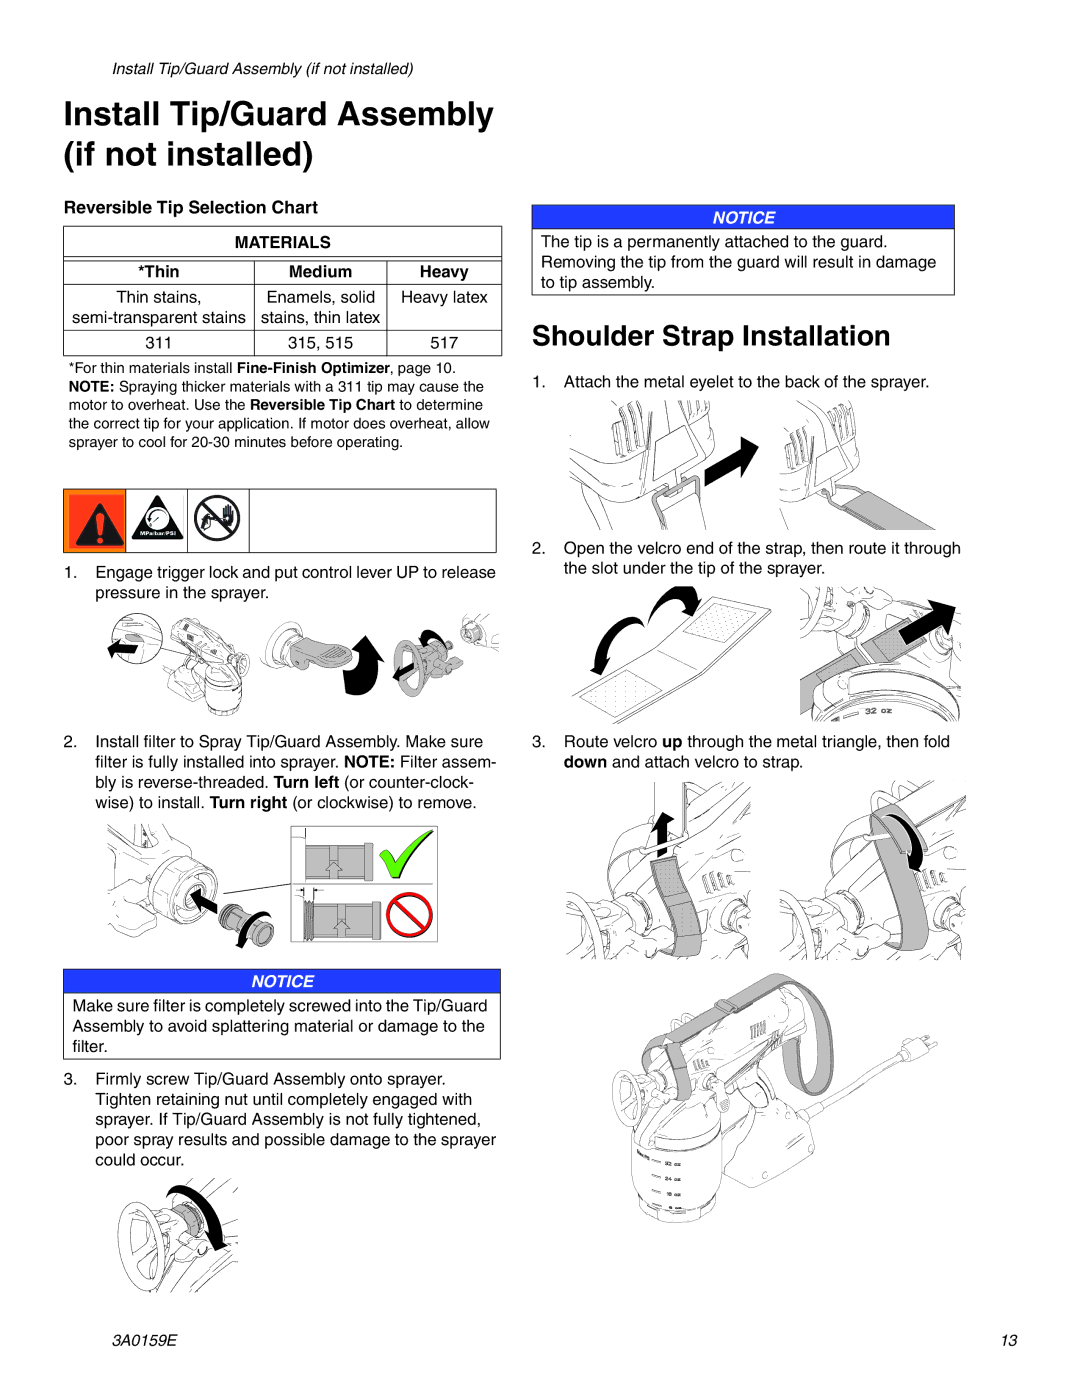
1.Engage trigger lock and put control lever UP to release pressure in the sprayer.
ti14994a | ti14999a |
|
2.Install filter to Spray Tip/Guard Assembly. Make sure filter is fully installed into sprayer. NOTE: Filter assem- bly is
NOTICE
Make sure filter is completely screwed into the Tip/Guard Assembly to avoid splattering material or damage to the filter.
3.Firmly screw Tip/Guard Assembly onto sprayer. Tighten retaining nut until completely engaged with sprayer. If Tip/Guard Assembly is not fully tightened, poor spray results and possible damage to the sprayer could occur.
NOTICE
The tip is a permanently attached to the guard. Removing the tip from the guard will result in damage to tip assembly.
Shoulder Strap Installation
1.Attach the metal eyelet to the back of the sprayer.
2.Open the velcro end of the strap, then route it through the slot under the tip of the sprayer.
3.Route velcro up through the metal triangle, then fold down and attach velcro to strap.
ti14997a
3A0159E | 13 |