Shutdown and Cleaning
7.Discard contaminated fluid and refill with appropri- ate flushing fluid.
8.Disengage trigger lock, reverse tip to UNCLOG position, and pull trigger for 5 seconds to prepare sprayer.
11.Remove material cup and discard used fluid.
12.Use a soft brush to clean the black rubber inlet seal. If the vent holes become clogged, use the Fine Fin- ish Optimizer cleaning tool or a paper clip to clear the holes.
ti14991a
9.Put control lever DOWN to spray position. Trigger sprayer into waste area until no paint appears in water or flushing fluid.
ti15425a
ti15491a
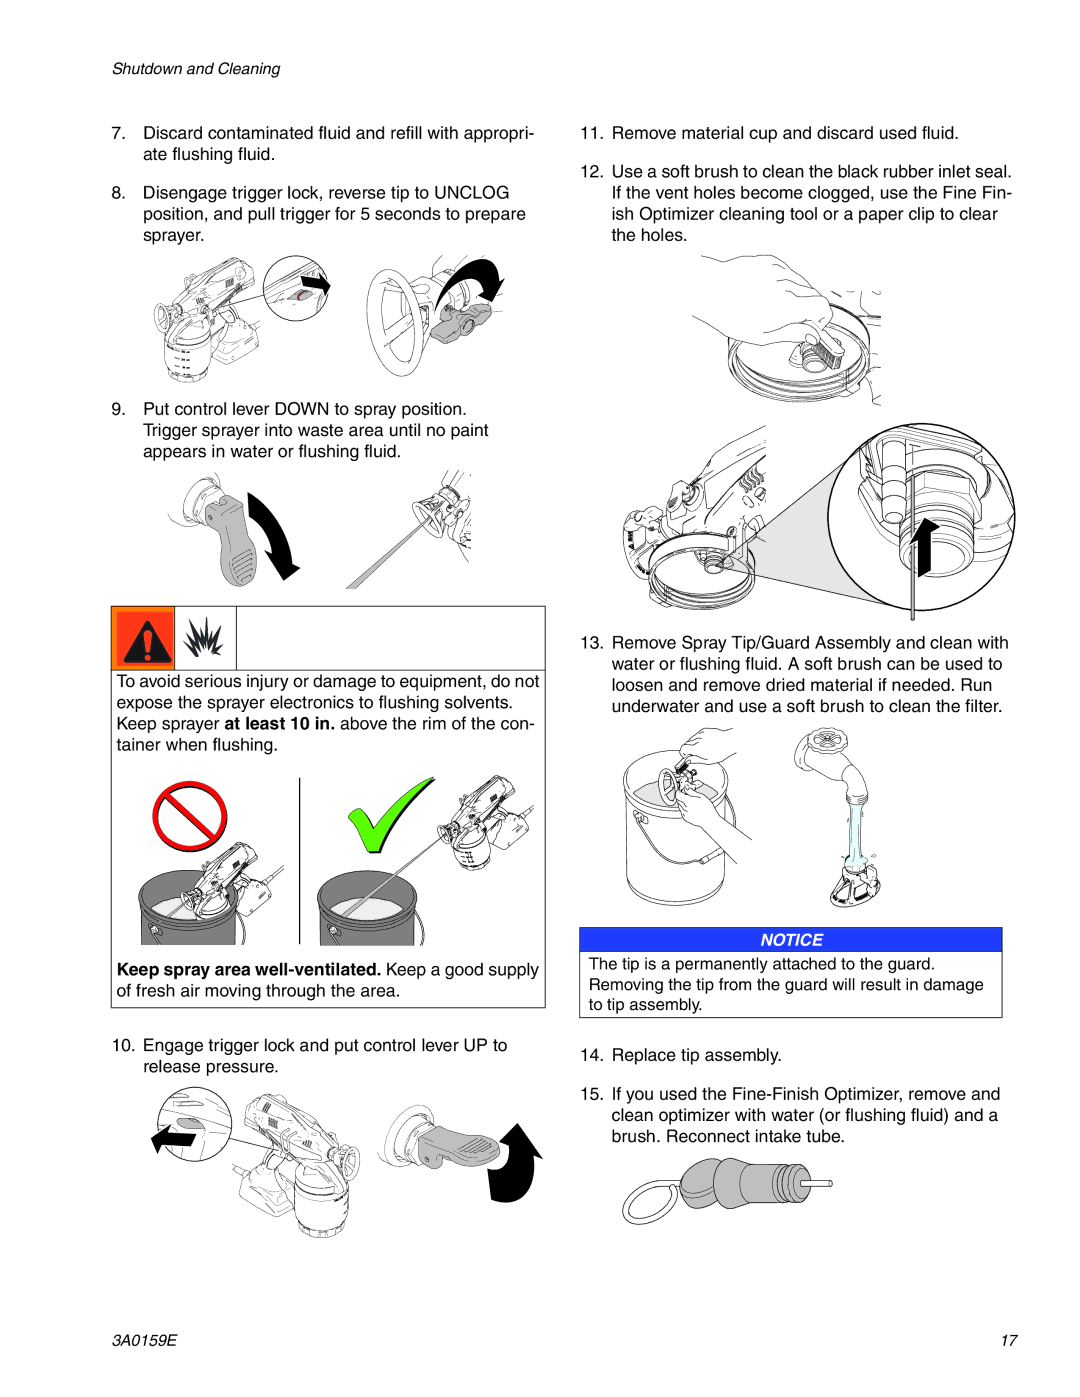
To avoid serious injury or damage to equipment, do not expose the sprayer electronics to flushing solvents. Keep sprayer at least 10 in. above the rim of the con- tainer when flushing.
ti15529a
Keep spray area
10.Engage trigger lock and put control lever UP to release pressure.
13.Remove Spray Tip/Guard Assembly and clean with water or flushing fluid. A soft brush can be used to loosen and remove dried material if needed. Run underwater and use a soft brush to clean the filter.
NOTICE
The tip is a permanently attached to the guard. Removing the tip from the guard will result in damage to tip assembly.
14.Replace tip assembly.
15.If you used the
3A0159E | 17 |