Troubleshooting
Troubleshooting
Mechanical/Fluid Flow
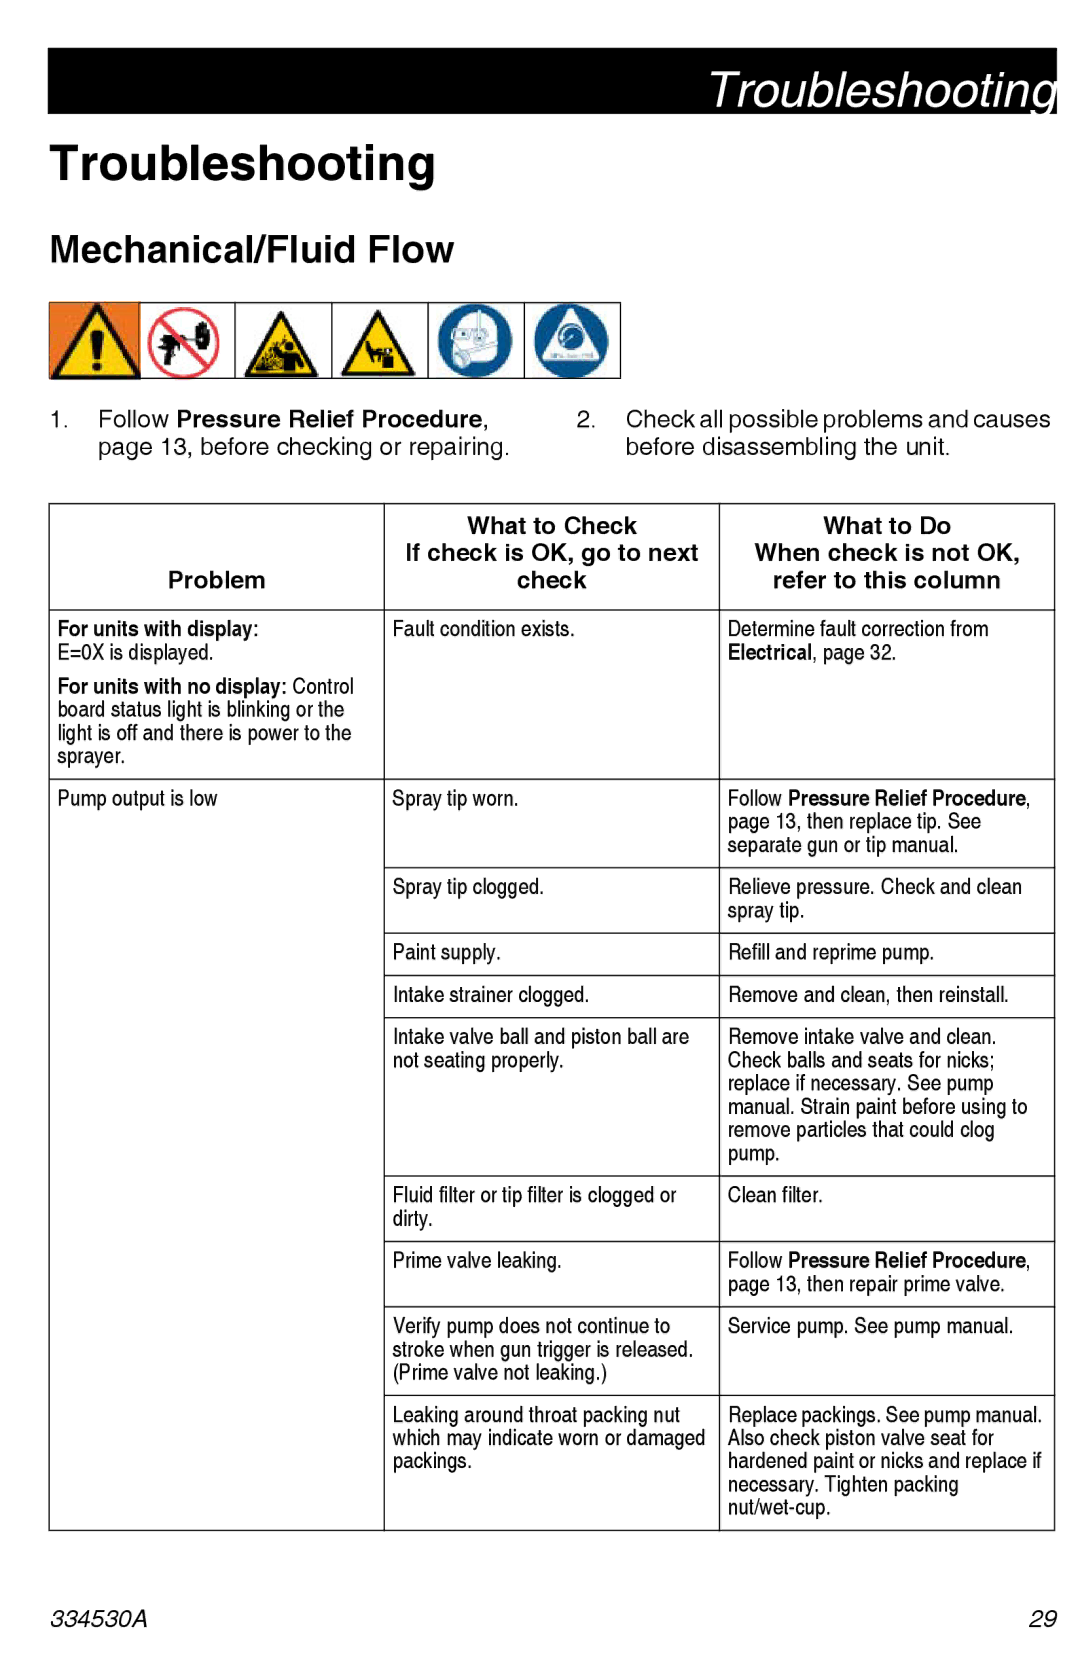
1.Follow Pressure Relief Procedure, page 13, before checking or repairing.
2.Check all possible problems and causes before disassembling the unit.
| What to Check | What to Do |
| If check is OK, go to next | When check is not OK, |
Problem | check | refer to this column |
|
|
|
For units with display: | Fault condition exists. | Determine fault correction from |
E=0X is displayed. |
| Electrical, page 32. |
For units with no display: Control |
|
|
board status light is blinking or the |
|
|
light is off and there is power to the |
|
|
sprayer. |
|
|
|
|
|
Pump output is low | Spray tip worn. | Follow Pressure Relief Procedure, |
|
| page 13, then replace tip. See |
|
| separate gun or tip manual. |
|
|
|
| Spray tip clogged. | Relieve pressure. Check and clean |
|
| spray tip. |
|
|
|
| Paint supply. | Refill and reprime pump. |
|
|
|
| Intake strainer clogged. | Remove and clean, then reinstall. |
|
|
|
| Intake valve ball and piston ball are | Remove intake valve and clean. |
| not seating properly. | Check balls and seats for nicks; |
|
| replace if necessary. See pump |
|
| manual. Strain paint before using to |
|
| remove particles that could clog |
|
| pump. |
|
|
|
| Fluid filter or tip filter is clogged or | Clean filter. |
| dirty. |
|
|
|
|
| Prime valve leaking. | Follow Pressure Relief Procedure, |
|
| page 13, then repair prime valve. |
|
|
|
| Verify pump does not continue to | Service pump. See pump manual. |
| stroke when gun trigger is released. |
|
| (Prime valve not leaking.) |
|
|
|
|
| Leaking around throat packing nut | Replace packings. See pump manual. |
| which may indicate worn or damaged | Also check piston valve seat for |
| packings. | hardened paint or nicks and replace if |
|
| necessary. Tighten packing |
|
| |
|
|
|
334530A | 29 |
