Service
Repairing the Air Valve
Tools Required
DTorque wrench
D
D
D
D
NOTE: Air Valve Service Kit 238765 is available. Parts included in the Air Valve Service Kit are marked with a symbol in the Air Motor Parts List, for example (3{). See page 23. Use all the parts in the kit for the best results.
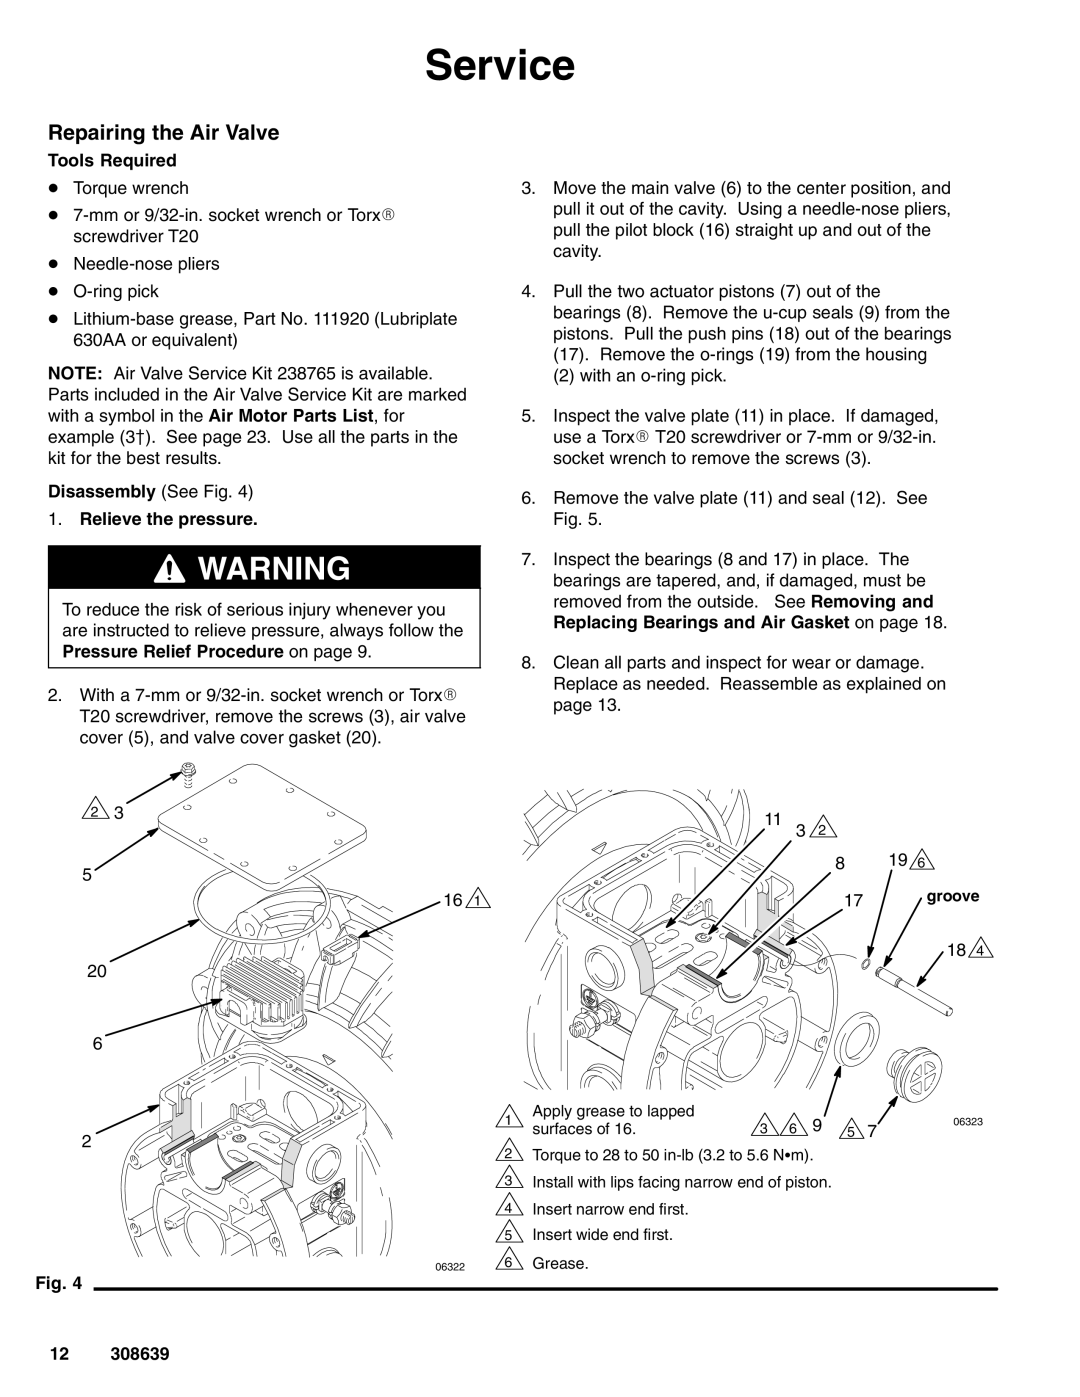
Disassembly (See Fig. 4)
1.Relieve the pressure.
![]() WARNING
WARNING
To reduce the risk of serious injury whenever you are instructed to relieve pressure, always follow the Pressure Relief Procedure on page 9.
2.With a
3.Move the main valve (6) to the center position, and pull it out of the cavity. Using a
4.Pull the two actuator pistons (7) out of the bearings (8). Remove the
(17).Remove the
(2)with an
5.Inspect the valve plate (11) in place. If damaged, use a TorxR T20 screwdriver or
6.Remove the valve plate (11) and seal (12). See Fig. 5.
7.Inspect the bearings (8 and 17) in place. The bearings are tapered, and, if damaged, must be removed from the outside. See Removing and Replacing Bearings and Air Gasket on page 18.
8.Clean all parts and inspect for wear or damage. Replace as needed. Reassemble as explained on page 13.
23
5
20
6
2
11 | 3 | 2 |
|
|
|
| 8 | 19 6 |
|
16 1 |
| 17 | groove | |
|
|
| 18 | 4 |
1 | Apply grease to lapped | 3 6 9 |
| 06323 | |
surfaces of 16. | 5 7 | ||||
|
|
2Torque to 28 to 50
3Install with lips facing narrow end of piston.
4Insert narrow end first.
5Insert wide end first.
06322 | 6 Grease. |
Fig. 4
12 308639