14.Hold adapter (9) stationary and screw nozzle and collar (16) into adapter. Do not over tighten collar.
15.Reconnect flow gun to material supply line.
16.Turn on material supply line.
17.Return flow gun to normal operating condition.
Model 12005
Disassembly
1.Actuate gun to purge material and relieve pressure in gun. Pressure Relief Procedure, page 5.
2.Disconnect material supply line from gun handle.
3.Hold adapter (9) stationary and unscrew nozzle and collar (16).
4.With trigger depressed, unscrew adapter (9) from gun body (17).
5.Remove
6.Loosen lock nut (14).
7.Carefully unscrew and remove spring retainer (15)
8.Remove screws (11) and lock washers (28) from trigger pins (12).
9.Pull trigger pins (12) from gun body (17) and remove trigger (18).
10.Remove piston valve (20) from front of gun.
11.Unscrew packing nut (5) from gun body (17).
12.Remove cartridge assembly from gun.
Service
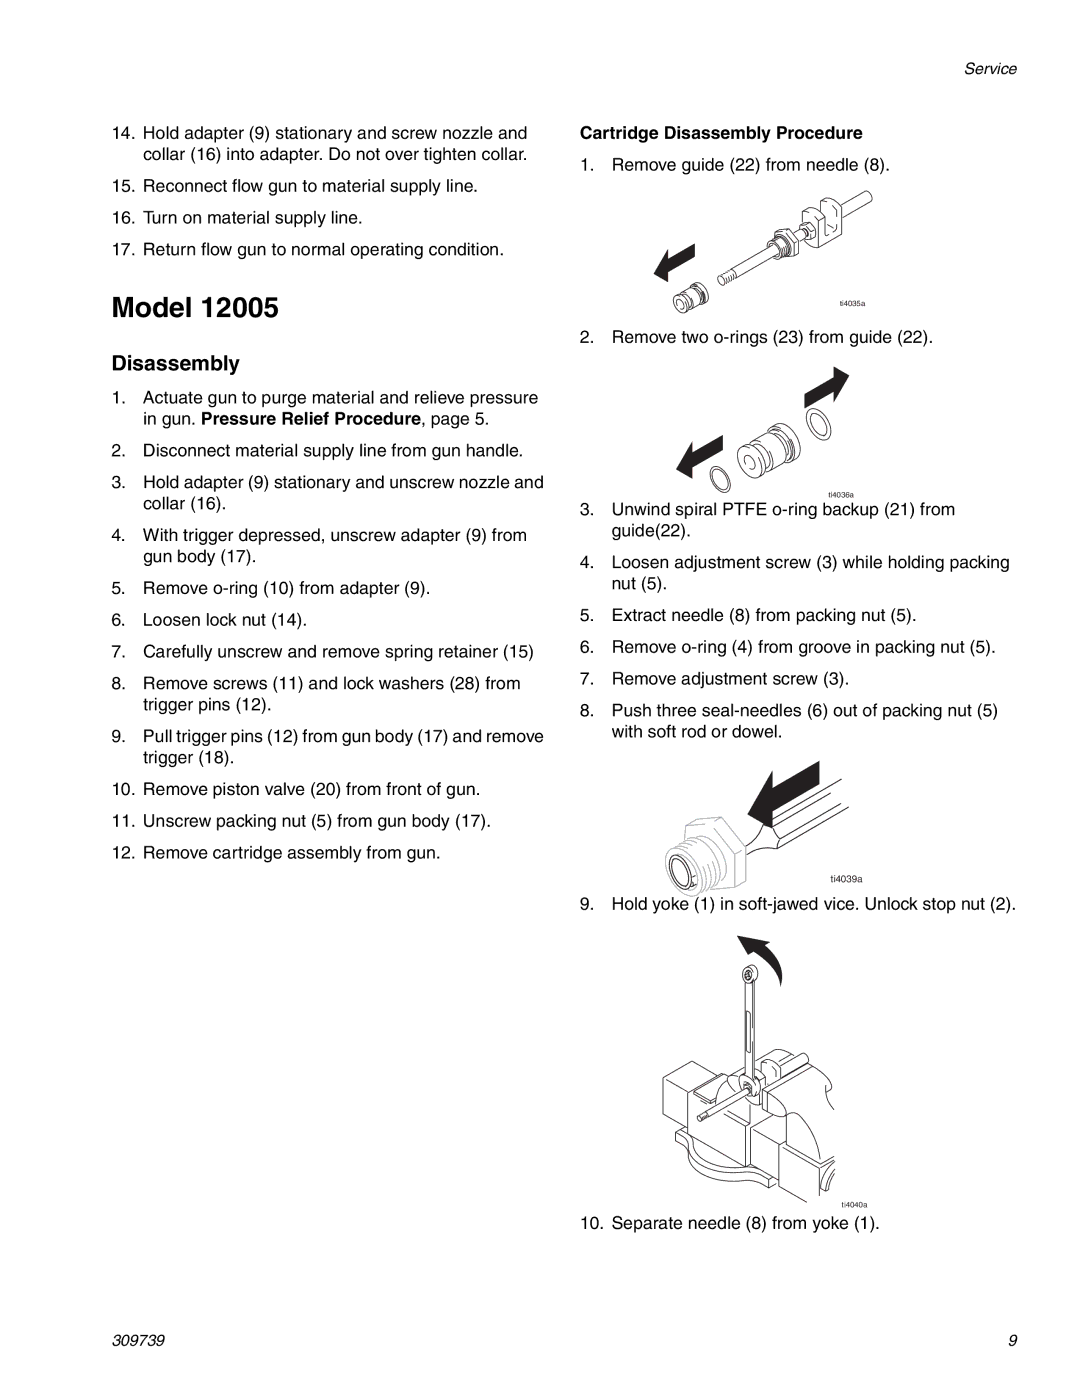
Cartridge Disassembly Procedure
1. Remove guide (22) from needle (8).
ti4035a
2. Remove two
ti4036a
3.Unwind spiral PTFE
4.Loosen adjustment screw (3) while holding packing nut (5).
5.Extract needle (8) from packing nut (5).
6.Remove
7.Remove adjustment screw (3).
8.Push three
ti4039a
9. Hold yoke (1) in
ti4040a
10. Separate needle (8) from yoke (1).
309739 | 9 |
