Service
Service
Models 12004, 12004X
Disassembly
1.Actuate gun to purge material and relieve pressure in gun. Pressure Relief Procedure, page 5.
2.Disconnect material supply line from gun handle.
3.Hold adapter (9) stationary and unscrew nozzle and collar (16).
4.With trigger depressed, unscrew adapter (9) from gun body (17).
5.Remove
6.Loosen lock nut (14).
7.Carefully unscrew and remove spring retainer (15) and spring (13) from the gun body (17).
8.Remove screw (11) and lock washer (23) from side of trigger (18).
9.Pull trigger pins (12) from gun body (17) and remove trigger (18).
10.Unscrew packing nut (5) from gun body (17).
11.Remove cartridge assembly through side of gun handle.
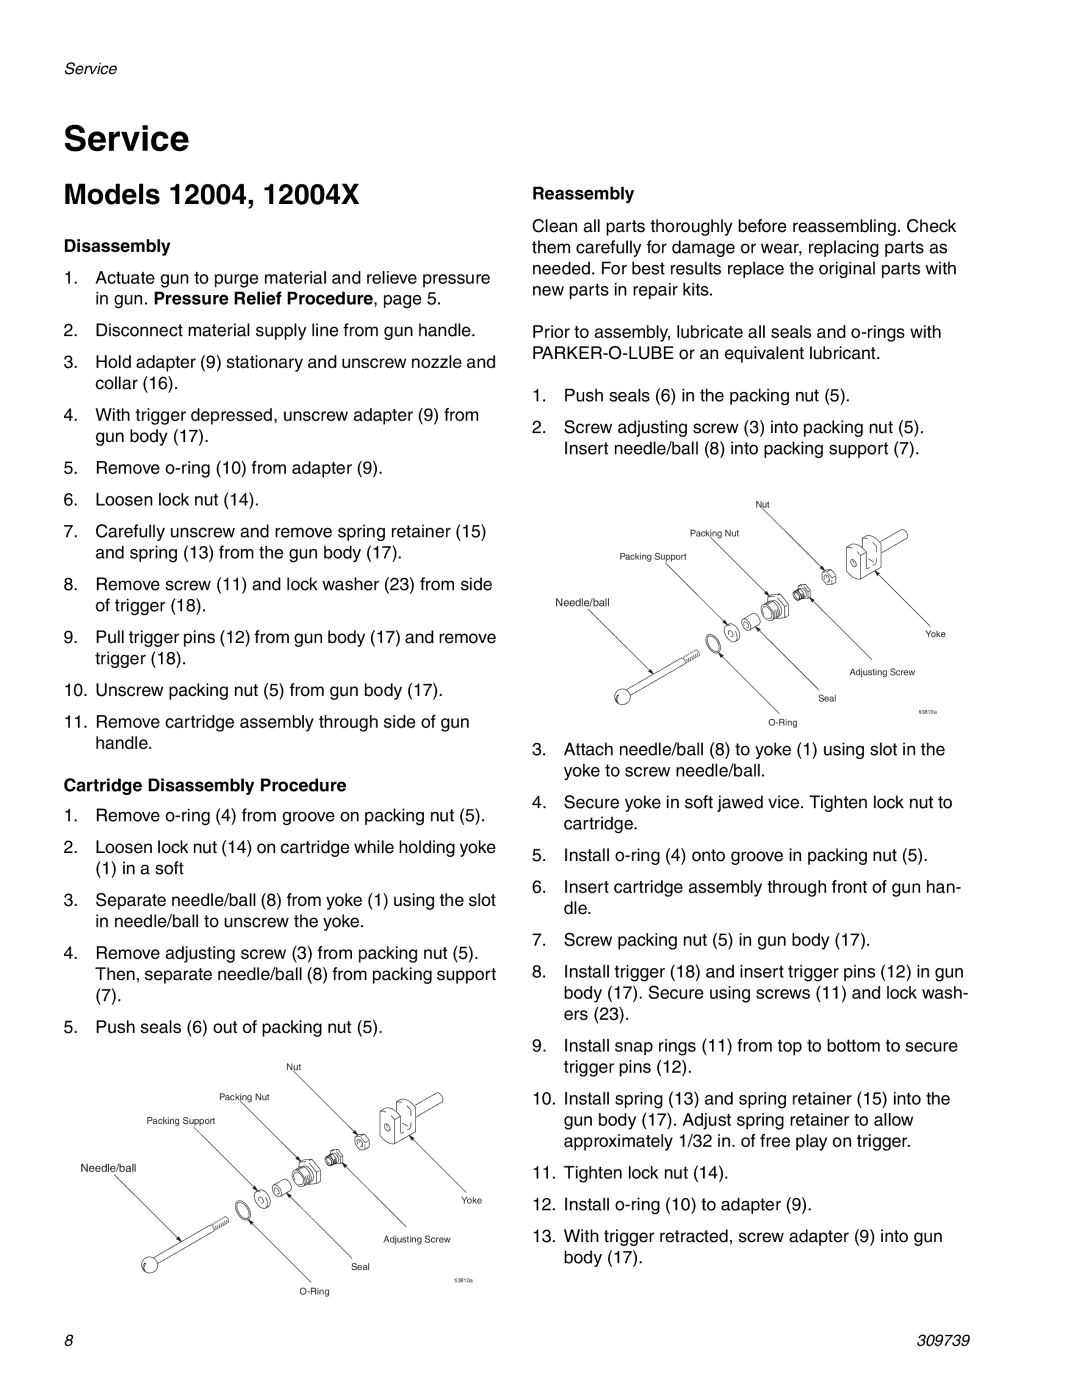
Cartridge Disassembly Procedure
1.Remove
2.Loosen lock nut (14) on cartridge while holding yoke
(1)in a soft
3.Separate needle/ball (8) from yoke (1) using the slot in needle/ball to unscrew the yoke.
4.Remove adjusting screw (3) from packing nut (5). Then, separate needle/ball (8) from packing support
5.Push seals (6) out of packing nut (5).
Nut
Packing Nut
Packing Support
Needle/ball
Yoke
Adjusting Screw
Seal
ti3810a
Reassembly
Clean all parts thoroughly before reassembling. Check them carefully for damage or wear, replacing parts as needed. For best results replace the original parts with new parts in repair kits.
Prior to assembly, lubricate all seals and
1.Push seals (6) in the packing nut (5).
2.Screw adjusting screw (3) into packing nut (5). Insert needle/ball (8) into packing support (7).
Nut
Packing Nut
Packing Support
Needle/ball
Yoke
Adjusting Screw
Seal
ti3810a
3.Attach needle/ball (8) to yoke (1) using slot in the yoke to screw needle/ball.
4.Secure yoke in soft jawed vice. Tighten lock nut to cartridge.
5.Install
6.Insert cartridge assembly through front of gun han- dle.
7.Screw packing nut (5) in gun body (17).
8.Install trigger (18) and insert trigger pins (12) in gun body (17). Secure using screws (11) and lock wash- ers (23).
9.Install snap rings (11) from top to bottom to secure trigger pins (12).
10.Install spring (13) and spring retainer (15) into the gun body (17). Adjust spring retainer to allow approximately 1/32 in. of free play on trigger.
11.Tighten lock nut (14).
12.Install
13.With trigger retracted, screw adapter (9) into gun body (17).
8 | 309739 |