4.Inspect the
5.Remove the seat nut (5d†), seat (5c†) and seat gas- ket (5b†, model G40 gun only) using a 7/32 in. hex wrench.
6.Inspect the seat (5c†) and seat gasket (5b†) and replace if necessary.
7.Reinstall the seat gasket (5b†, model G40 gun only), seat (5c†), and seat nut (5d†). Torque to
![]() • When reinstalling the carbide seat (5c†), the tapered end of the seat must point toward the gun tip.
• When reinstalling the carbide seat (5c†), the tapered end of the seat must point toward the gun tip.
•The acetal seat (5c†), standard in model G15 guns (249233), can be reinstalled in either direction.
1
5g* 5c†
5a
5e*
5d†
5f*
5b†
(G40 only)
30
TI6572A
FIG. 37
Repair
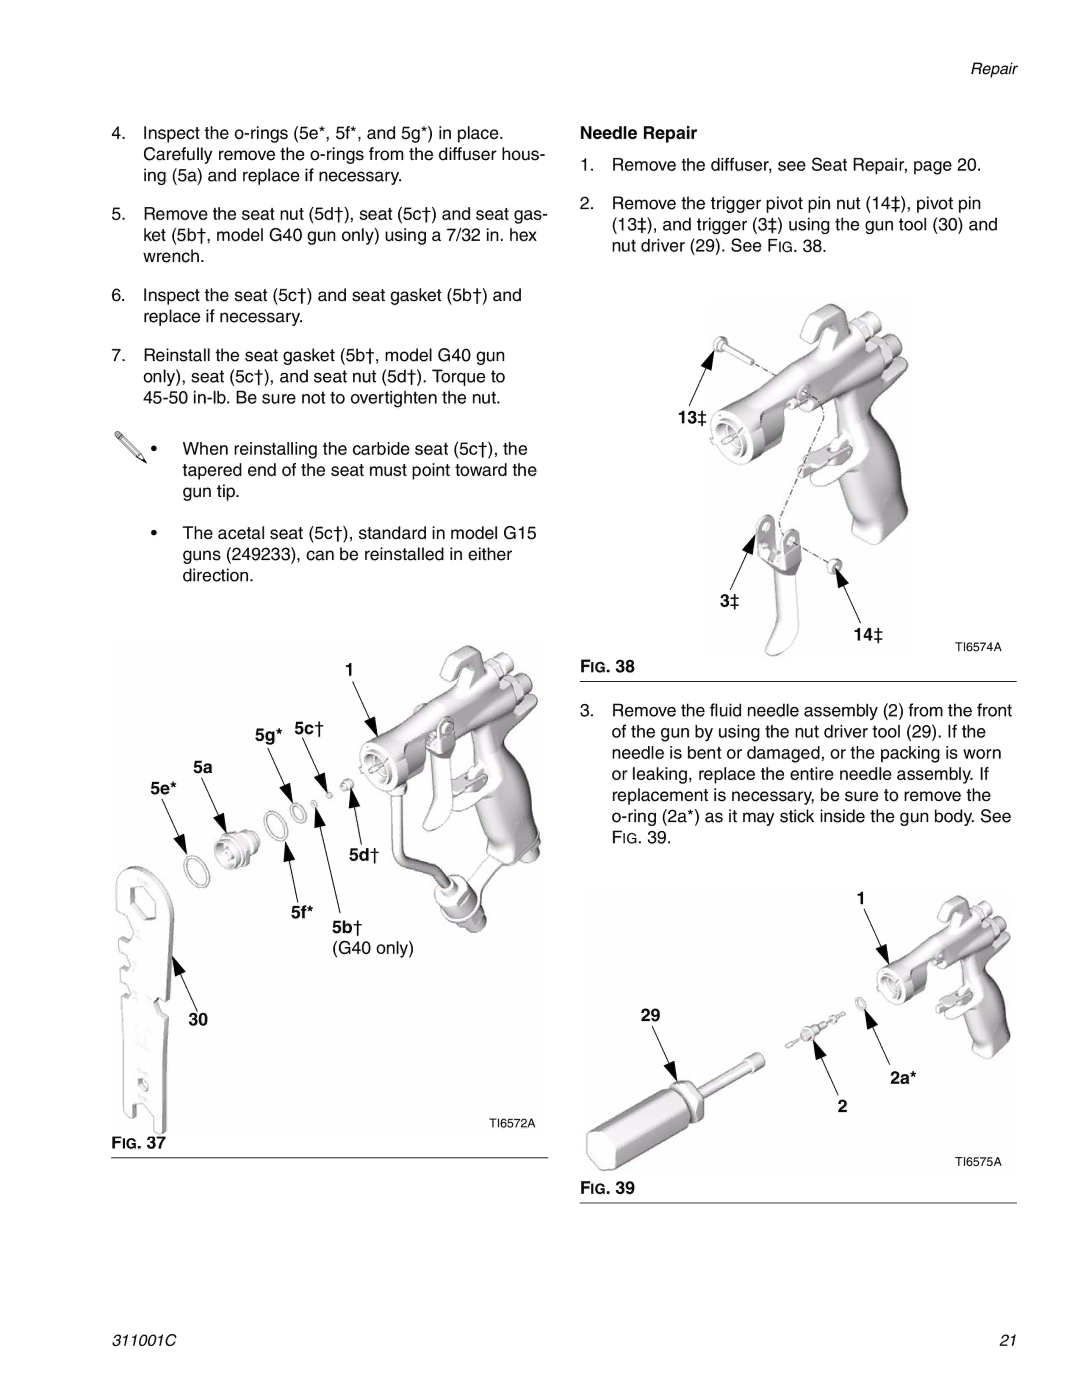
Needle Repair
1.Remove the diffuser, see Seat Repair, page 20.
2.Remove the trigger pivot pin nut (14‡), pivot pin (13‡), and trigger (3‡) using the gun tool (30) and nut driver (29). See FIG. 38.
13‡
3‡
14‡
TI6574A
FIG. 38
3.Remove the fluid needle assembly (2) from the front of the gun by using the nut driver tool (29). If the needle is bent or damaged, or the packing is worn or leaking, replace the entire needle assembly. If replacement is necessary, be sure to remove the
1
29
2a*
2
TI6575A
FIG. 39
311001C | 21 |