
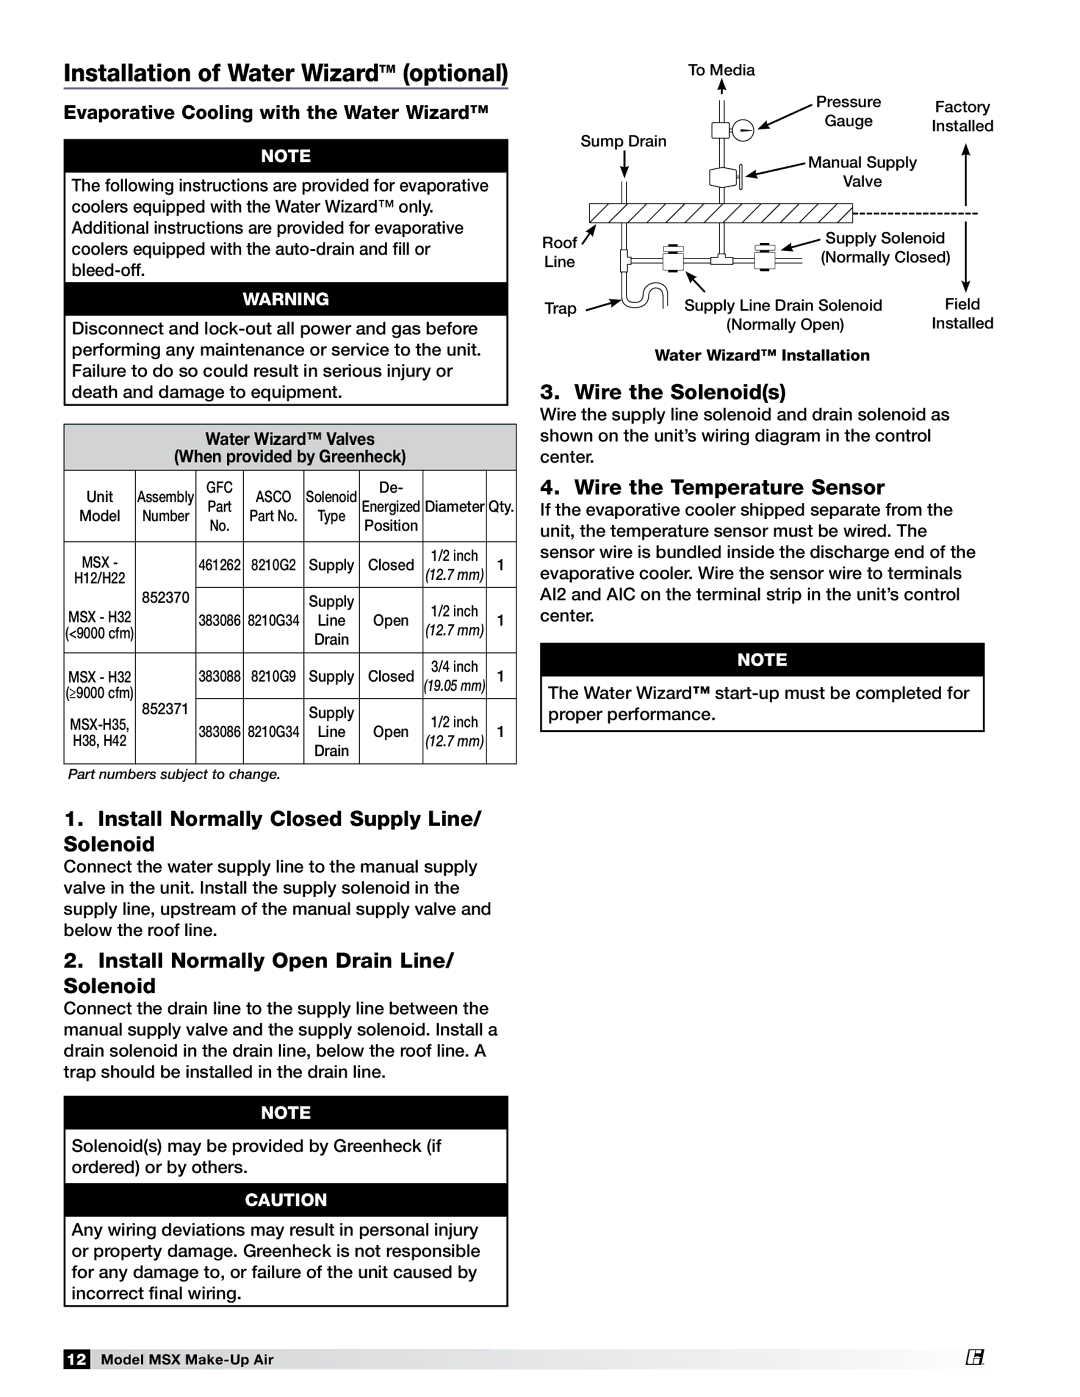
470658 MSX specifications
The Greenheck Fan 470658 MSX is a premium performance ventilation solution designed to meet the needs of various commercial and industrial applications. Known for its robustness and efficient air movement capabilities, the MSX series is highly regarded in the industry for its innovative technologies and user-friendly features.One of the standout features of the Greenheck Fan 470658 MSX is its advanced motor technology. It is equipped with an energy-efficient direct drive motor, which minimizes energy consumption while delivering high airflow rates. The motor's design allows for quieter operation, making it ideal for environments where noise reduction is crucial.
The aerodynamic design of the fan blades is another hallmark of the Greenheck MSX. The blades are engineered to enhance performance by maximizing airflow while reducing turbulence. This design optimization results in increased efficiency and lower operational costs over time. Furthermore, the fan is capable of handling a wide range of air volumes, making it versatile for various installation requirements.
Durability is a key characteristic of the Greenheck Fan 470658 MSX. Constructed from high-quality materials, it can withstand harsh environmental conditions, including exposure to moisture and corrosive elements. The fan housing is designed to be robust, ensuring long-lasting performance and minimal maintenance needs.
In addition to its physical attributes, the MSX series comes equipped with smart technology features. The fan can be integrated with building management systems for real-time monitoring and control, helping facility managers optimize energy usage and maintain indoor air quality. The inclusion of variable speed controls further enhances adaptability, allowing users to adjust fan speed according to specific ventilation needs.
Safety features are also a priority with the Greenheck Fan 470658 MSX. The unit is designed with built-in protections against overheating and overcurrent, ensuring reliable operation under demanding conditions. Additionally, the fan meets rigorous safety standards and certifications, instilling confidence in its performance.
With its combination of efficiency, durability, and innovative features, the Greenheck Fan 470658 MSX is a top choice for those seeking reliable ventilation solutions. Its ability to deliver consistent airflow while minimizing energy consumption sets it apart in the competitive market of industrial fans, making it a valuable investment for businesses looking to enhance their air management systems.