Moulding Knives
Tools Needed: | Qty |
Wrench 8mm | 1 |
The G0477 has two moulding knife slots. Each slot can accommodate two different moulding knives at the same time. However, both moulding knife slots must be set up identically for a suc- cessful moulding operation. The planing knives do not need to be removed when moulding.
To install/change the moulding knives on your planer/moulder:
1.UNPLUG THE PLANER/MOULDER FROM THE POWER SOURCE!
2.Push the cutterhead lock down, and rotate the cutterhead until the moulding knife slot is visible, as shown in Figure 18, then release the cutterhead lock and slightly rotate the cutterhead in either direction until it locks.
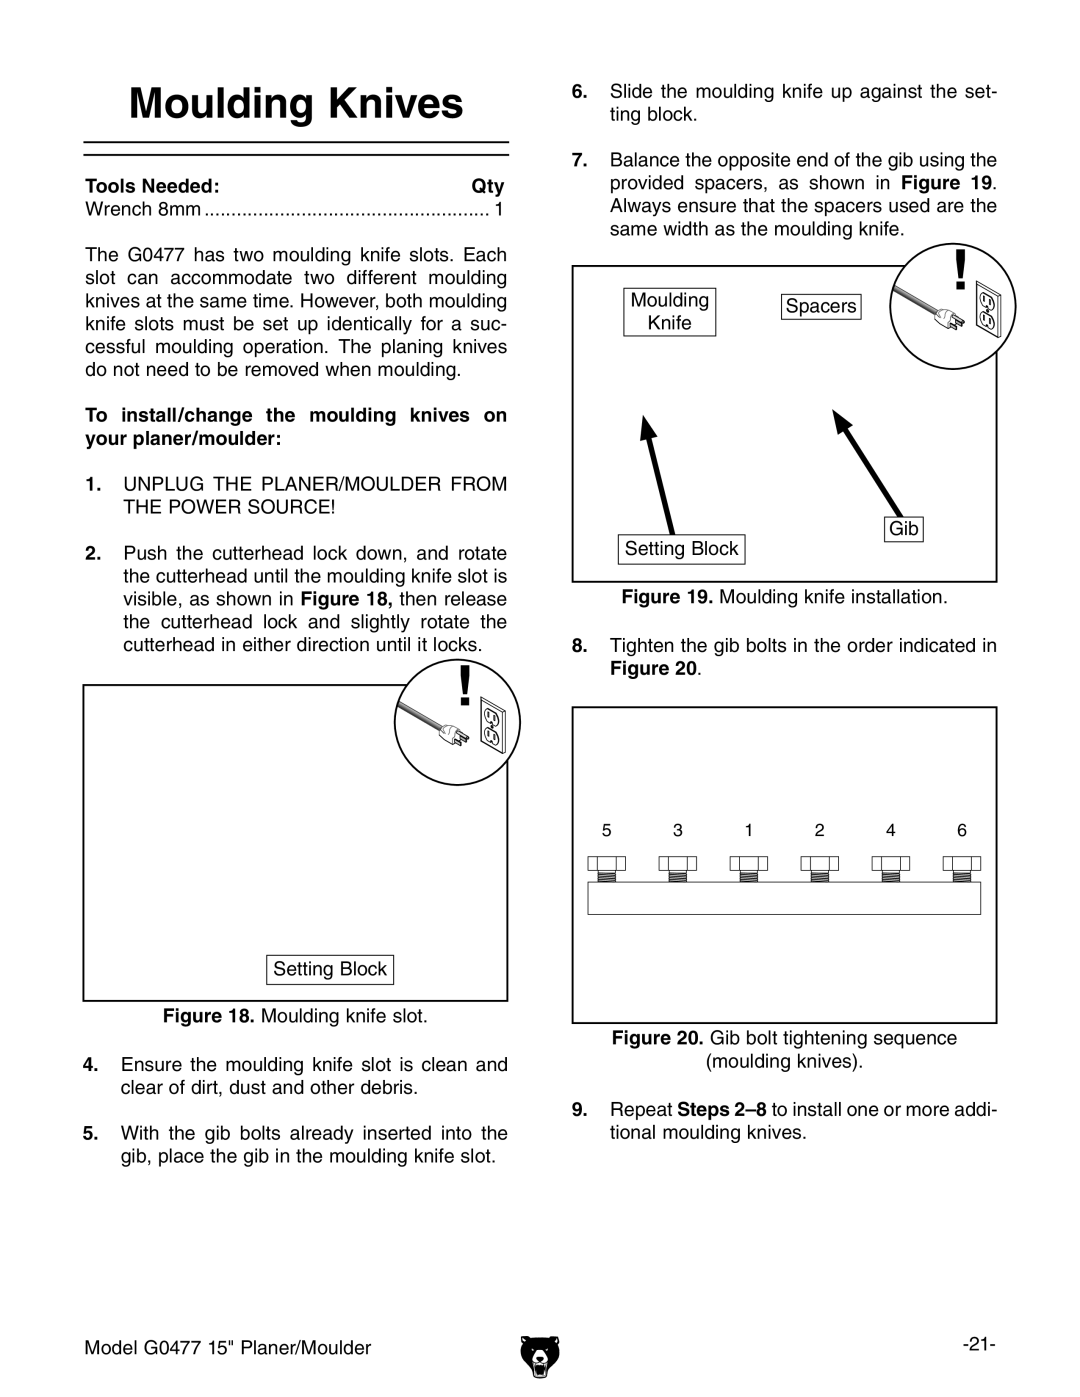
6.Slide the moulding knife up against the set- ting block.
7.Balance the opposite end of the gib using the provided spacers, as shown in Figure 19. Always ensure that the spacers used are the same width as the moulding knife.
Moulding | Spacers | |
Knife | ||
| ||
Setting Block | Gib | |
|
Figure 19. Moulding knife installation.
8.Tighten the gib bolts in the order indicated in Figure 20.
Setting Block
Figure 18. Moulding knife slot.
4.Ensure the moulding knife slot is clean and clear of dirt, dust and other debris.
5.With the gib bolts already inserted into the gib, place the gib in the moulding knife slot.
Model G0477 15" Planer/Moulder
5 |
| 3 |
| 1 |
| 2 |
| 4 |
| 6 |
| |||||||||||
|
|
|
|
|
|
|
|
|
|
|
|
|
|
|
|
|
|
|
|
|
|
|
|
|
|
|
|
|
|
|
|
|
|
|
|
|
|
|
|
|
|
|
|
|
|
|
|
|
|
|
|
|
|
|
|
|
|
|
|
|
|
|
|
|
|
|
|
|
|
|
|
|
|
|
|
|
|
|
|
|
|
|
|
|
|
|
|
|
|
|
|
|
|
|
|
|
|
|
|
|
|
|
|
|
|
|
|
|
|
|
|
|
|
|