Beginning Assembly
Complete the assembly in the order provided in this manual. Then read the rest of the manual before attempting any type of sanding operation. Your safety is important! Please follow the warnings below during this entire section:
Disconnect power to the |
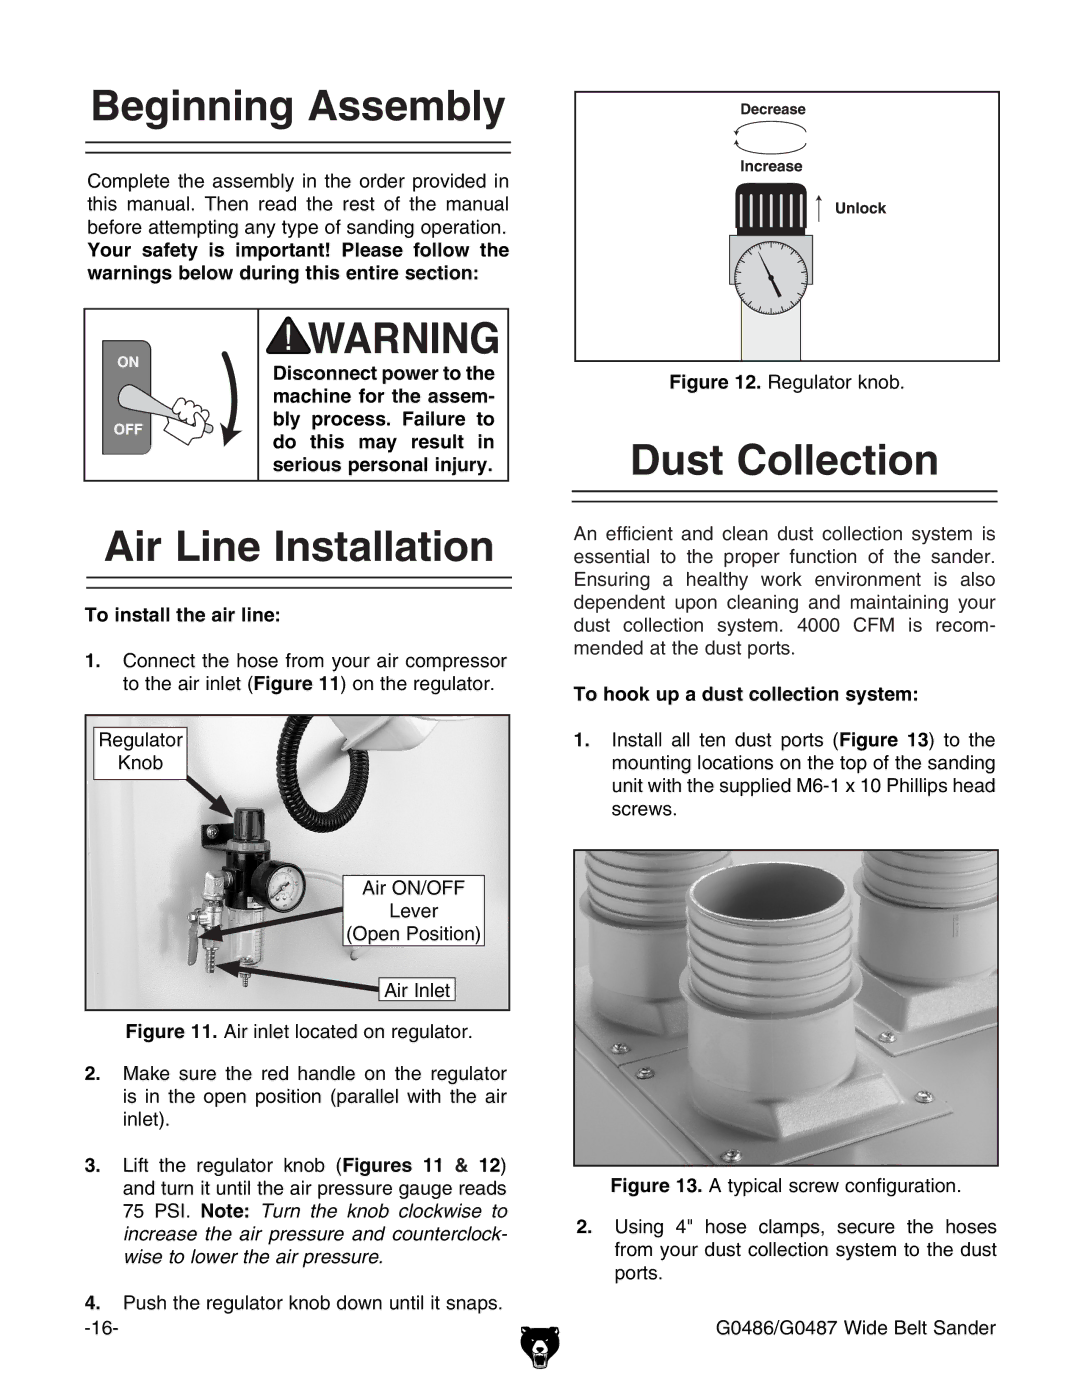
| Figure 12. Regulator knob. | |
machine for the assem- |
| ||
|
| ||
bly process. Failure to |
|
| |
do this may result in |
| Dust Collection | |
serious personal injury. |
| ||
Air Line Installation | An efficient and clean dust collection system is | ||
essential to the proper function of the sander. | |||
| Ensuring a healthy work environment is also | ||
To install the air line: | dependent upon cleaning and maintaining your | ||
dust collection system. 4000 CFM is recom- | |||
| |||
1. Connect the hose from your air compressor | mended at the dust ports. | ||
|
| ||
to the air inlet (Figure 11) on the regulator. | To hook up a dust collection system: | ||
| |||
Regulator | 1. | Install all ten dust ports (Figure 13) to the | |
Knob |
| mounting locations on the top of the sanding | |
|
| unit with the supplied | |
|
| screws. | |
Air ON/OFF |
|
| |
Lever |
|
| |
(Open Position) |
|
| |
Air Inlet |
|
| |
Figure 11. Air inlet located on regulator. |
|
| |
2.Make sure the is in the open inlet).
red handle on the regulator position (parallel with the air
3. | Lift the regulator knob (Figures 11 & 12) |
| Figure 13. A typical screw configuration. |
| and turn it until the air pressure gauge reads |
| |
| 75 PSI. Note: Turn the knob clockwise to | 2. | Using 4" hose clamps, secure the hoses |
| increase the air pressure and counterclock- | ||
|
| from your dust collection system to the dust | |
| wise to lower the air pressure. |
| |
|
| ports. | |
|
|
|
4.Push the regulator knob down until it snaps.
G0486/G0487 Wide Belt Sander |
