Sanding Drum
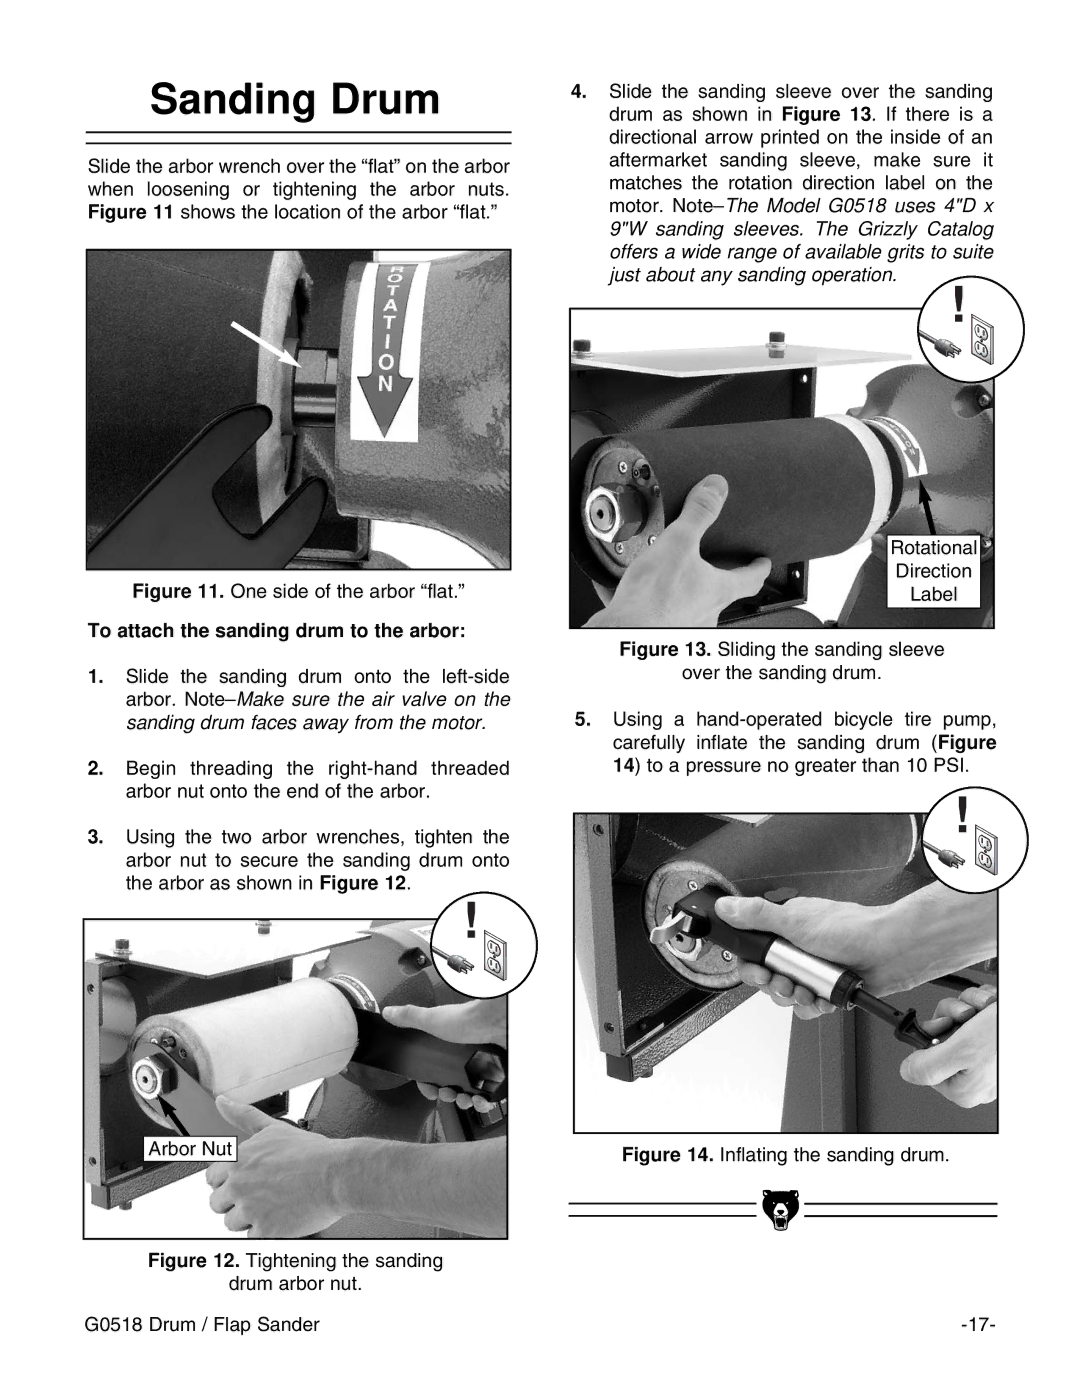
Slide the arbor wrench over the “flat” on the arbor when loosening or tightening the arbor nuts. Figure 11 shows the location of the arbor “flat.”
Figure 11. One side of the arbor “flat.”
To attach the sanding drum to the arbor:
1.Slide the sanding drum onto the
2.Begin threading the
3.Using the two arbor wrenches, tighten the arbor nut to secure the sanding drum onto the arbor as shown in Figure 12.
!
Arbor Nut
Figure 12. Tightening the sanding
drum arbor nut.
G0518 Drum / Flap Sander
4.Slide the sanding sleeve over the sanding drum as shown in Figure 13. If there is a directional arrow printed on the inside of an aftermarket sanding sleeve, make sure it matches the rotation direction label on the motor. Note–The Model G0518 uses 4"D x 9"W sanding sleeves. The Grizzly Catalog offers a wide range of available grits to suite just about any sanding operation.
!
Rotational
Direction
Label
Figure 13. Sliding the sanding sleeve
over the sanding drum.
5.Using a hand-operated bicycle tire pump, carefully inflate the sanding drum (Figure 14) to a pressure no greater than 10 PSI.
!
