G0690, G0691 specifications
The Grizzly G0691 is a remarkable cabinet table saw designed for both hobbyists and professional woodworkers seeking precision and reliability. With its robust construction and advanced features, it stands out in the woodworking industry, making it a popular choice among serious craftspeople.One of the key features of the G0691 is its powerful 3 HP motor, capable of delivering the performance needed for even the most demanding tasks. This motor can handle various materials, from softwoods to hardwoods, ensuring smooth, clean cuts every time. The saw's electronic variable speed control also allows users to adjust the blade speed according to the type of material being cut, providing flexibility and versatility in woodworking projects.
The G0691 boasts a heavy-duty cast iron table, which offers exceptional stability and supports larger workpieces. The table measures 27 inches by 40 inches, providing ample workspace for cutting. The potential for expansion is also present, as the saw is designed to accommodate extension wings for added surface area, making it easier to manage larger materials.
An impressive feature of the G0691 is its premium fence system. The T-square design ensures accurate measurements and smooth adjustments, enabling woodworkers to achieve precise cuts. This system includes a quick-release lever for easy adjustments, allowing for efficiency during the workflow.
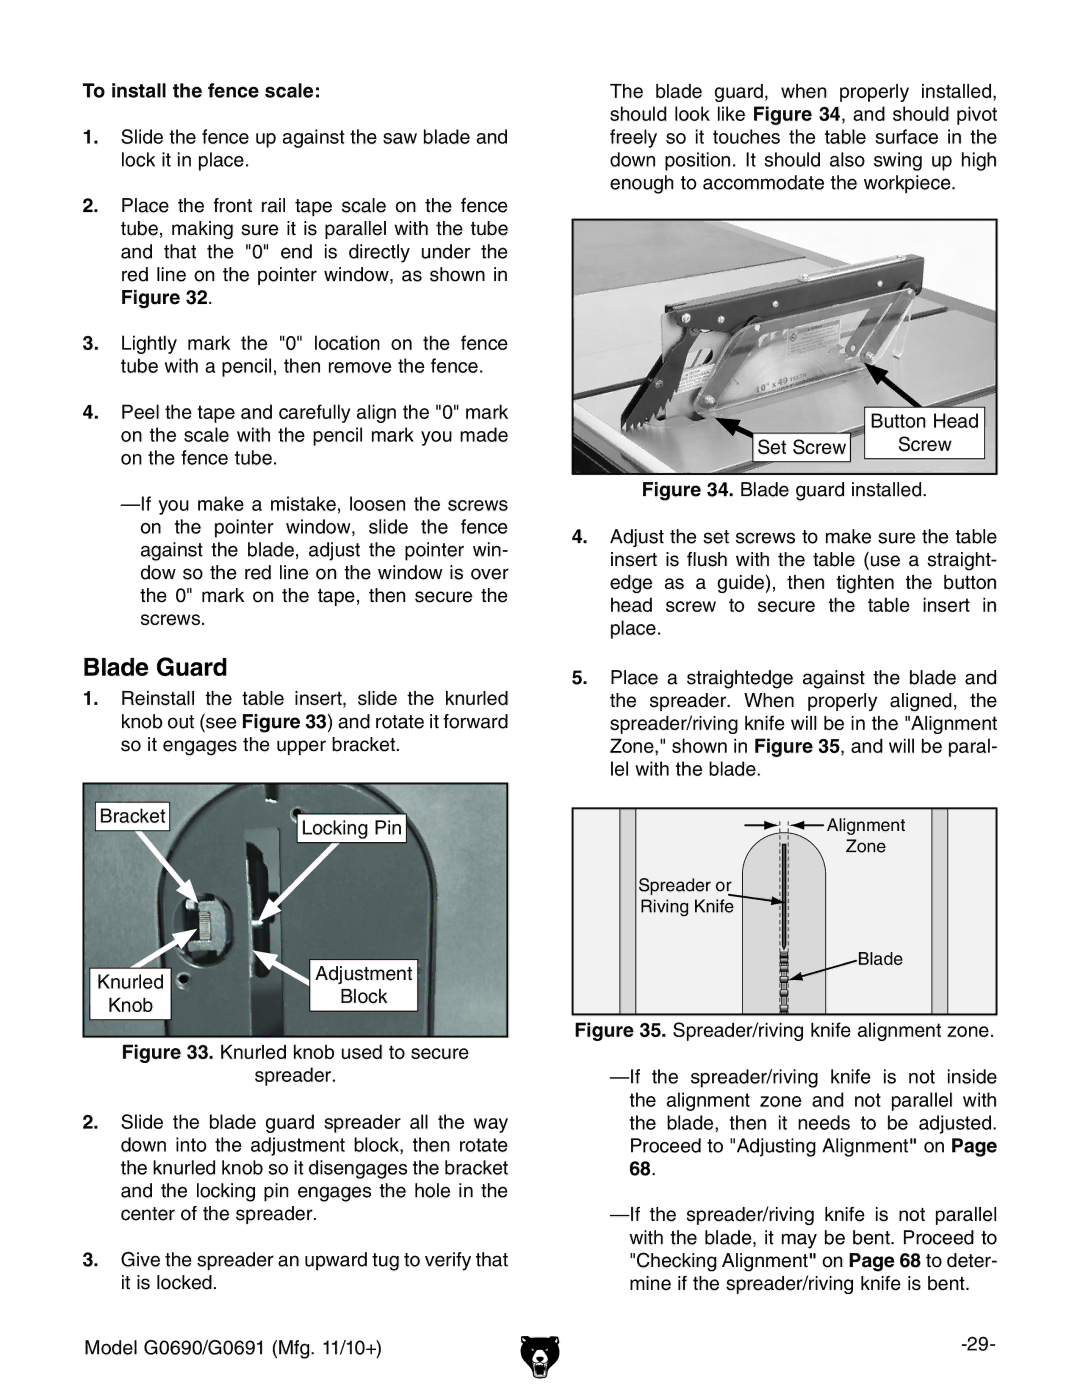
Safety is another priority with the Grizzly G0691. The saw is equipped with a smart blade-guard system designed to offer maximum visibility while protecting the user from accidental contact with the blade. Additionally, the riving knife technology significantly reduces the likelihood of kickback, enhancing safety during operations.
The G0691's dust collection system is integrated to minimize debris, creating a cleaner workspace. The system is designed to connect easily to standard dust collection hoses, allowing for effective removal of sawdust and other waste materials.
In summary, the Grizzly G0691 combines power, precision, and safety into an exceptional cabinet table saw. Its durable construction, advanced fence system, effective dust collection, and user-friendly features make it an ideal option for both seasoned professionals and dedicated hobbyists. The investment in this tool is justified by its performance, ensuring it stands out as a valuable addition to any woodworking setup.