Bed Rollers | |
Adjustment Height Range | |
Tools Needed: | Qty |
Hex Wrench 3mm | 1 |
Open End Wrench 12mm | 1 |
Rotacator (optional, Page 20) | 1 |
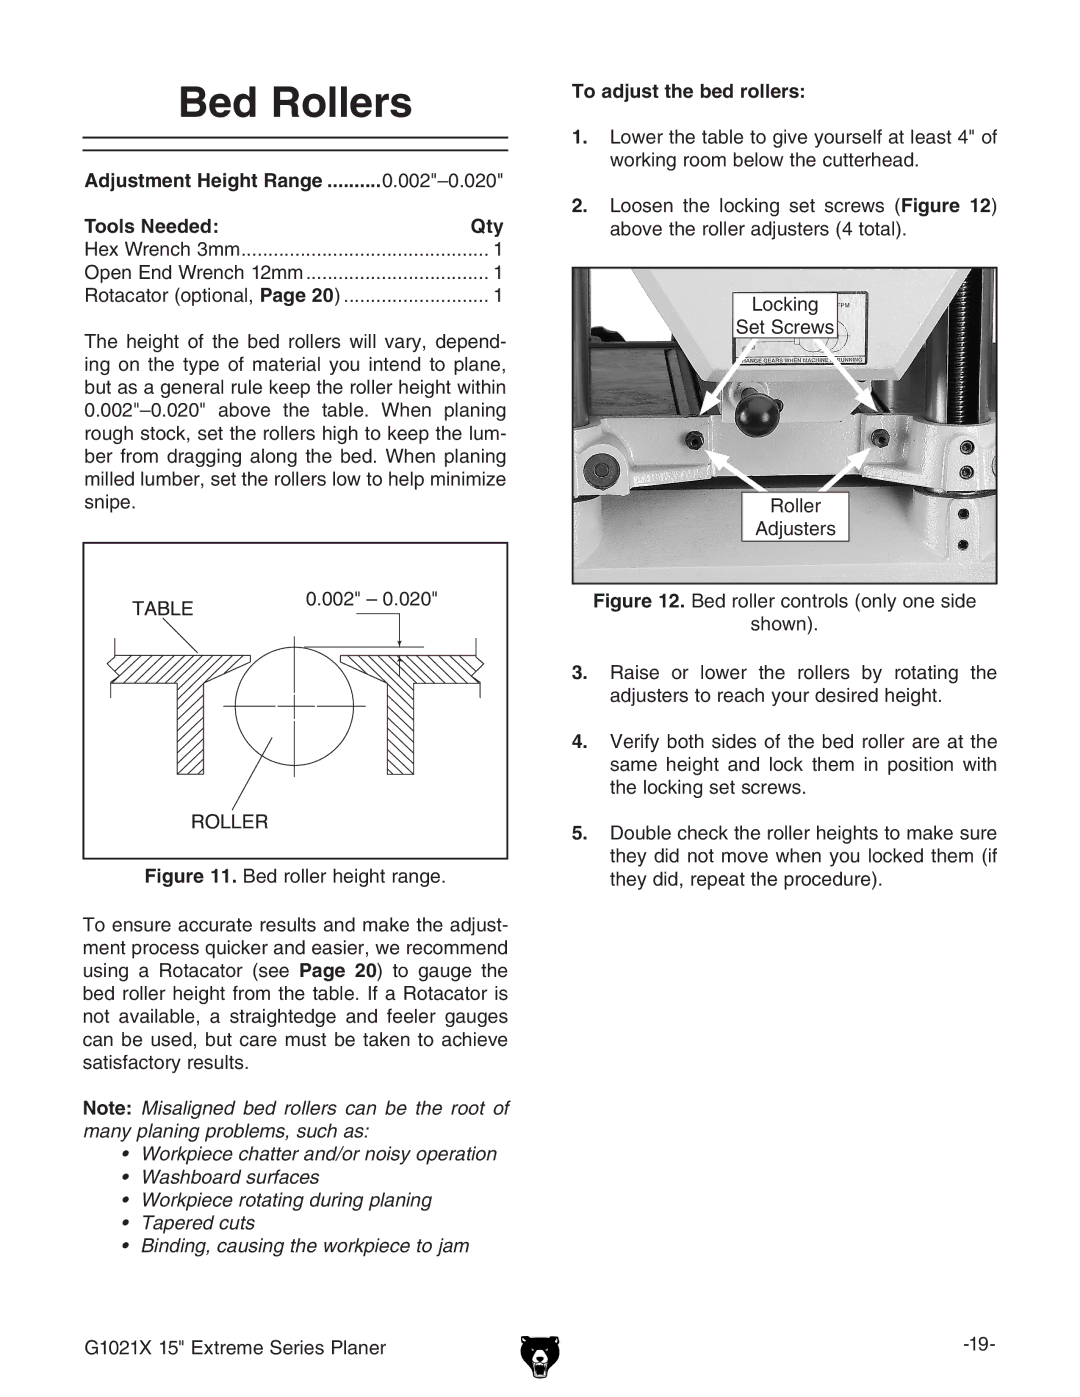
The height of the bed rollers will vary, depend- ing on the type of material you intend to plane, but as a general rule keep the roller height within
���������������
Figure 11. Bed roller height range.
To ensure accurate results and make the adjust- ment process quicker and easier, we recommend using a Rotacator (see Page 20) to gauge the bed roller height from the table. If a Rotacator is not available, a straightedge and feeler gauges can be used, but care must be taken to achieve satisfactory results.
Note: Misaligned bed rollers can be the root of many planing problems, such as:
•Workpiece chatter and/or noisy operation
•Washboard surfaces
•Workpiece rotating during planing
•Tapered cuts
•Binding, causing the workpiece to jam
G1021X 15" Extreme Series Planer
To adjust the bed rollers:
1.Lower the table to give yourself at least 4" of working room below the cutterhead.
2.Loosen the locking set screws (Figure 12) above the roller adjusters (4 total).
Locking
Set Screws
Roller
Adjusters
