IX. ASSEMBLY
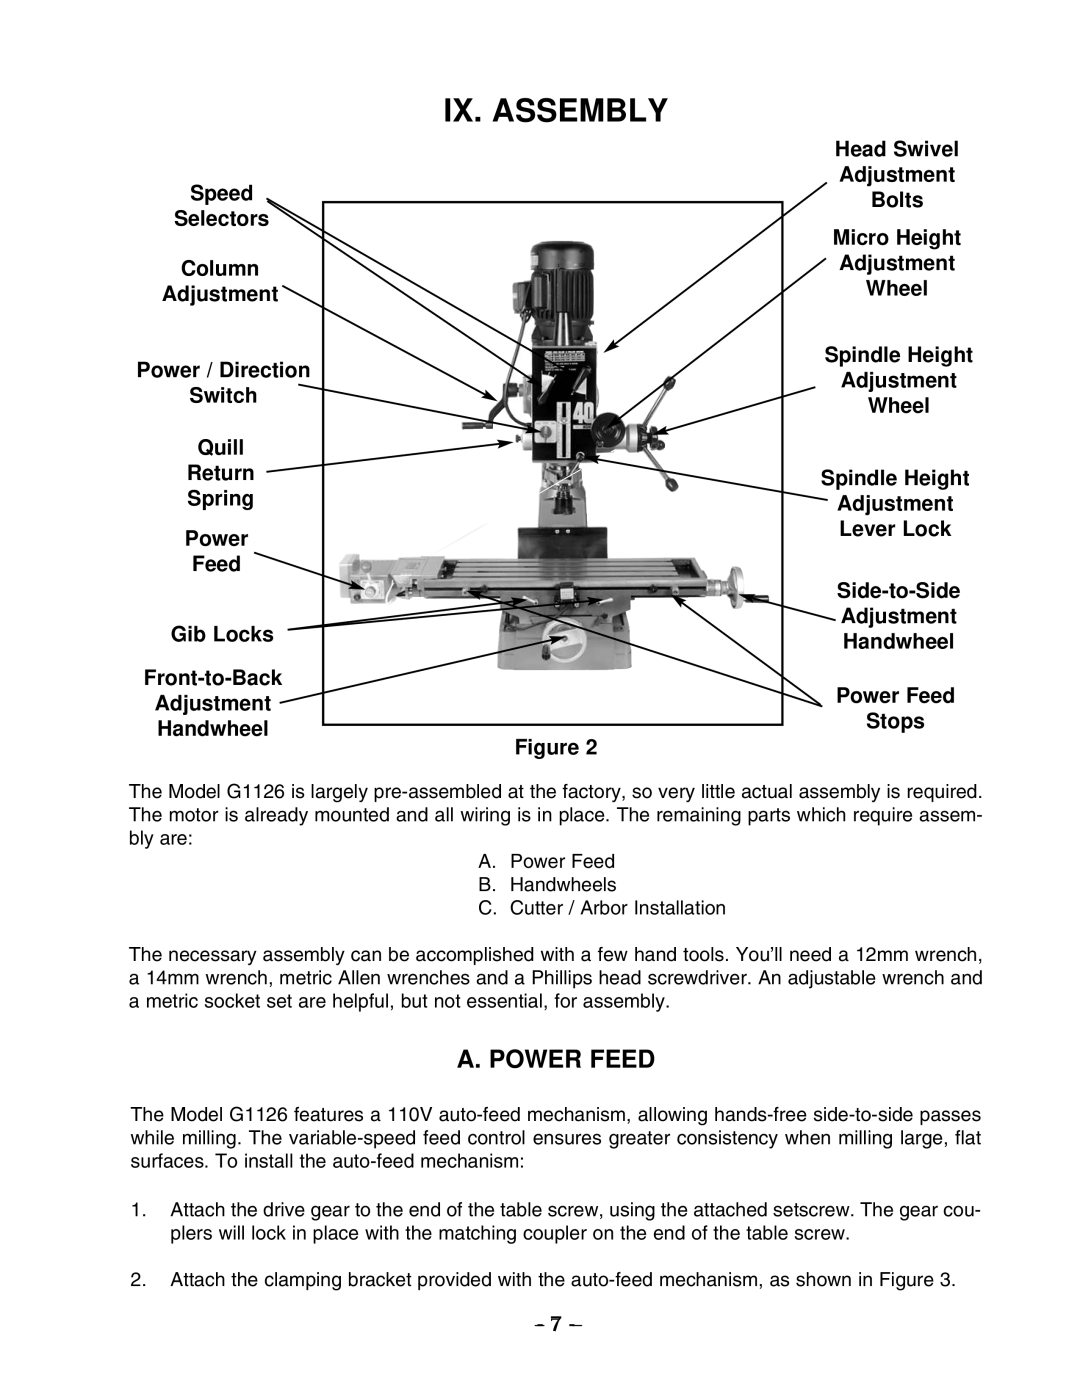
Speed
Selectors
Column
Adjustment
Power / Direction
Switch
Quill
Return
Spring
Power
Feed
Gib Locks
Adjustment
Handwheel
Figure 2
Head Swivel
Adjustment
Bolts
Micro Height
Adjustment
Wheel
Spindle Height
Adjustment
Wheel
Spindle Height
Adjustment
Lever Lock
Adjustment
Handwheel
Power Feed
Stops
The Model G1126 is largely
A.Power Feed
B.Handwheels
C.Cutter / Arbor Installation
The necessary assembly can be accomplished with a few hand tools. You’ll need a 12mm wrench, a 14mm wrench, metric Allen wrenches and a Phillips head screwdriver. An adjustable wrench and a metric socket set are helpful, but not essential, for assembly.
A. POWER FEED
The Model G1126 features a 110V
1.Attach the drive gear to the end of the table screw, using the attached setscrew. The gear cou- plers will lock in place with the matching coupler on the end of the table screw.
2.Attach the clamping bracket provided with the
- 7