B. HANDWHEELS
When the
Attach the other handwheel to the leadscrew at the front of the base casting. When the handwheel locks in place, tighten the setscrew.
C. CUTTER / ARBOR INSTALLATION
The Model G1126 features an
1.Remove the spindle cap from the top of the mill head.
2.Insert the collet or cutting tool’s arbor in the spindle housing, making sure to line up the keyway with the matching pin in the spindle opening.
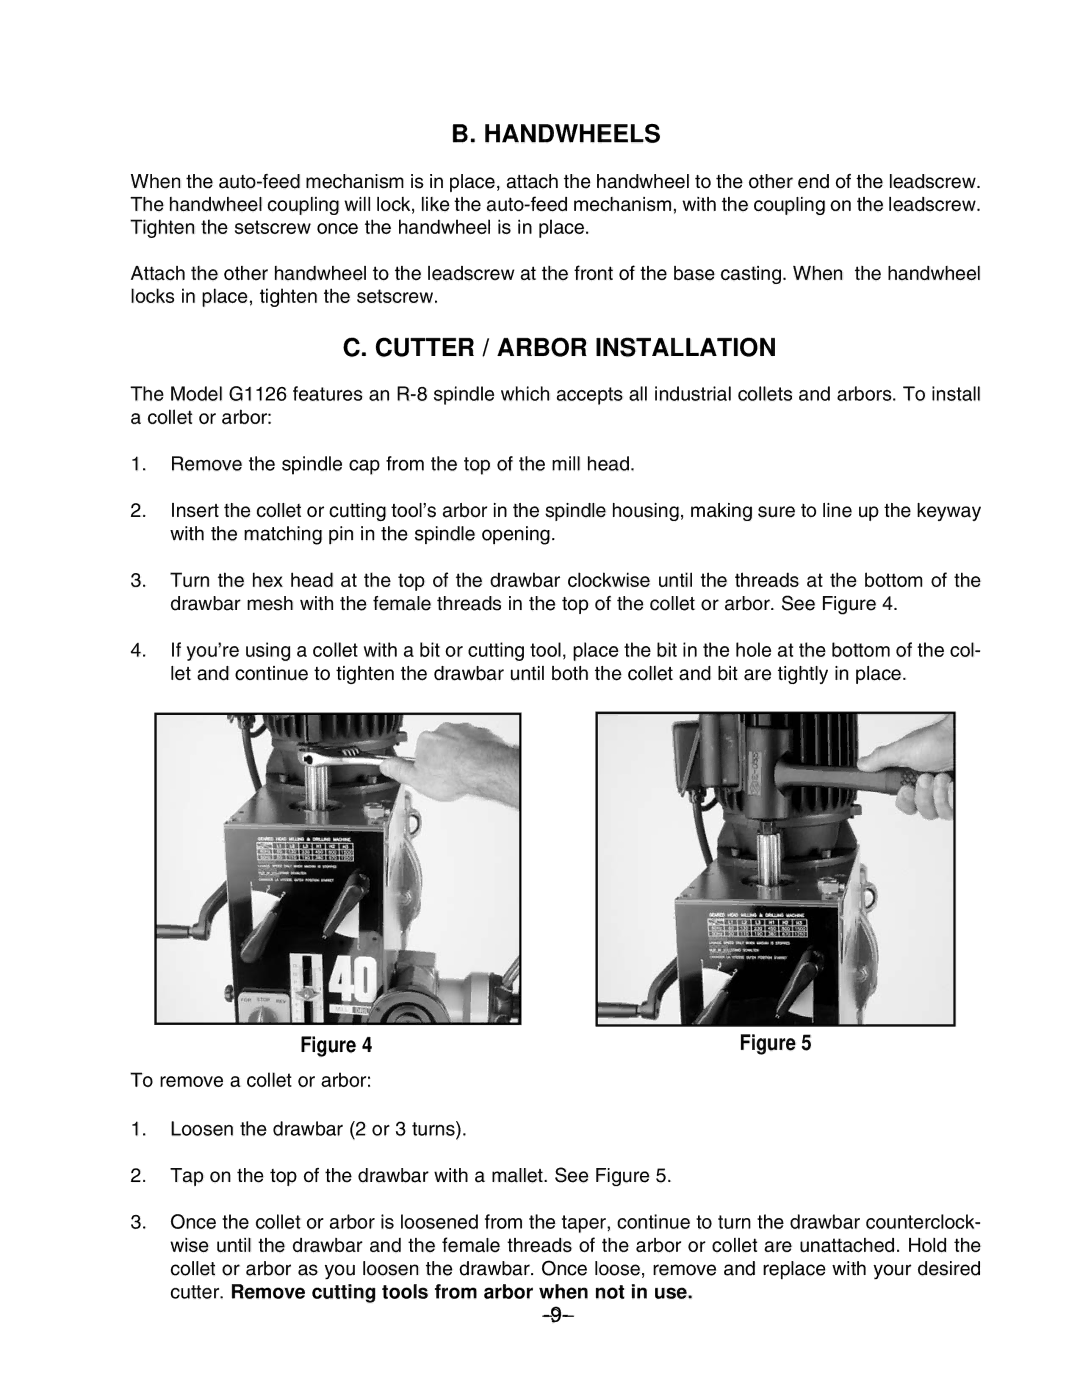
3.Turn the hex head at the top of the drawbar clockwise until the threads at the bottom of the drawbar mesh with the female threads in the top of the collet or arbor. See Figure 4.
4.If you’re using a collet with a bit or cutting tool, place the bit in the hole at the bottom of the col- let and continue to tighten the drawbar until both the collet and bit are tightly in place.
Figure 4 | Figure 5 |
To remove a collet or arbor:
1.Loosen the drawbar (2 or 3 turns).
2.Tap on the top of the drawbar with a mallet. See Figure 5.
3.Once the collet or arbor is loosened from the taper, continue to turn the drawbar counterclock- wise until the drawbar and the female threads of the arbor or collet are unattached. Hold the collet or arbor as you loosen the drawbar. Once loose, remove and replace with your desired cutter. Remove cutting tools from arbor when not in use.
