2.Guide the string through the bridge, over the saddle, over the nut, and through the hole in the corresponding tuner.
3.Allow only enough slack in the string for 2 or 3 rotations around the tuner.
Note: If too much slack is allowed, then the string could wind off the machine head after many successive rotations. If not enough slack is allowed, then the string may not hold the winding tension.
4.Bend the string at a right angle across the edge of the machine head.
5.Rotate the tuners until the string just begins to hold the winding tension, as shown in Figure 24.
Note: DO NOT tighten the strings beyond the initial tensioning at this time. Final tensioning should be completed during the string tuning process.
Figure 24. String wrapped around tuner.
6.Repeat the above process for the remaining strings.
String Retainers |
| ||
Components Needed | Qty | ||
Guitar |
| 1 | |
Retainers | ⁄2" | 2 | |
Silver Screw #2 x | 1 | 1 | |
Silver Screw #2 x | 3 | ⁄8" | 1 |
|
|
| |
Bushings |
| 2 | |
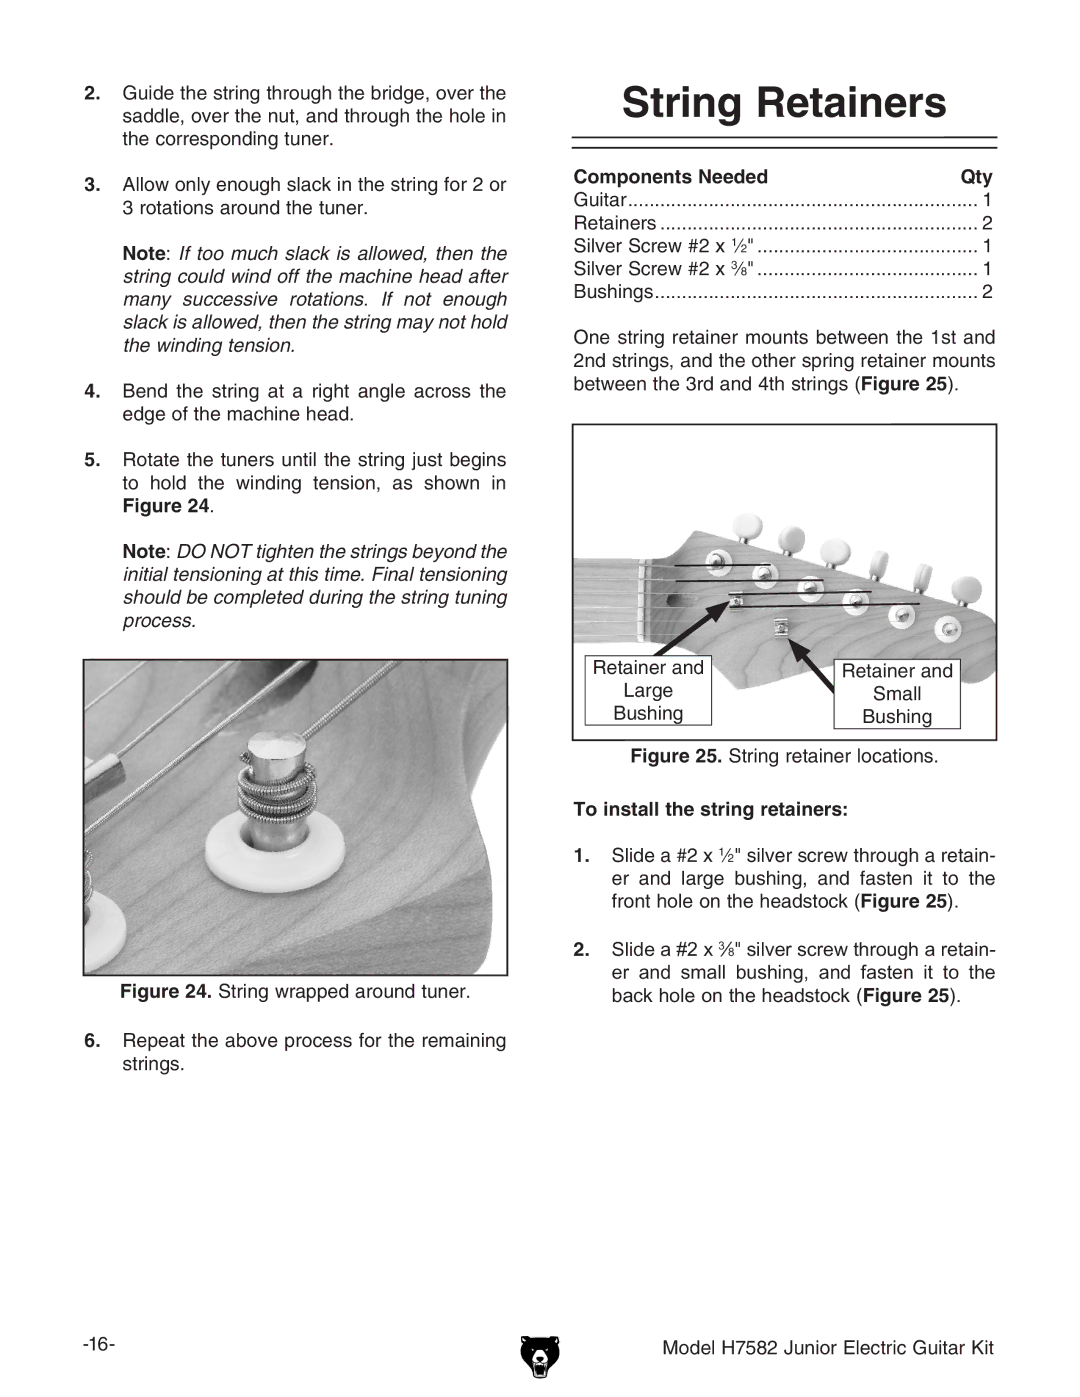
One string retainer mounts between the 1st and | |||
2nd strings, and the other spring retainer mounts | |||
between the 3rd and 4th strings (Figure 25). |
| ||
Retainer and | Retainer and |
Large | Small |
Bushing | Bushing |
Figure 25. String retainer locations. | |
To install the string retainers: | |
1.Slide a #2 x 1⁄2" silver screw through a retain- er and large bushing, and fasten it to the front hole on the headstock (Figure 25).
2.Slide a #2 x 3⁄8" silver screw through a retain- er and small bushing, and fasten it to the
back hole on the headstock (Figure 25).
Model H7582 Junior Electric Guitar Kit |