Positioning the
Universal Support
The Model T10097 Wet Grinder is equipped with a universal support that serves as a tool rest and as an attachment point for
To work against the rotation of the grinding wheel:
1.Position the machine with the ON/OFF switch facing you.
2.. Attach the universal support in the ver- tical mounts as shown in Figure 6. Be sure it is securely positioned and will not move during grinding.
3.. Rest your workpiece on the univer- sal support with the sharpened edge pointing away from you. Grind your workpiece in the indicated grinding area.
Grinding |
Area |
Universal |
Support |
Vertical |
Mounts |
Figure 6. Vertical mount.
Working against the rotation removes large amounts of materials quickly but does not yield precise results. Use this method for coarse tools such as axes.
Model T10097 Wet Grinder
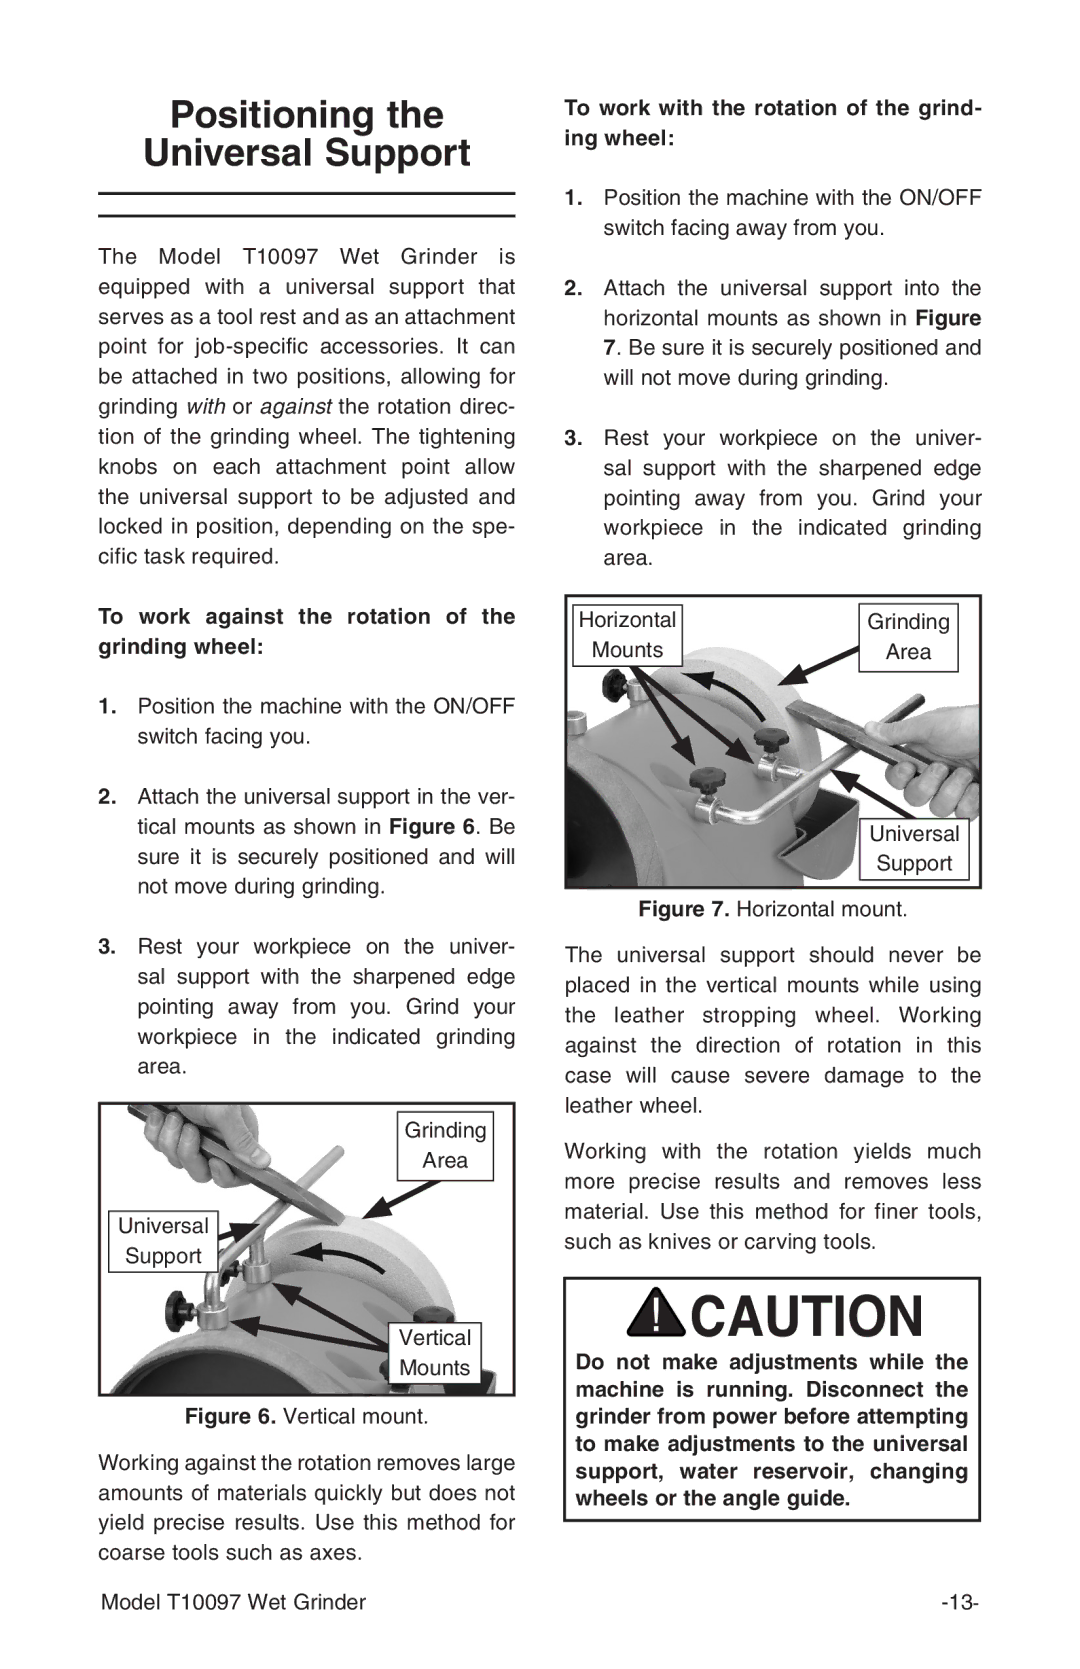
To work with the rotation of the grind- ing wheel:
1.. Position the machine with the ON/OFF switch facing away from you.
2.. Attach the universal support into the horizontal mounts as shown in Figure 7. Be sure it is securely positioned and will not move during grinding.
3.. Rest your workpiece on the univer- sal support with the sharpened edge pointing away from you. Grind your workpiece in the indicated grinding area.
Horizontal | Grinding |
Mounts | Area |
| Universal |
| Support |
Figure 7. Horizontal mount.
The universal support should never be placed in the vertical mounts while using the leather stropping wheel. Working against the direction of rotation in this case will cause severe damage to the leather wheel.
Working with the rotation yields much more precise results and removes less material. Use this method for finer tools, such as knives or carving tools.
Do not make adjustments while the machine is running. Disconnect the grinder from power before attempting to make adjustments to the universal support, water reservoir, changing wheels or the angle guide.