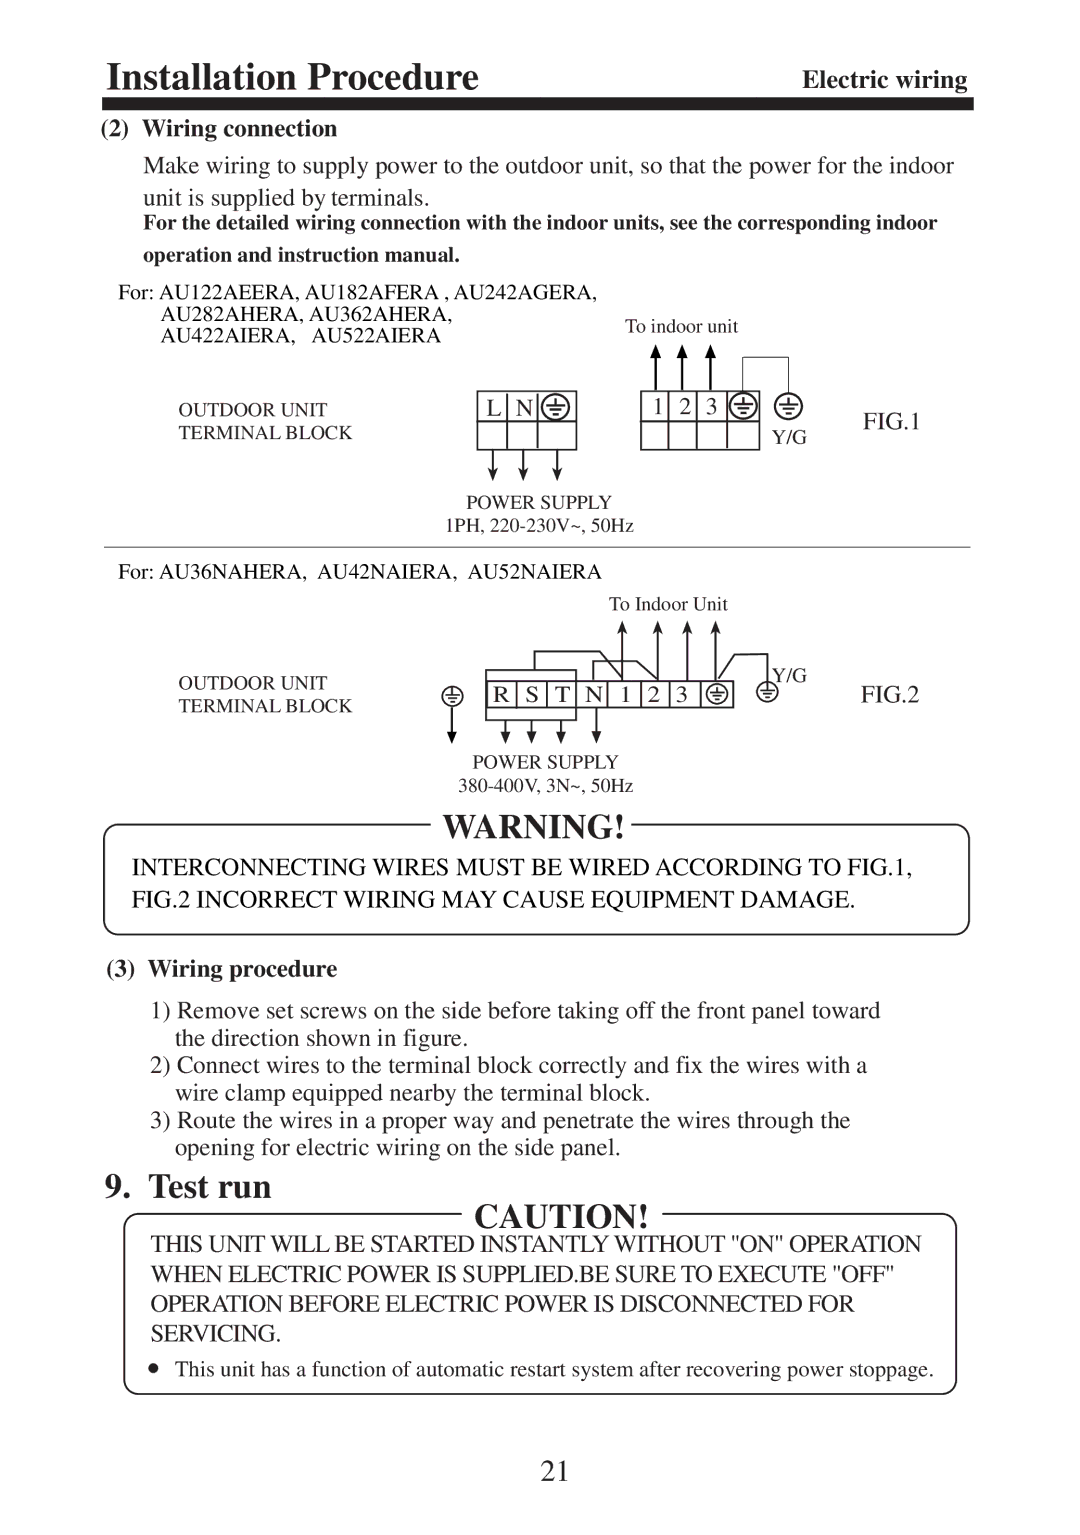
AU282AHERA, AU242AGERA, AU362AHERA, AU36NAHERA, AU182AFERA specifications
Haier, a leading brand in home appliances and air conditioning solutions, offers a range of innovative air conditioners designed to enhance comfort and energy efficiency. Among their notable models are the AU36NAHERA, AU182AFERA, AU242AGERA, AU362AHERA, and AU282AHERA, each tailored to meet diverse cooling needs.The AU36NAHERA is a high-capacity air conditioning unit, perfect for larger spaces. Its powerful compressor ensures rapid cooling, while the inverter technology optimizes energy consumption by adjusting the cooling output according to the ambient temperature. This model also features a 3D airflow system, which maintains consistent temperature distribution throughout the room, enhancing overall comfort.
Moving to the AU182AFERA, this air conditioner is ideal for medium-sized areas. It utilizes advanced filtration technology, including a high-performance HEPA filter that captures airborne dust, allergens, and pollutants. This feature not only provides cleaner air but also promotes a healthier environment, making it a perfect choice for families or individuals with allergies.
The AU242AGERA stands out with its sleek design and versatile functionality. This model is equipped with a smart control feature that allows users to manage settings through a mobile app. Additionally, its eco-friendly refrigerant contributes to lower carbon emissions, showcasing Haier's commitment to sustainability without sacrificing performance.
The AU362AHERA is another impressive unit that combines efficiency and performance. Its turbo cooling feature ensures quick temperature drops during hot days, while the quiet operation mode guarantees a peaceful environment. This model is equipped with a self-cleaning function that removes dust and germs from the evaporator, further promoting air quality.
Lastly, the AU282AHERA offers a balance of compact size and powerful cooling capabilities. Its energy-efficient design makes it suitable for smaller spaces without compromising performance. Equipped with a user-friendly remote control, this model provides convenience in adjusting settings from anywhere in the room.
Together, these models exemplify Haier's dedication to integrating advanced technology, energy efficiency, and user convenience, making them excellent choices for anyone looking to enhance their indoor climate while remaining environmentally conscious.

