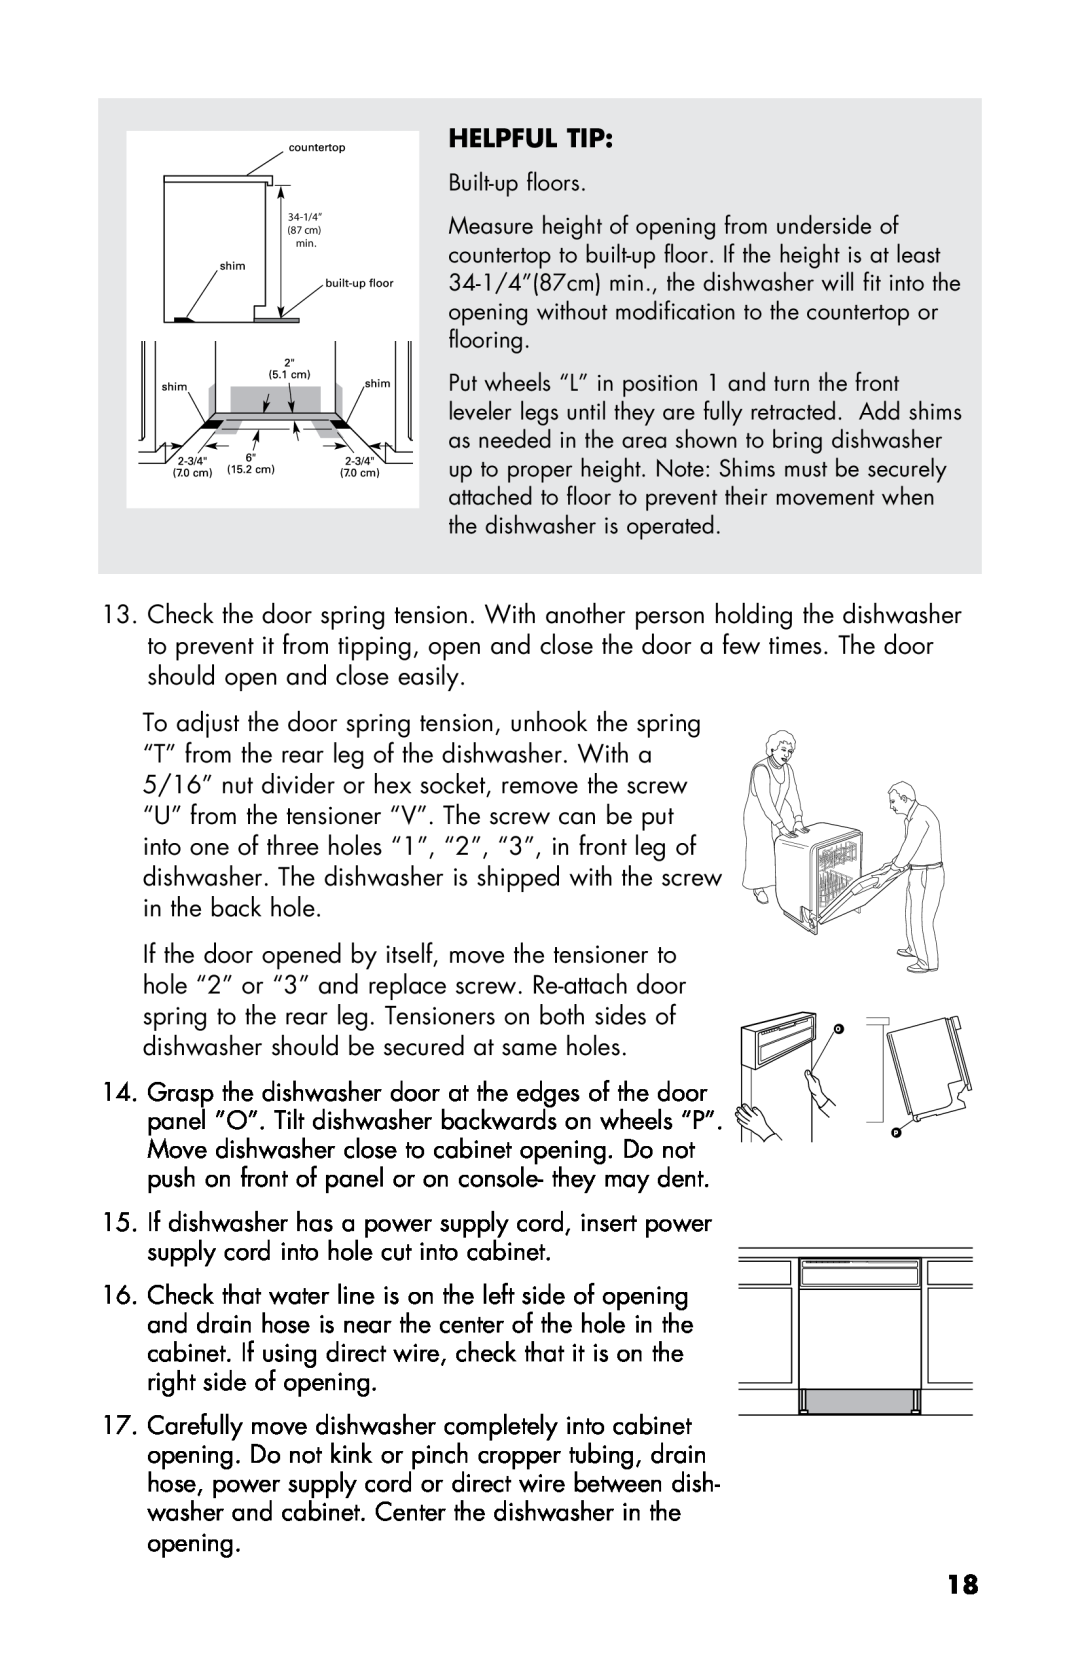
(87 cm) min.
HELPFUL TIP:
Measure height of opening from underside of countertop to
Put wheels “L” in position 1 and turn the front leveler legs until they are fully retracted. Add shims as needed in the area shown to bring dishwasher up to proper height. Note: Shims must be securely attached to floor to prevent their movement when the dishwasher is operated.
13.Check the door spring tension. With another person holding the dishwasher to prevent it from tipping, open and close the door a few times. The door
should open and close easily.
To adjust the door spring tension, unhook the spring “T” from the rear leg of the dishwasher. With a
5/16” nut divider or hex socket, remove the screw
“U” from the tensioner “V”. The screw can be put into one of three holes “1”, “2”, “3”, in front leg of dishwasher. The dishwasher is shipped with the screw in the back hole.
If the door opened by itself, move the tensioner to hole “2” or “3” and replace screw.
14. Grasp the dishwasher door at the edges of the door panel ”O”. Tilt dishwasher backwards on wheels “P”. ![]() Move dishwasher close to cabinet opening. Do not
Move dishwasher close to cabinet opening. Do not ![]()
![]()
![]() push on front of panel or on console- they may dent.
push on front of panel or on console- they may dent.
15.If dishwasher has a power supply cord, insert power supply cord into hole cut into cabinet.
16.Check that water line is on the left side of opening and drain hose is near the center of the hole in the
cabinet. If using direct wire, check that it is on the right side of opening.
17. Carefully move dishwasher completely into cabinet opening. Do not kink or pinch cropper tubing, drain hose, power supply cord or direct wire between dish- washer and cabinet. Center the dishwasher in the
O
P
opening.
18
