Connection Instructions
VCR Setup
-To avoid picture noise (interference), leave an adequate distance between the VCR and TV
Connection and use steps:
1.Read the user guide supplied with your AV devices and ensure that it has Composite or
2.Make sure that the power of the
Connection Option 1
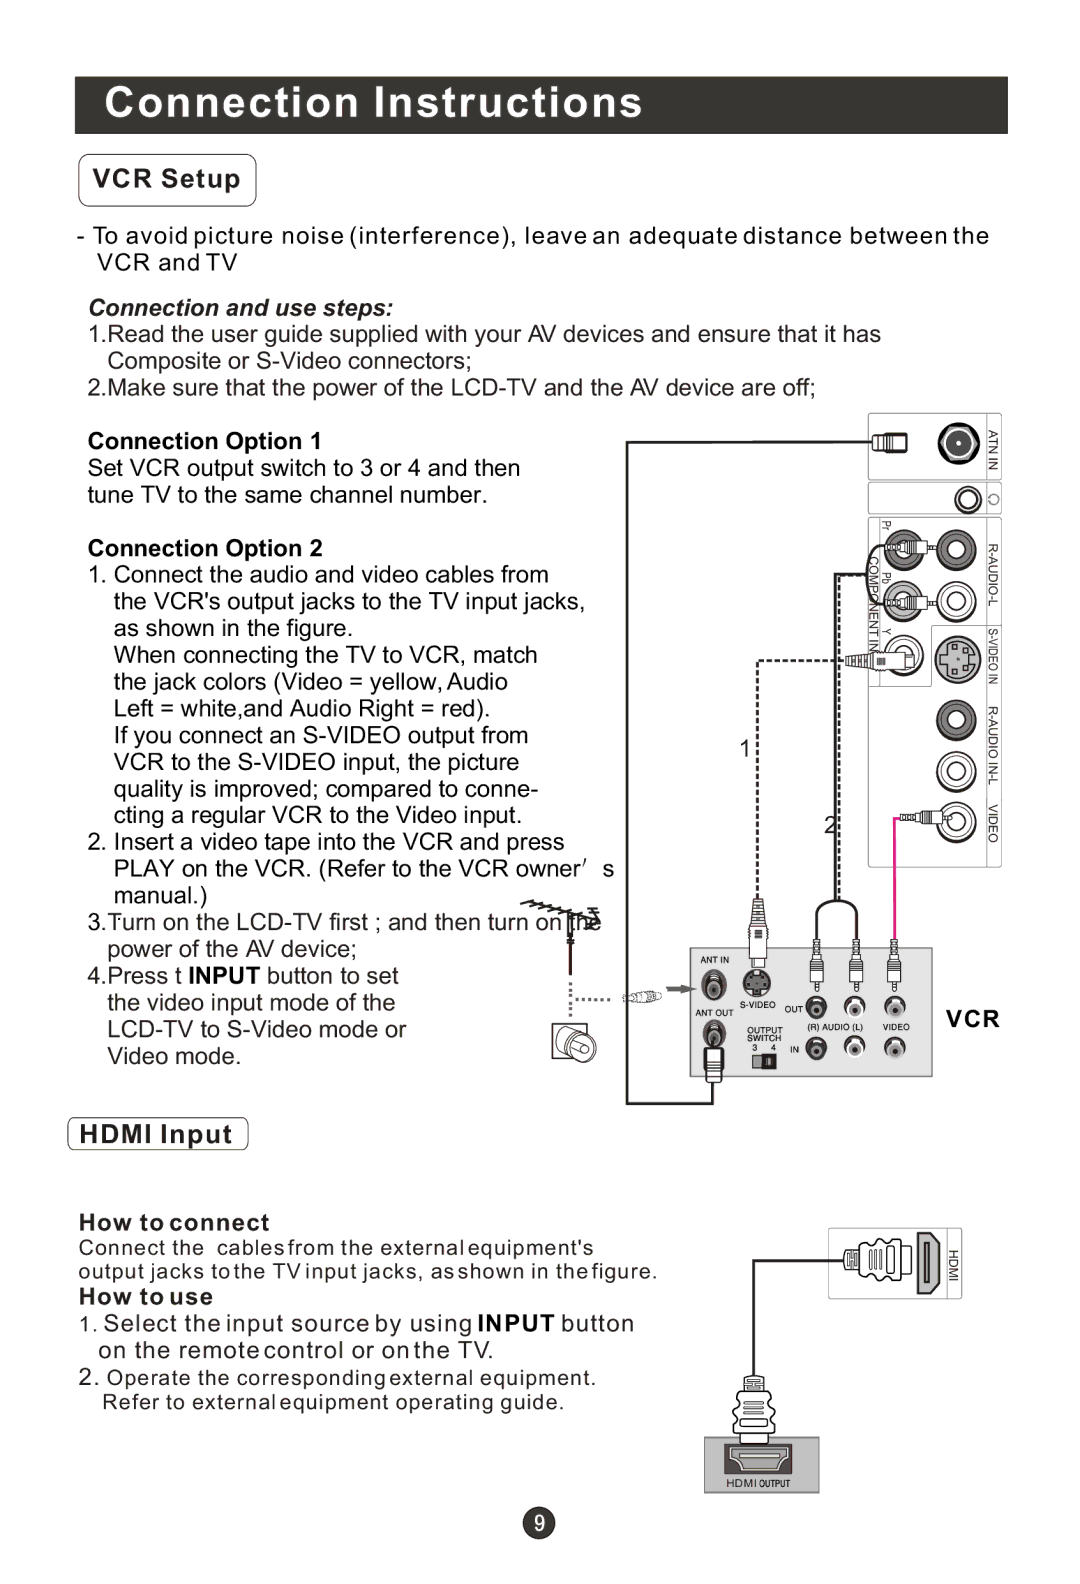
Set VCR output switch to 3 or 4 and then tune TV to the same channel number.
Connection Option 2
1.Connect the audio and video cables from the VCR's output jacks to the TV input jacks, as shown in the figure.
When connecting the TV to VCR, match |
| |
the jack colors (Video = yellow, Audio |
| |
Left = white,and Audio Right = red). |
| |
If you connect an | 1 | |
VCR to the | ||
| ||
quality is improved; compared to conne- |
| |
cting a regular VCR to the Video input. | 2 | |
2. Insert a video tape into the VCR and press | ||
| ||
PLAY on the VCR. (Refer to the VCR owner s |
| |
manual.) |
| |
. |
| |
3.Turn on the |
| |
power of the AV device; |
|
4.Press t INPUT button to set the video input mode of the
|
| ATN IN |
| Pr |
|
COMPONENT IN | PbY | |
|
| IN |
|
| |
|
| |
|
| VIDEO |
VCR
HDMI Input
How to connect
Connect the cables from the external equipment's output jacks to the TV input jacks, as shown in the figure.
How to use
1.Select the input source by using INPUT button on the remote control or on the TV.
2.Operate the corresponding external equipment. Refer to external equipment operating guide.
![]()
![]()
![]()
![]()
![]()
![]()
![]()
![]()
![]()
![]()
![]()
![]()
![]()
![]()
![]() HDMI
HDMI
HDMI ![]()
![]()
![]()
