DVD System Setup
DVD System Setup
General Setup Process
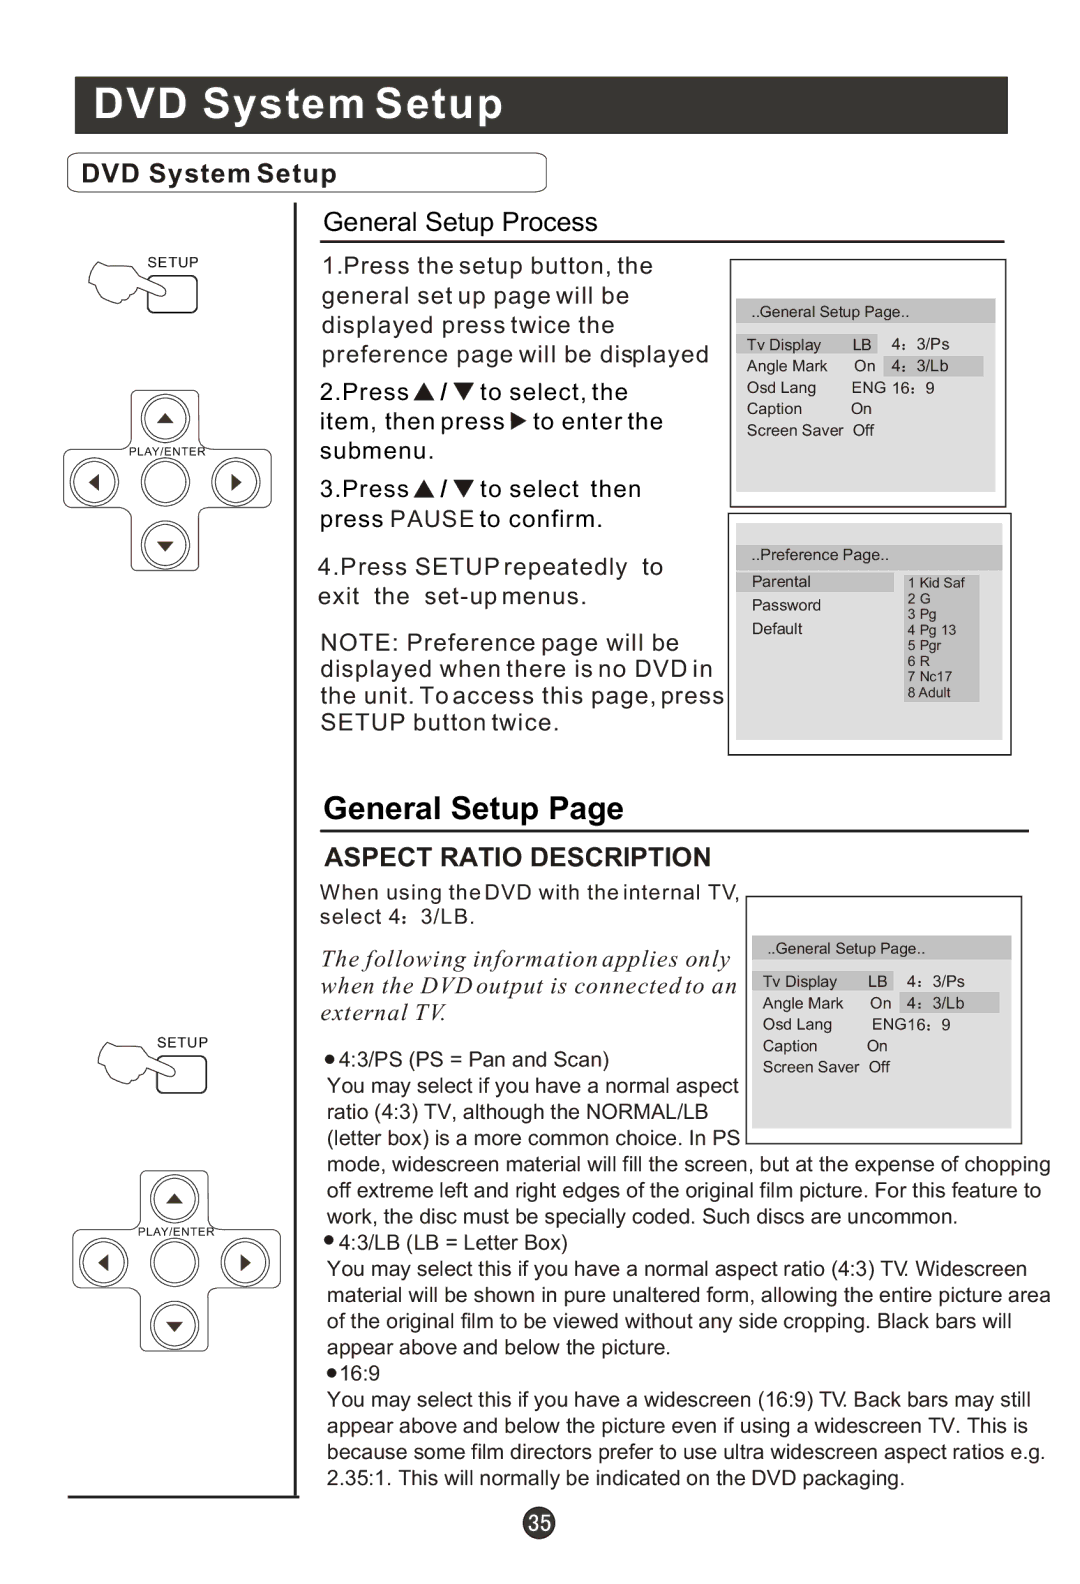
1.Press the setup button, the general set up page will be displayed press twice the preference page will be displayed
2.Press ![]() /
/ ![]() to select, the item, then press
to select, the item, then press ![]() to enter the submenu.
to enter the submenu.
3.Press ![]() /
/ ![]() to select then press PAUSE to confirm.
to select then press PAUSE to confirm.
4.Press SETUP repeatedly to exit the set-up menus.
NOTE: Preference page will be displayed when there is no DVD in the unit. To access this page, press SETUP button twice.
..General Setup Page..
Tv Display | LB | 4 | 3/Ps |
Angle Mark | On | 4 | 3/Lb |
Osd Lang | ENG 16 | 9 | |
Caption | On |
|
|
Screen Saver Off
..Preference Page.. |
| |
Parental | 1 Kid Saf | |
Password | 2 G | |
3 Pg | ||
Default | ||
4 Pg 13 | ||
| 5 Pgr | |
| 6 R | |
| 7 Nc17 | |
| 8 Adult |
SETUP |
PLAY/ENTER |
SETUP |
PLAY/ENTER |
General Setup Page
ASPECT RATIO DESCRIPTION
When using the DVD with the internal TV,
select 4![]() 3/LB.
3/LB.
The following information applies only | ..General Setup Page.. |
| |||
when the DVD output is connected to an Tv Display | LB | 4 | 3/Ps | ||
external TV. | Angle Mark | On | 4 | 3/Lb | |
Osd Lang | ENG16 | 9 | |||
| |||||
| Caption | On |
|
| |
 4:3/PS (PS = Pan and Scan)
You may select if you have a normal aspect ratio (4:3) TV, although the NORMAL/LB (letter box) is a more common choice. In PS
mode, widescreen material will fill the screen, but at the expense of chopping off extreme left and right edges of the original film picture. For this feature to work, the disc must be specially coded. Such discs are uncommon.
![]() 4:3/LB (LB = Letter Box)
4:3/LB (LB = Letter Box)
You may select this if you have a normal aspect ratio (4:3) TV. Widescreen material will be shown in pure unaltered form, allowing the entire picture area of the original film to be viewed without any side cropping. Black bars will appear above and below the picture.
![]() 16:9
16:9
You may select this if you have a widescreen (16:9) TV. Back bars may still appear above and below the picture even if using a widescreen TV. This is because some film directors prefer to use ultra widescreen aspect ratios e.g. 2.35:1. This will normally be indicated on the DVD packaging.
