Assembly / Installation
1.You will need to prepare the 1/4”
Note: If you are not using an automatic oiler system, before operation, add a few drops of Pneumatic Tool Oil to the airline connection. Add a few drops more after each hour of continual use.
2.Set the air pressure on your compressor to 90 PSI. Do not exceed the recommended air pressure of 90 PSI.
3.Check the air connection for leaks. Once you are satisfied there are no leaks, turn off the air compressor and disconnect the tool.
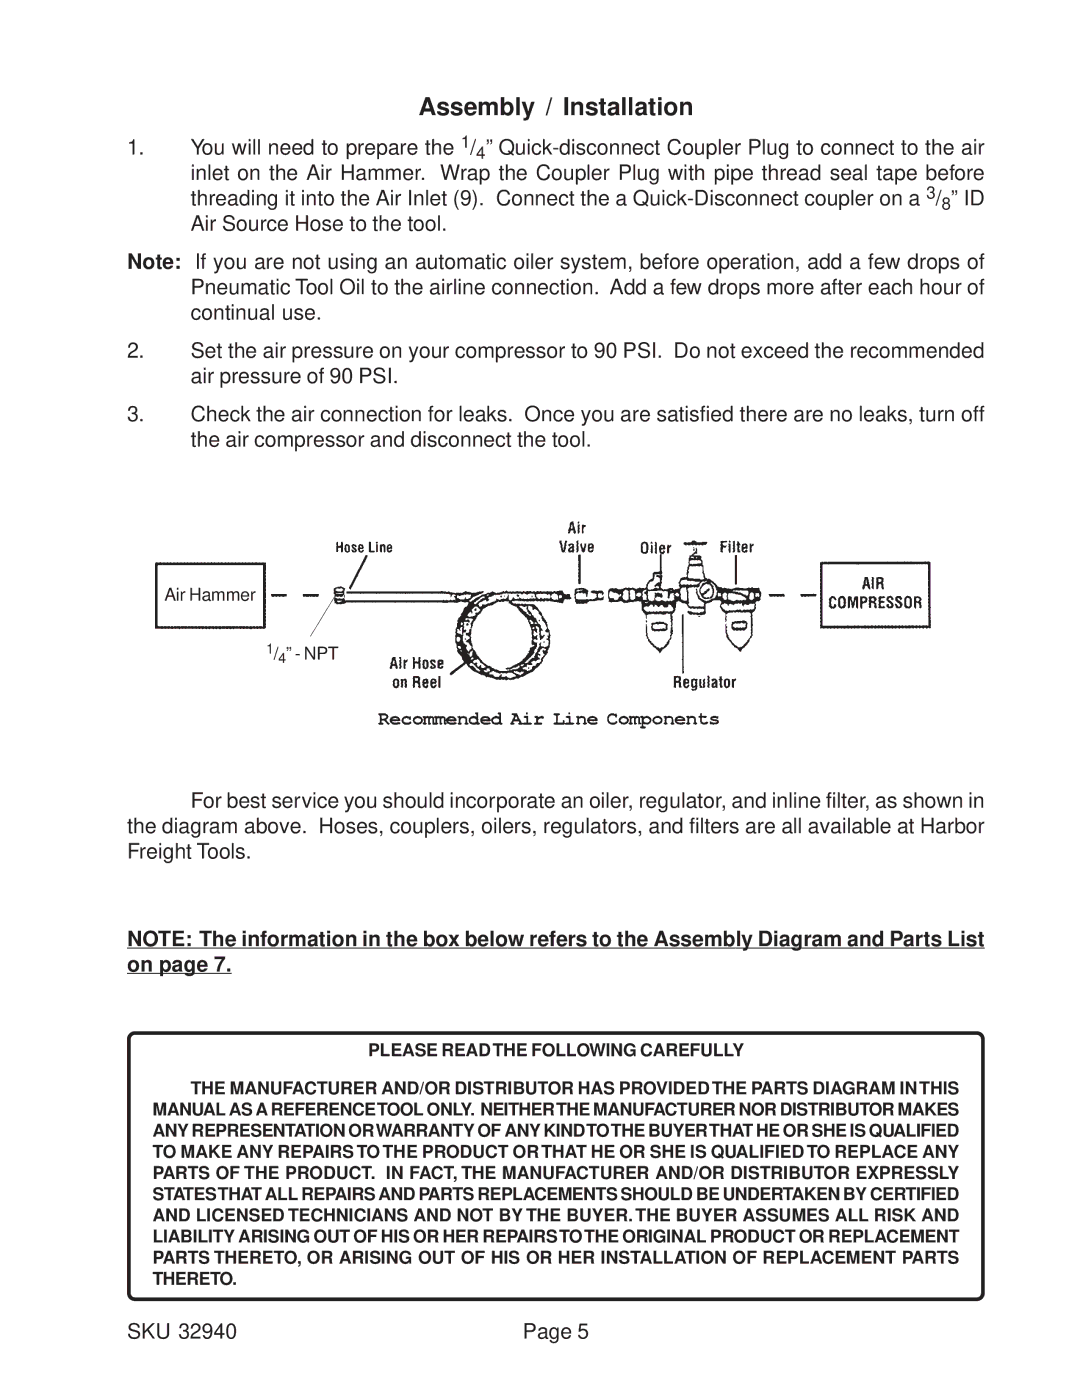
Air Hammer
1/4” - NPT
For best service you should incorporate an oiler, regulator, and inline filter, as shown in the diagram above. Hoses, couplers, oilers, regulators, and filters are all available at Harbor Freight Tools.
NOTE: The information in the box below refers to the Assembly Diagram and Parts List on page 7.
PLEASE READ THE FOLLOWING CAREFULLY
THE MANUFACTURER AND/OR DISTRIBUTOR HAS PROVIDED THE PARTS DIAGRAM IN THIS MANUAL AS A REFERENCETOOL ONLY. NEITHERTHE MANUFACTURER NOR DISTRIBUTOR MAKES ANY REPRESENTATION ORWARRANTY OF ANY KINDTOTHE BUYERTHAT HE OR SHE IS QUALIFIED TO MAKE ANY REPAIRS TO THE PRODUCT OR THAT HE OR SHE IS QUALIFIED TO REPLACE ANY PARTS OF THE PRODUCT. IN FACT, THE MANUFACTURER AND/OR DISTRIBUTOR EXPRESSLY STATESTHAT ALL REPAIRS AND PARTS REPLACEMENTS SHOULD BE UNDERTAKEN BY CERTIFIED AND LICENSED TECHNICIANS AND NOT BY THE BUYER. THE BUYER ASSUMES ALL RISK AND LIABILITY ARISING OUT OF HIS OR HER REPAIRS TO THE ORIGINAL PRODUCT OR REPLACEMENT PARTS THERETO, OR ARISING OUT OF HIS OR HER INSTALLATION OF REPLACEMENT PARTS THERETO.
SKU 32940 | Page 5 |