Sand Control Valve
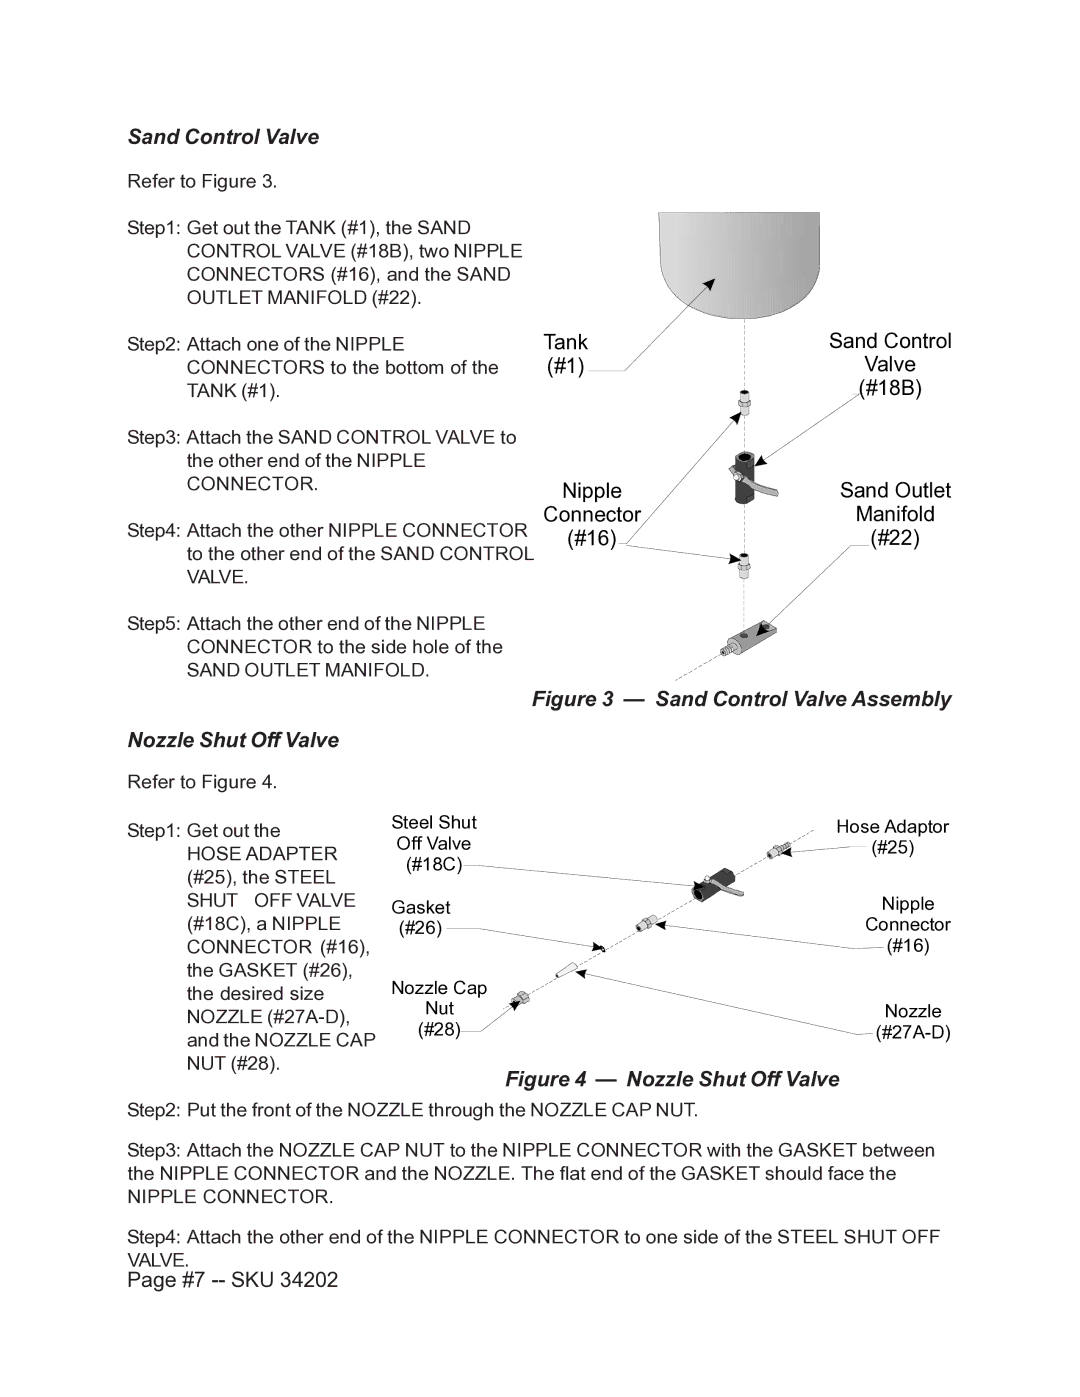
Refer to Figure 3.
Step1: Get out the TANK (#1), the SAND CONTROL VALVE (#18B), two NIPPLE CONNECTORS (#16), and the SAND OUTLET MANIFOLD (#22).
Step2: Attach one of the NIPPLE CONNECTORS to the bottom of the TANK (#1).
Step3: Attach the SAND CONTROL VALVE to the other end of the NIPPLE CONNECTOR.
Step4: Attach the other NIPPLE CONNECTOR to the other end of the SAND CONTROL VALVE.
Step5: Attach the other end of the NIPPLE CONNECTOR to the side hole of the
SAND OUTLET MANIFOLD.
Tank (#1)
Nipple
Connector
(#16)
Sand Control
Valve
(#18B)
Sand Outlet
Manifold
(#22)
Figure 3 — Sand Control Valve Assembly
Nozzle Shut Off Valve
Refer to Figure 4.
Step1: Get out the
HOSE ADAPTER
(#25), the STEEL
SHUT OFF VALVE (#18C), a NIPPLE CONNECTOR (#16), the GASKET (#26), the desired size NOZZLE
Steel Shut
Off Valve
(#18C)
Gasket (#26)
Nozzle Cap
Nut (#28)
Hose Adaptor
![]()
![]() (#25)
(#25)
Nipple
Connector
(#16)
Nozzle
Figure 4 — Nozzle Shut Off Valve
Step2: Put the front of the NOZZLE through the NOZZLE CAP NUT.
Step3: Attach the NOZZLE CAP NUT to the NIPPLE CONNECTOR with the GASKET between the NIPPLE CONNECTOR and the NOZZLE. The flat end of the GASKET should face the
NIPPLE CONNECTOR.
Step4: Attach the other end of the NIPPLE CONNECTOR to one side of the STEEL SHUT OFF VALVE.
