ASSEMBLY
Mounting the Body to Your
Workbench
1.Select a place on your workbench to mount the Arbor Press.
2.Purchase hardware to mount your Arbor Press to your workbench. Bolt length will be the thickness of your workbench plus
| Body (#1) |
Mounting Hole |
|
(not shown) | Mounting Hole |
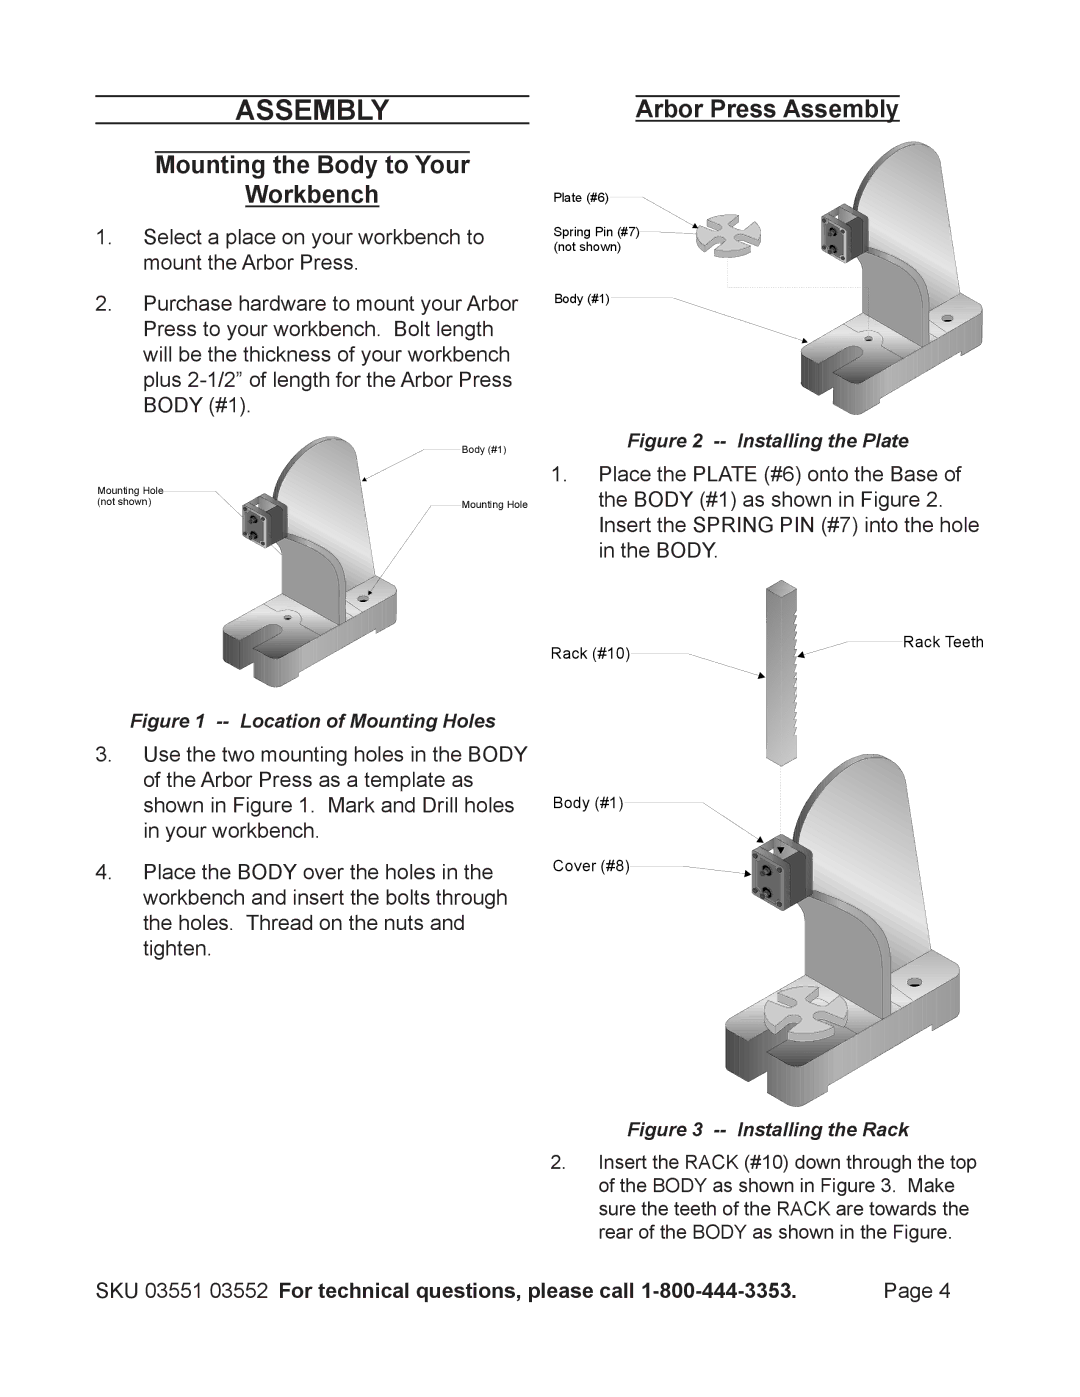
Figure 1 -- Location of Mounting Holes
3.Use the two mounting holes in the BODY of the Arbor Press as a template as shown in Figure 1. Mark and Drill holes in your workbench.
4.Place the BODY over the holes in the workbench and insert the bolts through the holes. Thread on the nuts and tighten.
Arbor Press Assembly
Plate (#6)
Spring Pin (#7)![]() (not shown)
(not shown)
Body (#1)
Figure 2 -- Installing the Plate
1.Place the PLATE (#6) onto the Base of the BODY (#1) as shown in Figure 2. Insert the SPRING PIN (#7) into the hole in the BODY.
Rack (#10) | Rack Teeth |
|
Body (#1)
Cover (#8)![]()
![]()
![]()
![]()
![]()
![]()
![]()
![]()
![]()
![]()
![]()
![]()
![]()
![]()
![]()
![]()
![]()
![]()
![]()
Figure 3 -- Installing the Rack
2.Insert the RACK (#10) down through the top of the BODY as shown in Figure 3. Make sure the teeth of the RACK are towards the rear of the BODY as shown in the Figure.
SKU 03551 03552 For technical questions, please call | Page 4 |
