PTO Drive Maintenance
Disassembly of the PTO Drive and replacement of the PTO Drive
Sheave/Bearing Assembly requires the PTO Bearing Puller
(P/N 18610). The Sheave/Bearing Assembly is not serviceable and must be
replaced as a complete unit.
1.Remove the Drive Belt (see Replacing the Blade Shaft Drive Belt).
2.Remove the Drive Plate Assembly from the engine.
∙The Assembly is held on by 11 bolts.
∙Note the clocking orientation of the plate.
3.On the workbench:
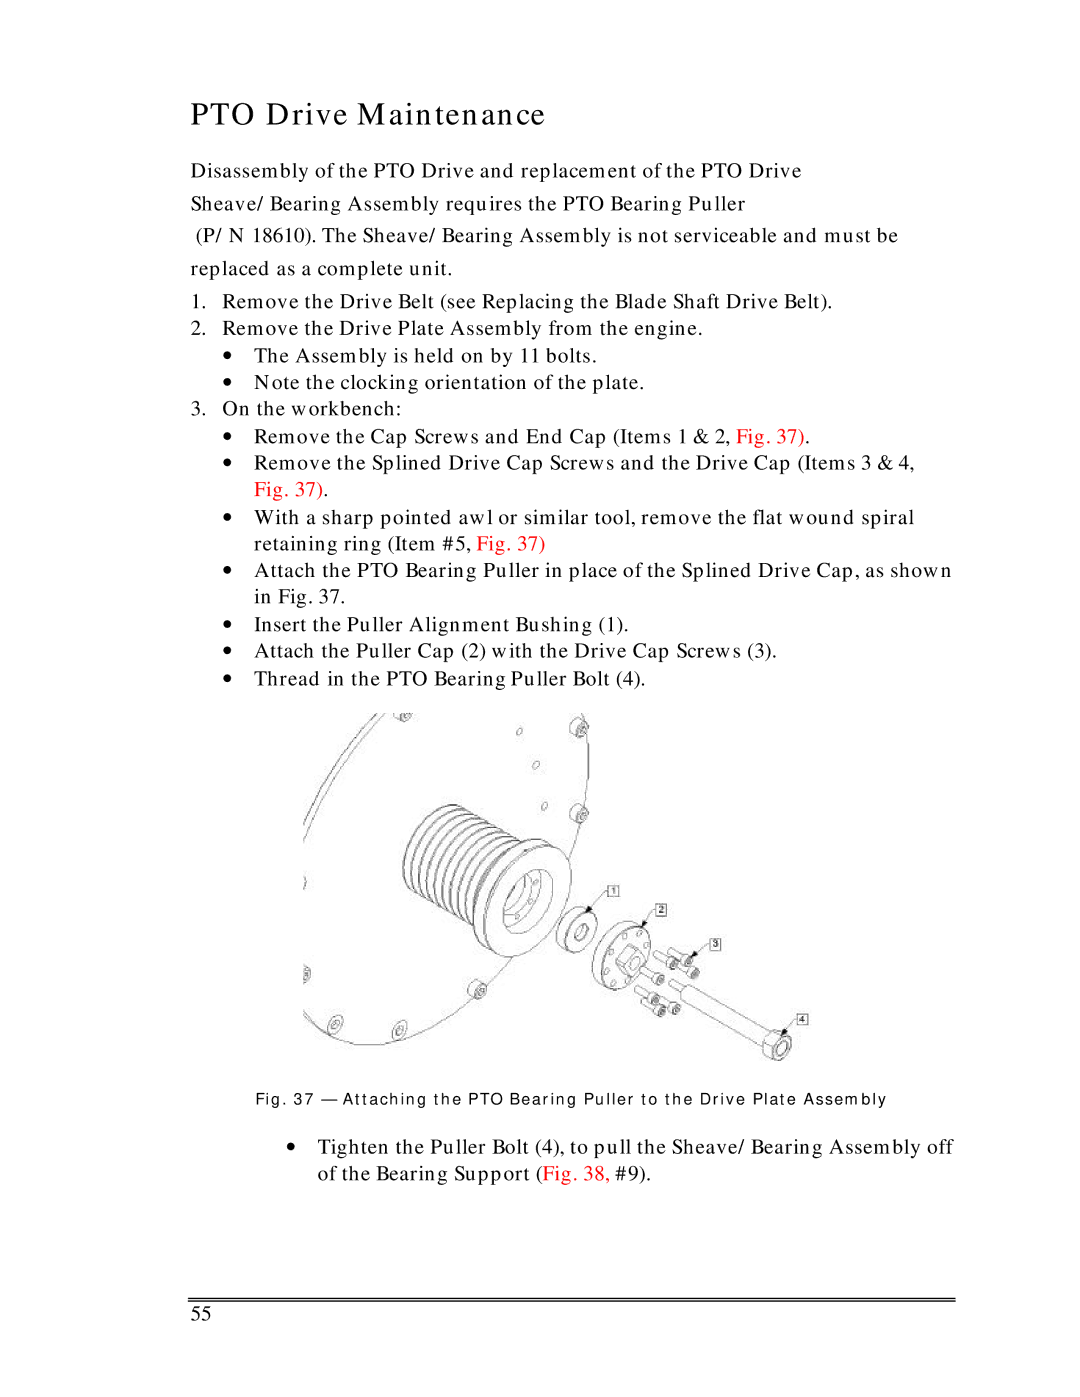
∙Remove the Cap Screws and End Cap (Items 1 & 2, Fig. 37).
∙Remove the Splined Drive Cap Screws and the Drive Cap (Items 3 & 4, Fig. 37).
∙With a sharp pointed awl or similar tool, remove the flat wound spiral retaining ring (Item #5, Fig. 37)
∙Attach the PTO Bearing Puller in place of the Splined Drive Cap, as shown in Fig. 37.
∙Insert the Puller Alignment Bushing (1).
∙Attach the Puller Cap (2) with the Drive Cap Screws (3).
∙Thread in the PTO Bearing Puller Bolt (4).
Fig. 37 — Attaching the PTO Bearing Puller to the Drive Plate Assembly
∙Tighten the Puller Bolt (4), to pull the Sheave/Bearing Assembly off of the Bearing Support (Fig. 38, #9).
55