Setting the Depth Indicator
1.Lower the blade until it just touches the cutting surface.
2.Set the Depth Indicator dial to zero. (The Depth Indicator now accurately indicates how deep the blade is cutting.)
Setting the Depth Stop
This saw uses a hydraulic Depth Stop to position and lock the blade at the
desired cut depth.
1.Depress SLOW LOWERING button until blade has reached desired cutting depth.
2.While holding the Slow Lowering button, open the Depth Stop Valve.
3.Close the Depth Stop Valve.
4.Release the SLOW LOWERING button.
5.The saw will now repeatedly lower to the set cutting depth, until the Depth Stop is
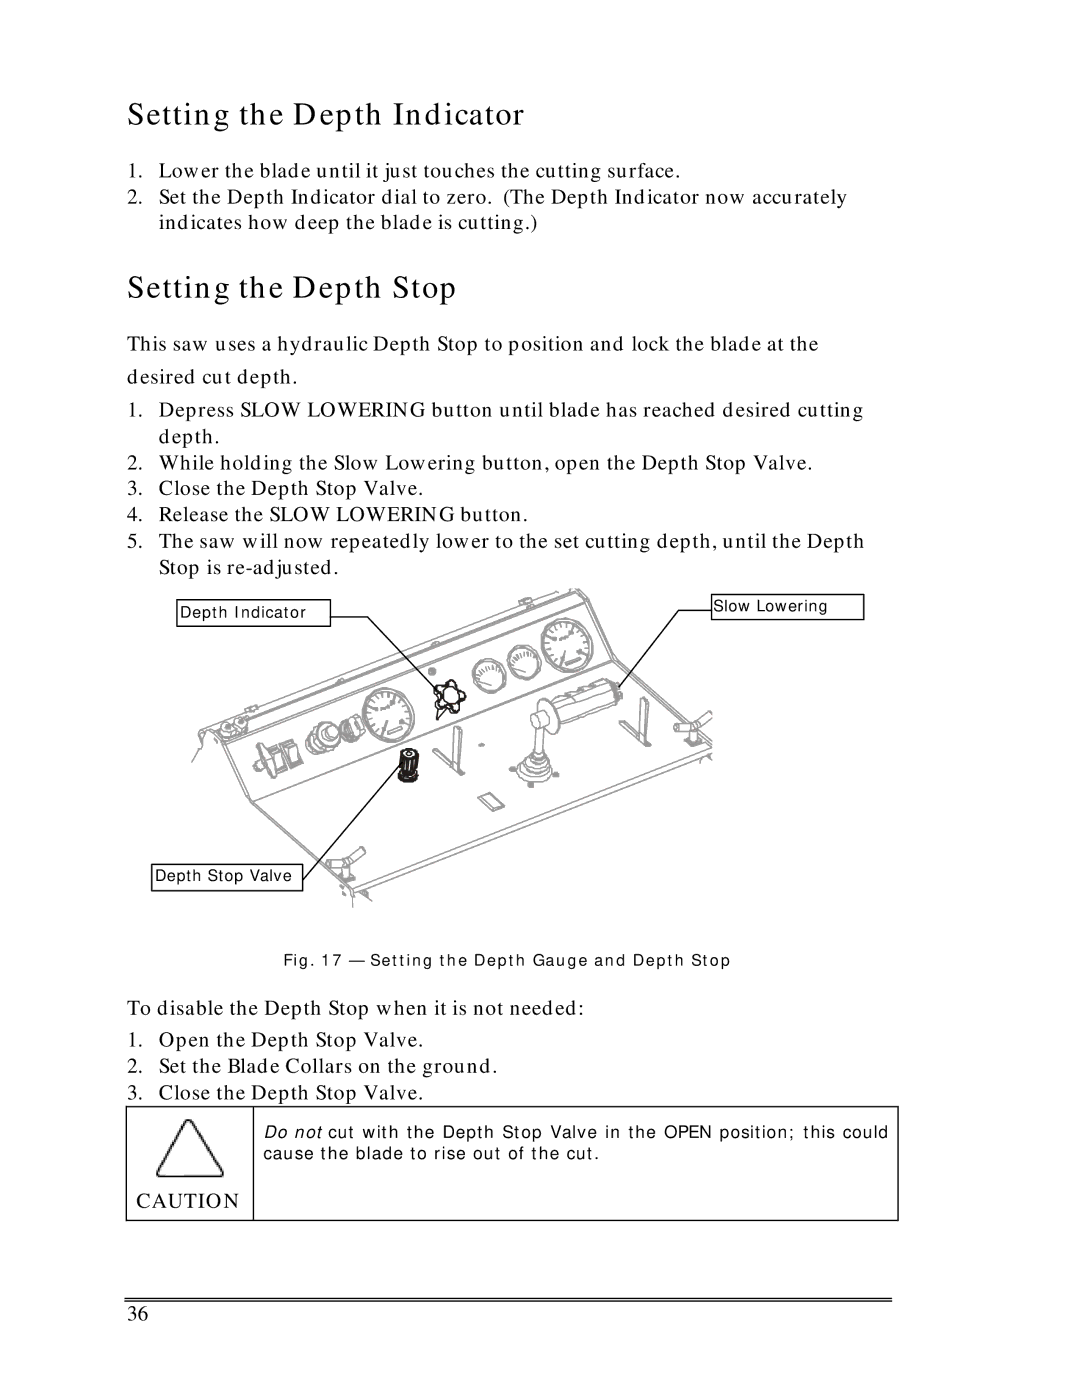
Depth Indicator
Slow Lowering
Depth Stop Valve
Fig. 17 — Setting the Depth Gauge and Depth Stop
To disable the Depth Stop when it is not needed:
1.Open the Depth Stop Valve.
2.Set the Blade Collars on the ground.
3.Close the Depth Stop Valve.
Do not cut with the Depth Stop Valve in the OPEN position; this could cause the blade to rise out of the cut.
CAUTION
36