Replacing the Carbon Brushes
1.Unscrew the Brush Caps (30).
2.Pull out the Carbon Brush (29) from each side of the motor and examine them.
If they are worn more than half way down, replace them. It could be that they are simply dirty. They can be cleaned using an ink eraser.
3.Replace the Brush Caps.
Installing a New Saw Blade
1.Always use 9 inch saw blades. The saw blade speed rating must be at least 4,000 RPM.
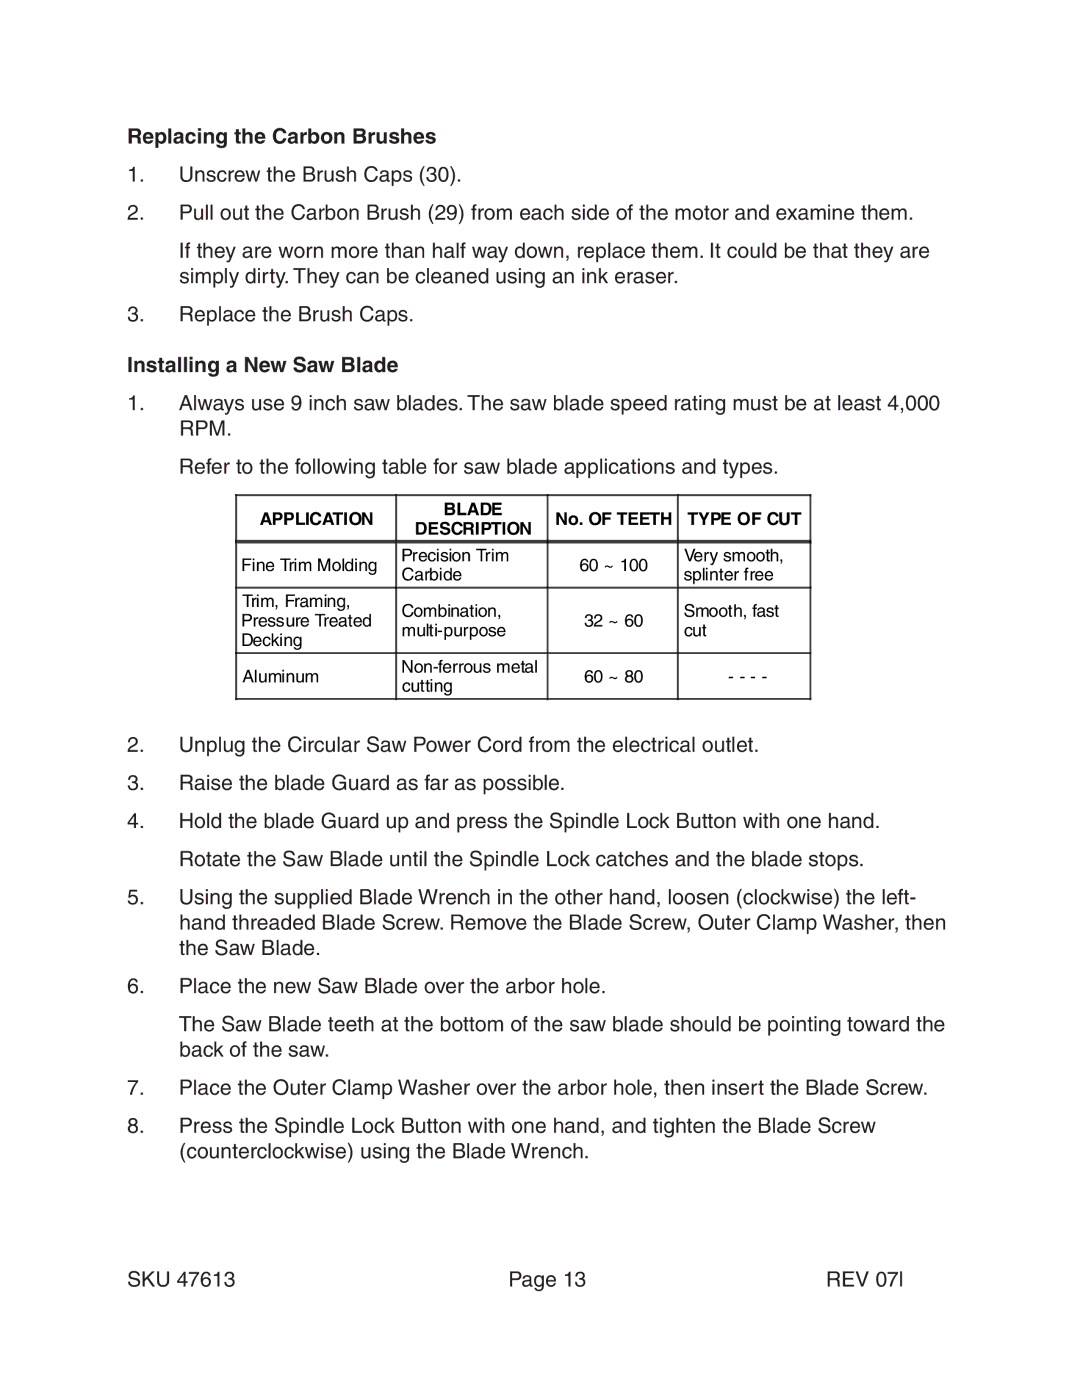
Refer to the following table for saw blade applications and types.
APPLICATION | BLADE | No. OF TEETH | TYPE OF CUT | |
DESCRIPTION | ||||
|
|
| ||
|
|
|
| |
Fine Trim Molding | Precision Trim | 60 ~ 100 | Very smooth, | |
Carbide | splinter free | |||
|
| |||
Trim, Framing, | Combination, |
| Smooth, fast | |
Pressure Treated | 32 ~ 60 | |||
cut | ||||
Decking |
| |||
|
|
| ||
Aluminum | 60 ~ 80 | - - - - | ||
cutting | ||||
|
|
|
2.Unplug the Circular Saw Power Cord from the electrical outlet.
3.Raise the blade Guard as far as possible.
4.Hold the blade Guard up and press the Spindle Lock Button with one hand. Rotate the Saw Blade until the Spindle Lock catches and the blade stops.
5.Using the supplied Blade Wrench in the other hand, loosen (clockwise) the left- hand threaded Blade Screw. Remove the Blade Screw, Outer Clamp Washer, then the Saw Blade.
6.Place the new Saw Blade over the arbor hole.
The Saw Blade teeth at the bottom of the saw blade should be pointing toward the back of the saw.
7.Place the Outer Clamp Washer over the arbor hole, then insert the Blade Screw.
8.Press the Spindle Lock Button with one hand, and tighten the Blade Screw (counterclockwise) using the Blade Wrench.
SKU 47613 | Page 13 | REV 07l |