Setting Up The Weld
WARNING! Use care not to touch the welding tip to grounded material whenever the unit is plugged in. This unit is what is referred to as a “hot tip” welder, meaning that current is available to the wire at all times that the power Switch (7a) is in the ON position. Electric shock, fire, or burns may happen if appropriate precautions are not taken.
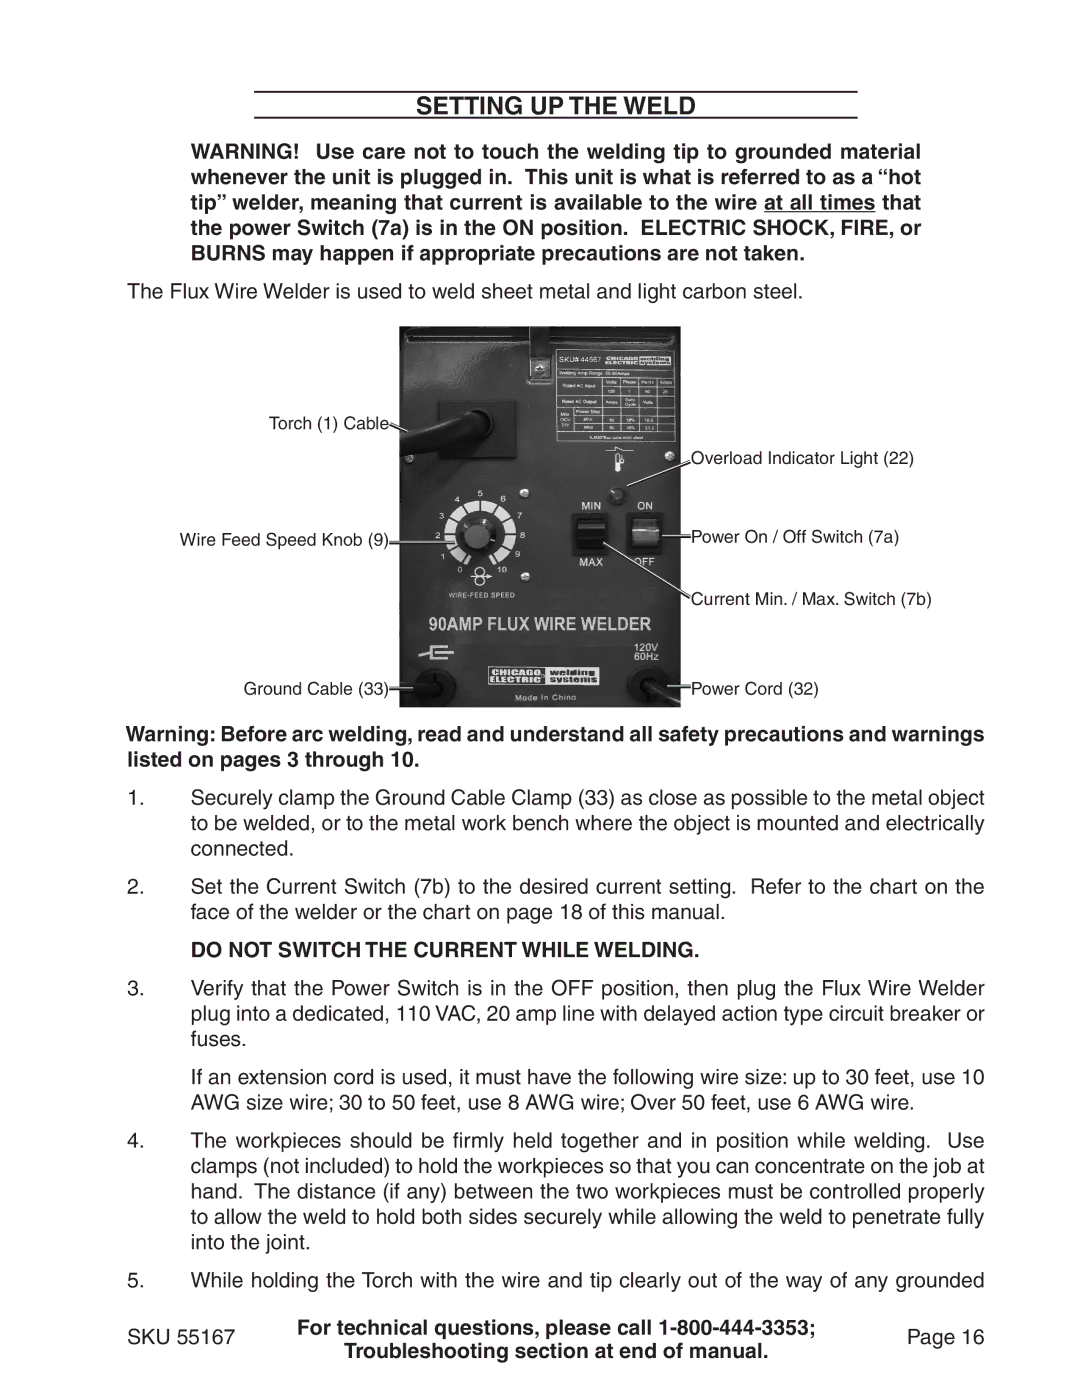
The Flux Wire Welder is used to weld sheet metal and light carbon steel.
Torch (1) Cable![]()
|
|
|
| Overload Indicator Light (22) |
Wire Feed Speed Knob (9) |
|
|
| Power On / Off Switch (7a) |
| ||||
| ||||
|
| |||
|
|
| ||
|
|
|
| Current Min. / Max. Switch (7b) |
Ground Cable (33) |
|
|
| Power Cord (32) |
|
|
| ||
|
|
|
Warning: Before arc welding, read and understand all safety precautions and warnings listed on pages 3 through 10.
1.Securely clamp the Ground Cable Clamp (33) as close as possible to the metal object to be welded, or to the metal work bench where the object is mounted and electrically connected.
2.Set the Current Switch (7b) to the desired current setting. Refer to the chart on the face of the welder or the chart on page 18 of this manual.
DO NOT SWITCH THE CURRENT WHILE WELDING.
3.Verify that the Power Switch is in the OFF position, then plug the Flux Wire Welder plug into a dedicated, 110 VAC, 20 amp line with delayed action type circuit breaker or fuses.
If an extension cord is used, it must have the following wire size: up to 30 feet, use 10 AWG size wire; 30 to 50 feet, use 8 AWG wire; Over 50 feet, use 6 AWG wire.
4.The workpieces should be firmly held together and in position while welding. Use clamps (not included) to hold the workpieces so that you can concentrate on the job at hand. The distance (if any) between the two workpieces must be controlled properly to allow the weld to hold both sides securely while allowing the weld to penetrate fully into the joint.
5.While holding the Torch with the wire and tip clearly out of the way of any grounded
SKU 55167 | For technical questions, please call | Page 16 | |
Troubleshooting section at end of manual. | |||
|
|
