the Long Bolt at each bottom connection, but do not install a Nut (61) over the Long Bolt yet.
9.Remove the bottom Bolt from the Corner Brackets (26) at the front of the green- house. Install the Front Diagonal Braces (24) to the bottom hole of the Brackets on
the inside using Long Bolts (60). Attach the bottom of the Front Diagonal Braces
(24)to the Long Bolt left exposed on the Floor Plate (17) from the last step.
(See Figure C.)
10.Remove the second Bolt from the bottom of the front Corner Brackets (26). Con- nect the Front Braces (21) to the exposed hole using Long Bolts (60). Connect the loose ends of the Front Braces (21) to the Doorway Studs (6, 7) using Long Bolts
(60).(See Figure C.)
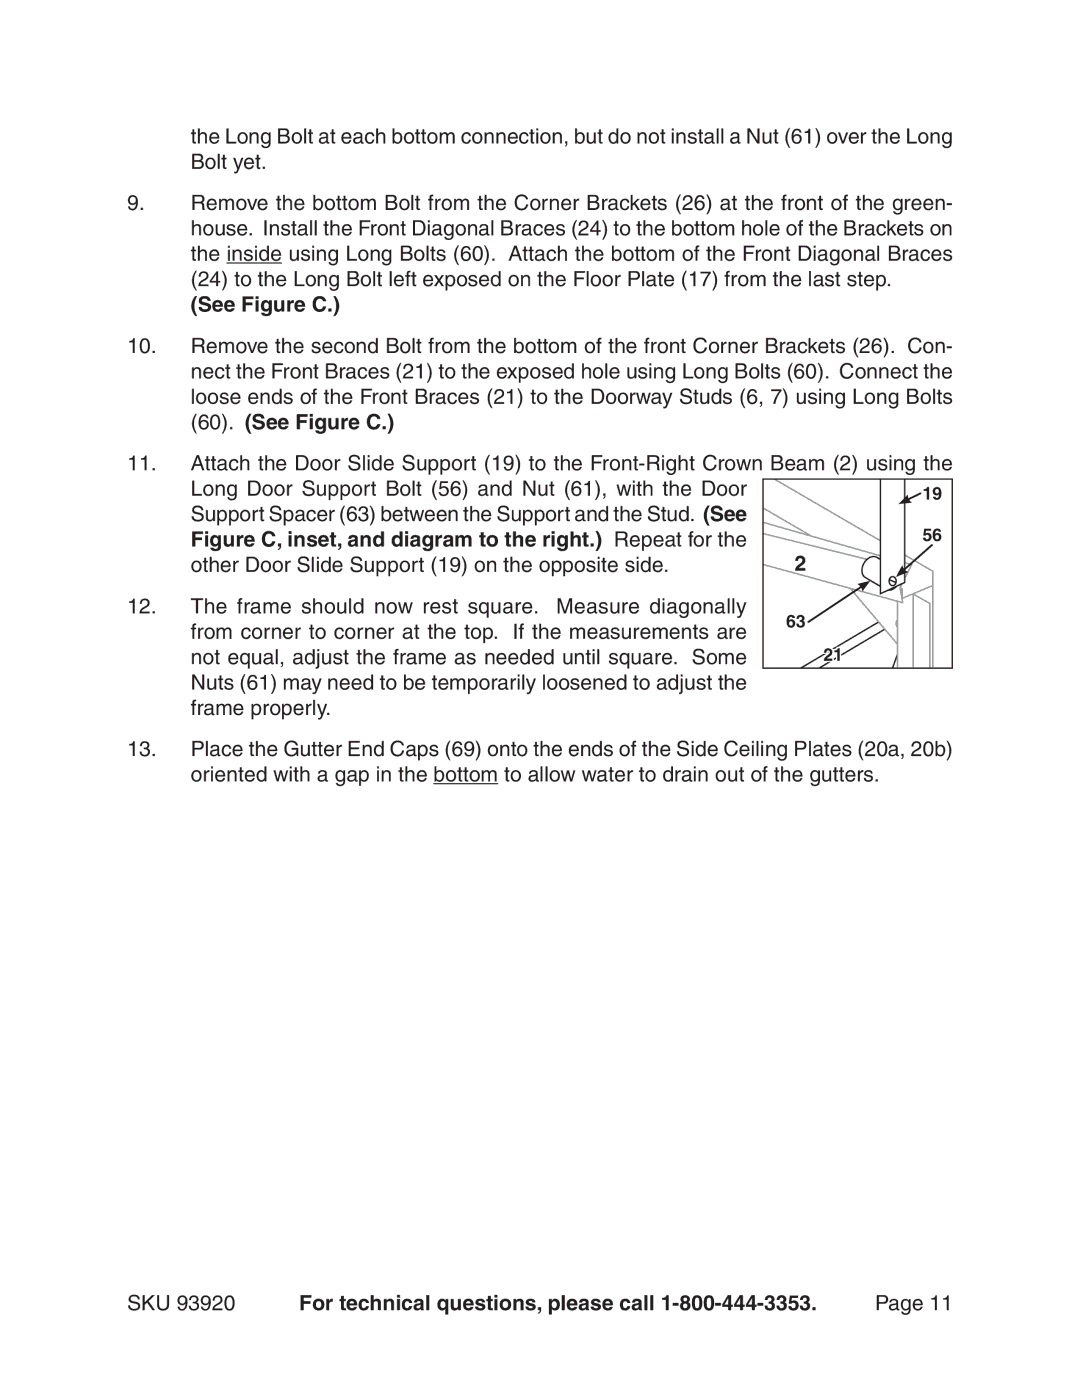
11.Attach the Door Slide Support (19) to the
Long Door Support Bolt (56) and Nut (61), with the Door | 19 | |
Support Spacer (63) between the Support and the Stud. (See | 56 | |
Figure C, inset, and diagram to the right.) Repeat for the | ||
other Door Slide Support (19) on the opposite side. | 2 | |
12. The frame should now rest square. Measure diagonally | 63 | |
from corner to corner at the top. If the measurements are | ||
| ||
not equal, adjust the frame as needed until square. Some | 21 |
Nuts (61) may need to be temporarily loosened to adjust the frame properly.
13.Place the Gutter End Caps (69) onto the ends of the Side Ceiling Plates (20a, 20b) oriented with a gap in the bottom to allow water to drain out of the gutters.
SKU 93920 | For technical questions, please call | Page 11 |