through the workbench, making sure no hidden electric cords or cables are in the drilling path.
5.Once the 3/16” mounting holes are drilled, align the four mounting holes at the Base (4) of the Grinder with the four predrilled mounting holes in the workbench. Secure the Grinder to the workbench, using four appropriate length Bolts, Lock Washers, and Nuts (not included). (See Assy. Diagram.)
OPERATING INSTRUCTIONS
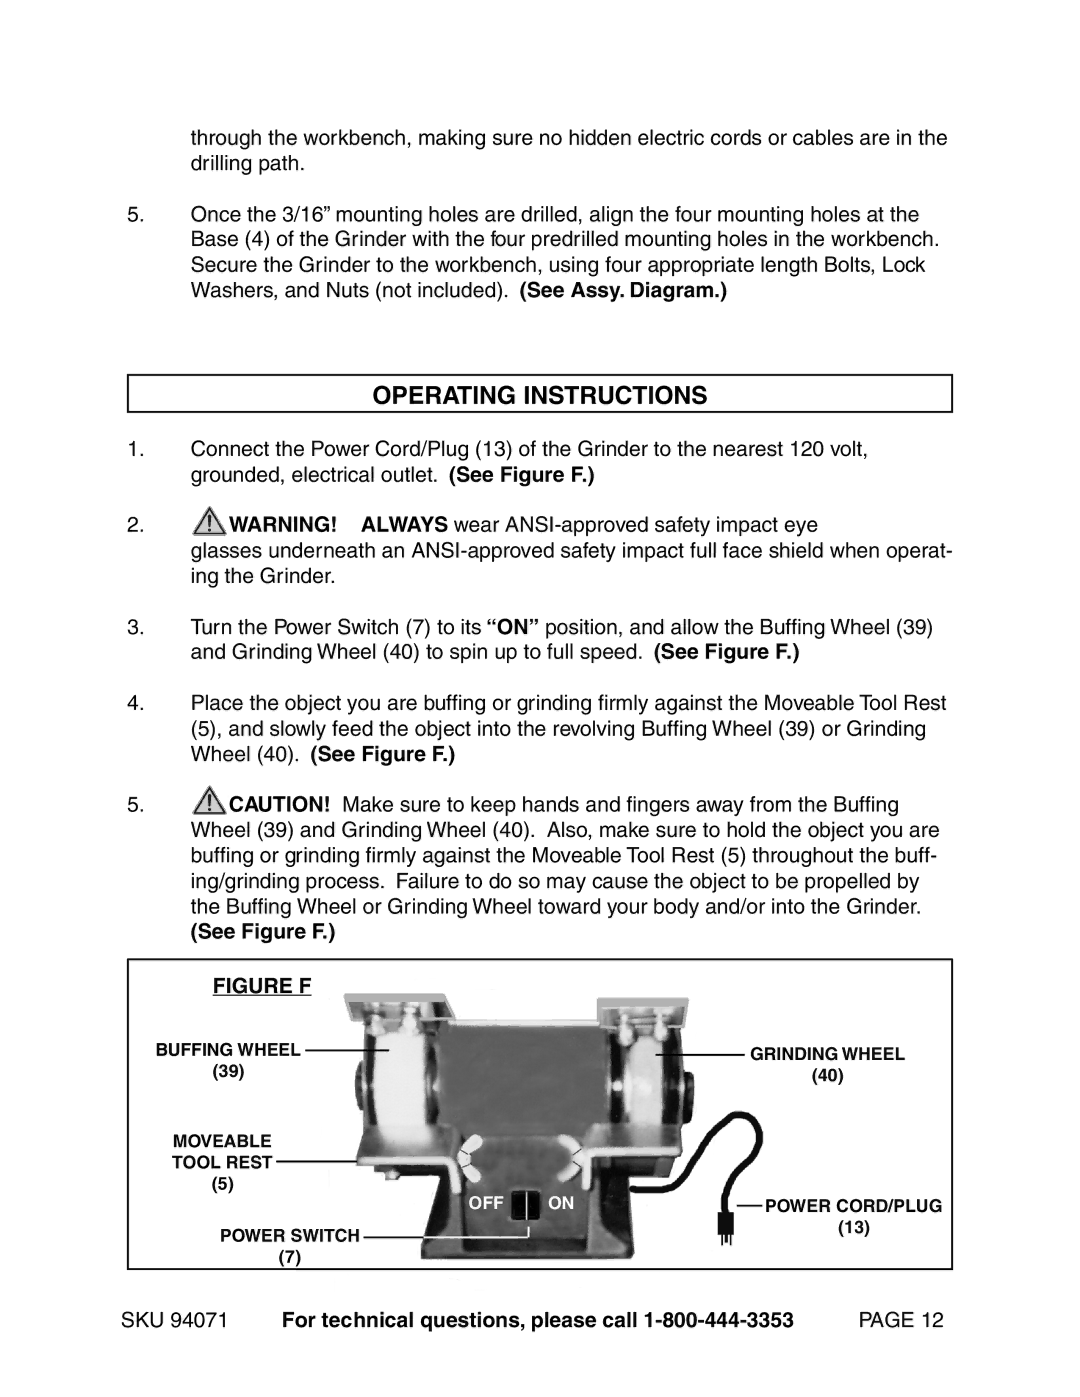
1.Connect the Power Cord/Plug (13) of the Grinder to the nearest 120 volt, grounded, electrical outlet. (See Figure F.)
2.![]() WARNING! ALWAYS wear
WARNING! ALWAYS wear
glasses underneath an
3.Turn the Power Switch (7) to its “ON” position, and allow the Buffing Wheel (39) and Grinding Wheel (40) to spin up to full speed. (See Figure F.)
4.Place the object you are buffing or grinding firmly against the Moveable Tool Rest (5), and slowly feed the object into the revolving Buffing Wheel (39) or Grinding Wheel (40). (See Figure F.)
5.![]() CAUTION! Make sure to keep hands and fingers away from the Buffing Wheel (39) and Grinding Wheel (40). Also, make sure to hold the object you are buffing or grinding firmly against the Moveable Tool Rest (5) throughout the buff- ing/grinding process. Failure to do so may cause the object to be propelled by the Buffing Wheel or Grinding Wheel toward your body and/or into the Grinder.
CAUTION! Make sure to keep hands and fingers away from the Buffing Wheel (39) and Grinding Wheel (40). Also, make sure to hold the object you are buffing or grinding firmly against the Moveable Tool Rest (5) throughout the buff- ing/grinding process. Failure to do so may cause the object to be propelled by the Buffing Wheel or Grinding Wheel toward your body and/or into the Grinder.
(See Figure F.)
FIGURE F
BUFFING WHEEL
(39)
MOVEABLE
TOOL REST
(5)
OFF
POWER SWITCH ![]()
![]()
(7)
GRINDING WHEEL
(40)
ON |
| POWER CORD/PLUG |
| ||
| (13) | |
SKU 94071 | For technical questions, please call | PAGE 12 |