INITIAL SETUP

The receiver will generate a loud test tone, which sounds like static. In fact, it’s a tone that simultaneously uses all frequencies from 20Hz to 20kHz.

The tone should be heard first through the front left speaker. It will circu- late to the other speakers in this order: front left, center, front right, sur- round right, surround left. The tone pauses for a few moments at each speaker position, while a microphone built into the remote measures the loudness (sound pressure level) of the tone. The remote contains pro- gramming that compares the loudness of the tone at each position to a reference and sends commands to the receiver to adjust the output level for that channel until the tone matches the reference.

A tri-color LED on the remote indicates EzSet’s findings. The LED turns red if the channel’s level is too high, amber if the level is too low, and green when the level is correct.

The result is that each speaker will be heard equally loud at the listening position. This is important for movie directors, who adjust the loudness of each channel in the recording to produce a desired sound presenta- tion. Usually, the director reduces the loudness of, or even the presence of information in the surround channels so as not to distract the viewer from the main action taking place on screen. If the test tone sounds as loud in the rear speakers as it does coming from the other speakers, then the receiver is performing correctly.

As the tone circulates to each speaker position, the semi-OSD system and the front panel will display a message reporting which channel the tone is being sent to. Make sure that the message matches the speaker you are actually hearing the tone from, and that you are hearing a tone from each speaker. If that isn’t the case, press the Test Button twice to stop EzSet, and turn off the receiver and unplug it. Then check your speaker-wire connections.

The semi-OSD system and front panel will also display the level adjust- ments being made. The levels may vary from –10dB to +10dB. If you notice that the levels for all speakers are being adjusted very far in either direction, then stop EzSet by pressing the Test Button twice, and adjust the master volume level higher to compensate for EzSet pushing each speaker close to +10dB, or lower to compensate for EzSet lowering each speaker close to –10dB.

As the levels are being adjusted, the LED on the remote will change until it is green for all channels.

The tone will circulate a second time, and then the procedure will end.

NOTE: In order to optimize performance for each of the many surround modes and their variants, the AVR 145 is able to associate a different set of output level settings with each mode. While this results in extremely realistic reproduction of surround sound presentations, it does require that you determine the cor- rect settings for each surround mode.

The first time you turn on the AVR, it will default to the Logic 7 Music mode. Harman Kardon recommends that at initial set-up you use the default Logic 7 mode, and then copy down the set- tings produced by EzSet. Change the surround mode either

using the on-screen Surround Setup menu, or by pressing the desired surround mode group button on the remote, and re- enter the same settings for each new mode, selecting all modes you are likely to use.

If you prefer, you may run EzSet for the major surround modes, such as Logic 7 (select either Cinema or Music), Dolby (select Dolby Pro Logic II Movie) and DTS (select DTS Neo:6). Then you may copy the resulting level settings for the other mode variants within each group.

Advanced users may rerun EzSet for each mode individually.

Step Five – Configure Sources

This is the last step in the configuration process.

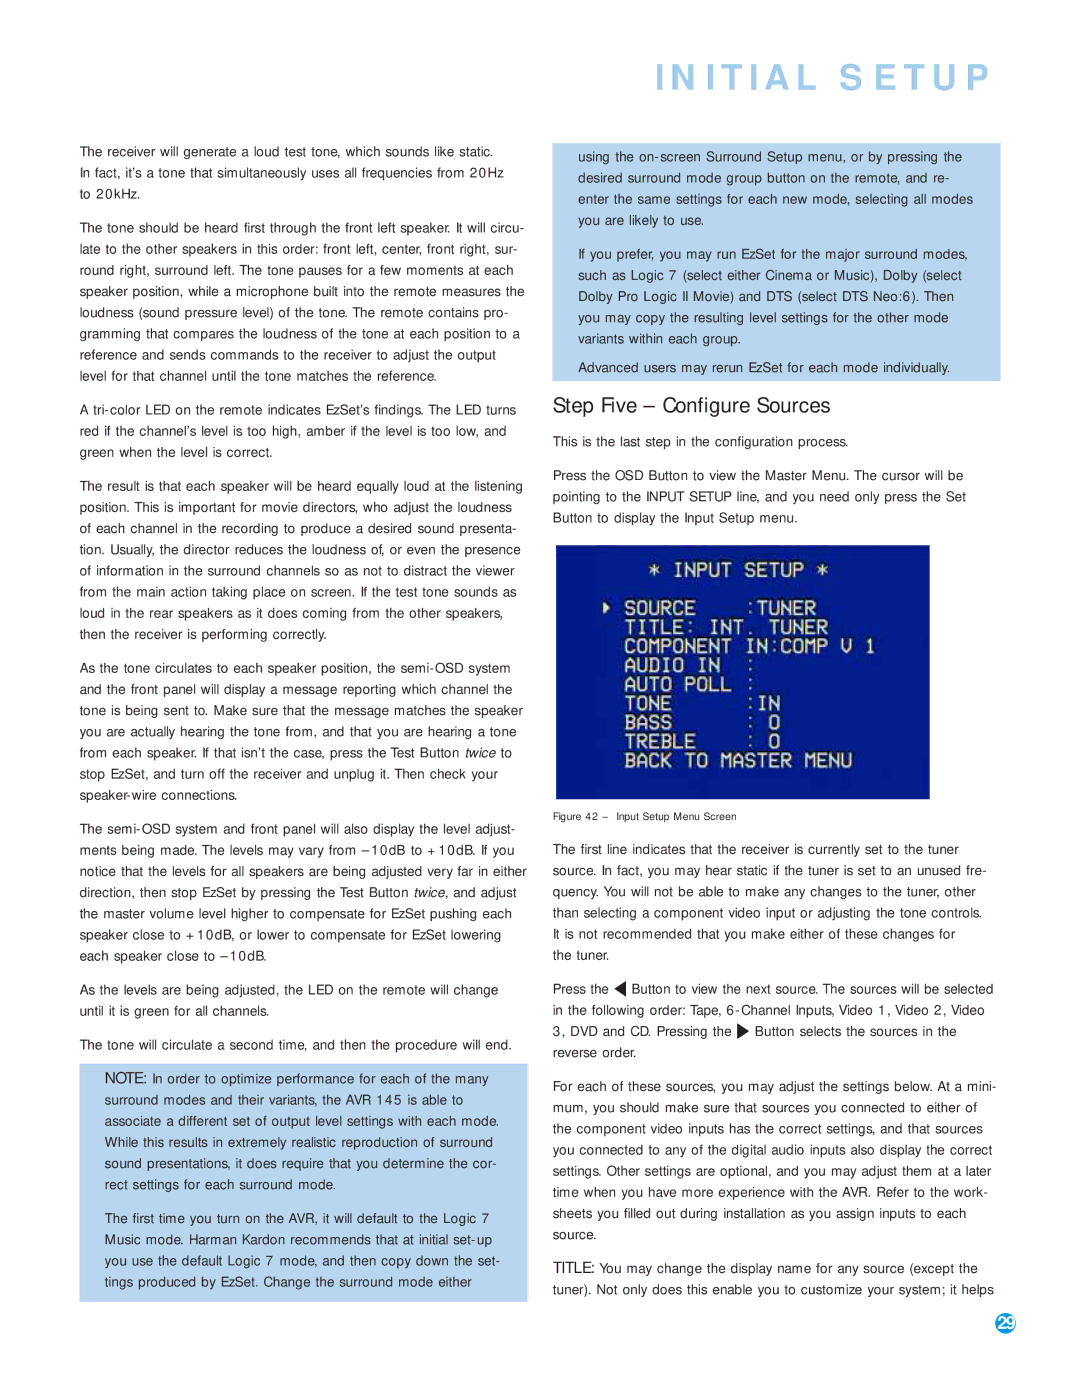
Press the OSD Button to view the Master Menu. The cursor will be pointing to the INPUT SETUP line, and you need only press the Set Button to display the Input Setup menu.

Figure 42 – Input Setup Menu Screen

The first line indicates that the receiver is currently set to the tuner source. In fact, you may hear static if the tuner is set to an unused fre- quency. You will not be able to make any changes to the tuner, other than selecting a component video input or adjusting the tone controls. It is not recommended that you make either of these changes for the tuner.

Press the Button to view the next source. The sources will be selected in the following order: Tape, 6-Channel Inputs, Video 1, Video 2, Video 3, DVD and CD. Pressing the Button selects the sources in the reverse order.

For each of these sources, you may adjust the settings below. At a mini- mum, you should make sure that sources you connected to either of the component video inputs has the correct settings, and that sources you connected to any of the digital audio inputs also display the correct settings. Other settings are optional, and you may adjust them at a later time when you have more experience with the AVR. Refer to the work- sheets you filled out during installation as you assign inputs to each source.

TITLE: You may change the display name for any source (except the tuner). Not only does this enable you to customize your system; it helps

29

Page 29
Image 29
Harman-Kardon AVR 145 owner manual Step Five Configure Sources, This is the last step in the configuration process

AVR 145 specifications

The Harman-Kardon AVR 145 is a compact yet powerful audio/video receiver designed to deliver an exceptional home theater experience. Launched to meet the needs of both music enthusiasts and movie lovers, the AVR 145 combines advanced technology with user-friendly features, making it a popular choice for those seeking quality sound and versatility.

One of the standout features of the AVR 145 is its impressive power output. The receiver delivers up to 50 watts per channel at 8 ohms, allowing it to produce rich and immersive audio across various media formats. This output ensures that even the most bass-heavy soundtracks and delicate dialogue are rendered with clarity and precision, enhancing the overall listening experience.

Harman-Kardon is known for its commitment to quality sound, and the AVR 145 is no exception. It supports multiple audio formats, including Dolby Digital and DTS, which provide surround sound capabilities that make movies feel like a cinematic experience at home. The receiver also includes High Definition Multimedia Interface (HDMI) inputs, supporting high-resolution video signals while simplifying connectivity between devices.

In terms of connectivity, the AVR 145 is equipped with several inputs and outputs, allowing users to connect multiple audio and video sources. It features composite video, component video, and multiple optical and coaxial digital audio inputs, making it compatible with various devices such as DVD players, game consoles, and media streaming devices. This versatility ensures that users can easily integrate the AVR 145 into their existing entertainment systems.

The user interface of the AVR 145 is thoughtfully designed, making it easy for users to navigate through settings and inputs. The built-in on-screen display offers a straightforward setup experience, and the remote control is intuitive for effortless operation. Additionally, the receiver includes a stereo mode for those who prefer a two-channel audio experience, catering to both modern surround sound setups and traditional stereo configurations.

Another notable characteristic of the AVR 145 is its compact design. With a sleek and elegant appearance, it fits seamlessly into any home entertainment setup without taking up excessive space. This aesthetic appeal, combined with its robust performance, positions the AVR 145 as a brilliant choice for anyone looking to enhance their audio experience without the bulk.

In summary, the Harman-Kardon AVR 145 stands out as a remarkable A/V receiver that combines powerful performance, versatile connectivity, and user-friendly design. Whether for movies, music, or gaming, it is an excellent addition to any home theater system, providing a reliable and high-quality audio experience for years to come.