INITIAL SETUP

TEST TONE SEQ: When this setting reads AUTO, the test tone will auto- matically circulate to all channels, pausing for a few moments at each channel and then moving to the next channel several seconds later, as indicated by the blinking cursor. You may adjust the level for any channel when the test tone is paused there by using the /Buttons. You may also use the/¤ Buttons at any time to move the cursor to another line, and the test tone will follow the cursor.

When this setting reads MANUAL, the test tone will not move to the next channel until you use the /¤ Buttons to move it.

TEST TONE: This line determines whether the test tone is active or not. To begin the process of setting the levels, use the /Buttons to change the setting to ON. Any time you manually move the cursor out of the channel listings area of the screen, this setting will automatically change to OFF, ending the test tone.

NOTE: Setting the channel levels while one surround mode is active does not necessarily carry over to all other modes. We recommend that after you have set the levels satisfactorily in one mode, you note the results and change to other surround modes. For those modes that don’t reflect your level settings, you may either copy the settings you obtained as a short cut, or re-do the procedure to determine the correct settings for those surround modes.

Step Five – Configure Sources

This is the last step in the configuration process. In the Installation section, you physically connected various cables between your source devices and the AVR. In this section, you will assign the various audio and video inputs to their sources, ensuring that the AVR uses the correct connections each time you select a source.

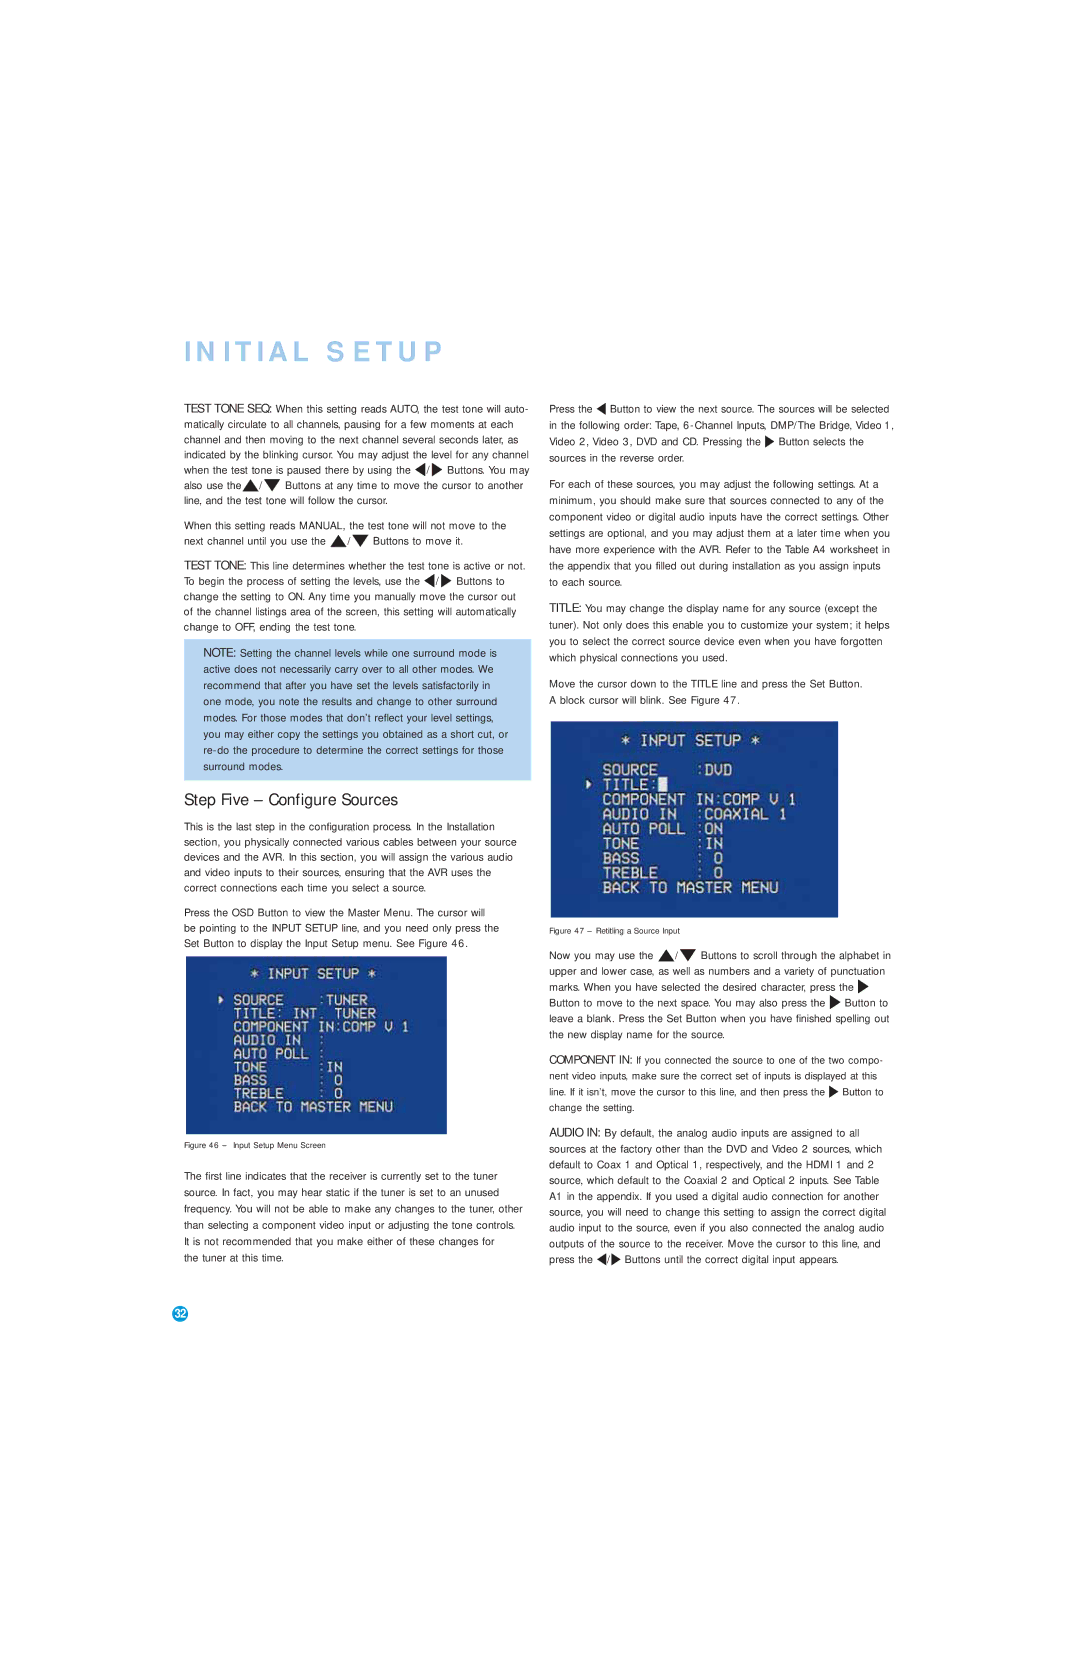
Press the OSD Button to view the Master Menu. The cursor will be pointing to the INPUT SETUP line, and you need only press the Set Button to display the Input Setup menu. See Figure 46.

Figure 46 – Input Setup Menu Screen

The first line indicates that the receiver is currently set to the tuner source. In fact, you may hear static if the tuner is set to an unused frequency. You will not be able to make any changes to the tuner, other than selecting a component video input or adjusting the tone controls. It is not recommended that you make either of these changes for

the tuner at this time.

Press the Button to view the next source. The sources will be selected in the following order: Tape, 6-Channel Inputs, DMP/The Bridge, Video 1, Video 2, Video 3, DVD and CD. Pressing the Button selects the sources in the reverse order.

For each of these sources, you may adjust the following settings. At a minimum, you should make sure that sources connected to any of the component video or digital audio inputs have the correct settings. Other settings are optional, and you may adjust them at a later time when you have more experience with the AVR. Refer to the Table A4 worksheet in the appendix that you filled out during installation as you assign inputs to each source.

TITLE: You may change the display name for any source (except the tuner). Not only does this enable you to customize your system; it helps you to select the correct source device even when you have forgotten which physical connections you used.

Move the cursor down to the TITLE line and press the Set Button. A block cursor will blink. See Figure 47.

Figure 47 – Retitling a Source Input

Now you may use the /¤ Buttons to scroll through the alphabet in upper and lower case, as well as numbers and a variety of punctuation marks. When you have selected the desired character, press the Button to move to the next space. You may also press the Button to leave a blank. Press the Set Button when you have finished spelling out the new display name for the source.

COMPONENT IN: If you connected the source to one of the two compo- nent video inputs, make sure the correct set of inputs is displayed at this line. If it isn’t, move the cursor to this line, and then press the Button to change the setting.

AUDIO IN: By default, the analog audio inputs are assigned to all sources at the factory other than the DVD and Video 2 sources, which default to Coax 1 and Optical 1, respectively, and the HDMI 1 and 2 source, which default to the Coaxial 2 and Optical 2 inputs. See Table A1 in the appendix. If you used a digital audio connection for another source, you will need to change this setting to assign the correct digital audio input to the source, even if you also connected the analog audio outputs of the source to the receiver. Move the cursor to this line, and press the /Buttons until the correct digital input appears.

32

Page 32
Image 32
Harman-Kardon AVR 146 owner manual Step Five Configure Sources, Tuner at this time

AVR 146 specifications

The Harman-Kardon AVR 146 is a versatile audio-video receiver designed to elevate home entertainment experiences. A product of the renowned Harman-Kardon brand, this receiver combines advanced audio technologies, user-friendly features, and sleek design, making it a popular choice for audiophiles and casual listeners alike.

One of the standout characteristics of the AVR 146 is its power output. It delivers 50 watts per channel across seven channels, allowing it to easily drive a wide range of speakers while ensuring that dynamic soundscapes are reproduced with clarity and depth. This capability makes it suitable for both movies and music, enhancing the overall auditory experience in home theater setups.

The AVR 146 supports high-definition audio formats, including Dolby TrueHD and DTS-HD Master Audio. These formats provide lossless sound quality, allowing listeners to appreciate every nuance of their favorite films and albums. The receiver's support for a 7.1 channel layout enriches movie nights with a surround sound experience, drawing viewers deeper into the action.

Connectivity is another key feature of the AVR 146. It is equipped with multiple HDMI inputs, allowing users to connect several high-definition devices such as Blu-ray players, gaming consoles, and streaming devices. This ensures that users can enjoy high-quality audio and video without the need for constant plug-and-play. Additionally, the receiver features an array of analog and digital inputs, which further broaden its compatibility with various devices.

Setup and operation are simplified by the inclusion of the user-friendly on-screen graphical interface. This intuitive design makes it easy to navigate through the various settings and features, allowing users to customize their audio preferences with ease. The AVR 146 also incorporates the Harman Kardon Quick Select feature, which allows users to save their favorite settings for different sources for quick access.

In terms of design, the Harman-Kardon AVR 146 showcases a modern and elegant appearance synonymous with the brand's aesthetic. It features a sleek front panel with an easy-to-read display and well-organized buttons, blending seamlessly into home environments.

In summary, the Harman-Kardon AVR 146 is a well-rounded audio-video receiver that promises exceptional performance and versatility. With its combination of powerful amplification, support for advanced audio formats, extensive connectivity options, and a user-friendly interface, it is an excellent choice for anyone looking to enhance their home entertainment system. Whether for movie enthusiasts or music lovers, the AVR 146 delivers an auditory experience that impresses and satisfies.